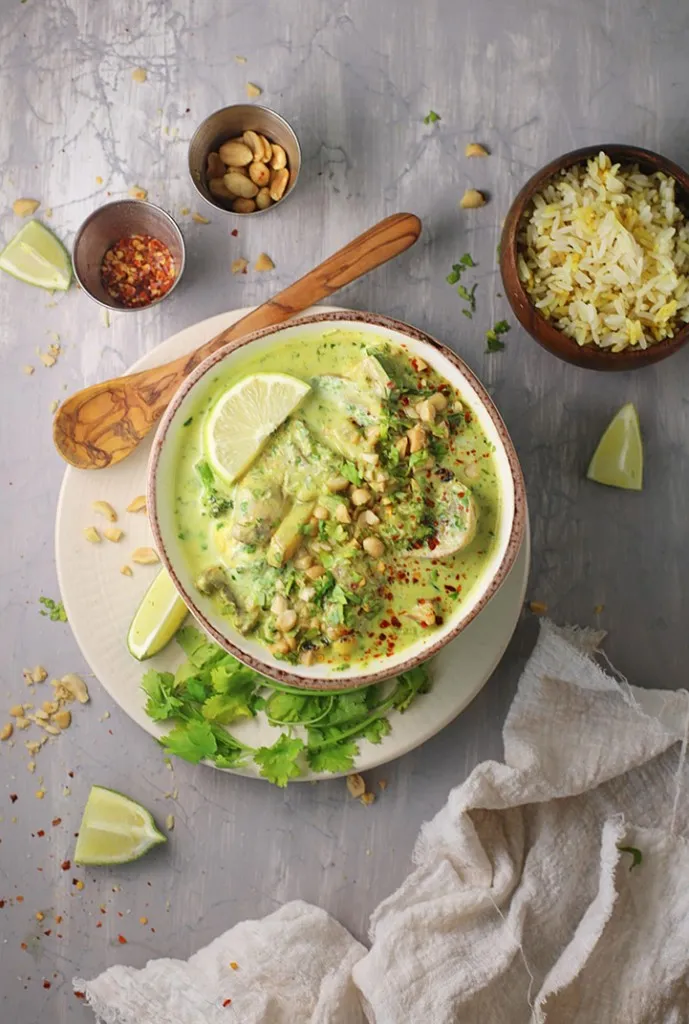
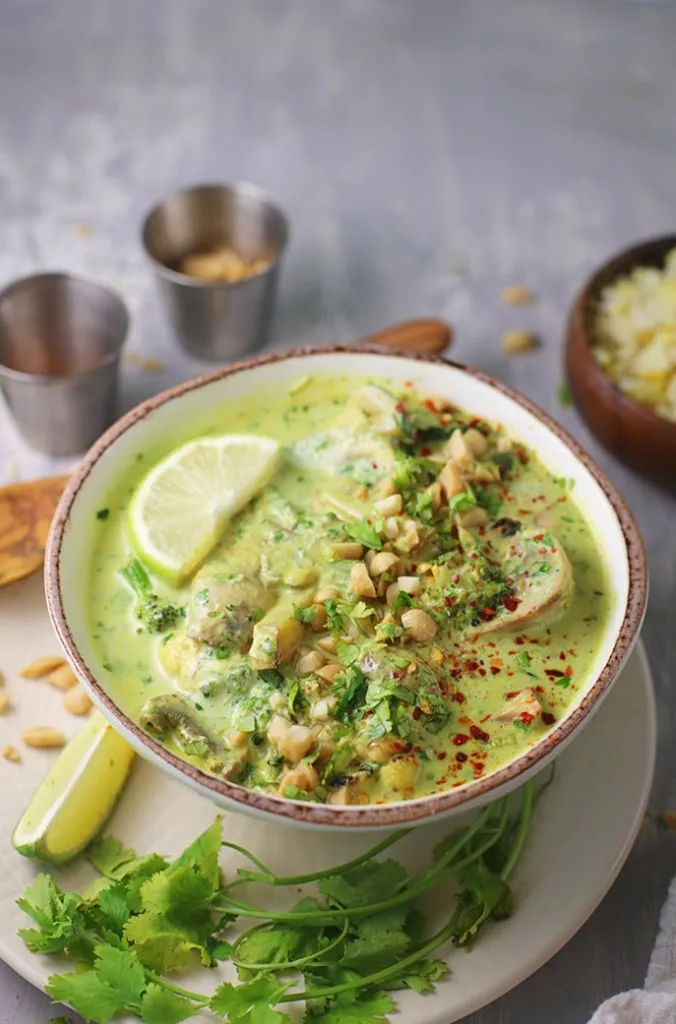
Instant Pot Thai Green Curry

This Instant Pot Thai Green Curry is a cozy pressure cooker dinner filled with tender chicken, creamy coconut milk, colorful vegetables, and that signature green curry flavor. It’s perfect when you’re craving your favorite Thai takeout flavors but want something easy to make right at home.
One of my favorite things about curry recipes is how a handful of ingredients can create so many layers of flavor. You get creamy coconut, fragrant spices, fresh vegetables, and a sauce that tastes like it simmered in your kitchen all day!
If you enjoy easy pressure cooker chicken dinners, my Instant Pot Thai Chicken Thighs is another flavorful recipe that brings big flavor with simple ingredients.
New to Pressure Cooking?
Start with the Instant Pot Playbook—basics, FAQs, and 40+ Recipes to get you started
About This Recipe
Instant Pot Thai Green Curry is a vegetarian pressure cooker curry made with green curry paste, full-fat coconut milk, zucchini, mushrooms, broccoli, onion, garlic, lime juice, and ground spices. It serves 4, takes about 12 minutes of active prep including the sauté step, and cooks on High Pressure for just 3 minutes followed by a quick release. The recipe starts with a sauté of the aromatics and curry paste directly in the Instant Pot to bloom the spices before the vegetables and coconut milk are added — this step is what gives the curry its depth and cannot be skipped. Chicken, shrimp, or tofu can be added to make it a complete meal.
Recipe Snapshot
Recipe Snapshot
- 25 minutes start to finish: One sauté step, three minutes under pressure, quick release, done. This is genuinely one of the fastest full-flavored curry recipes you can make.
- The sauté step is the whole game: Blooming the green curry paste in hot oil before the liquid goes in unlocks flavor compounds that stay locked if you skip it. Five minutes of sautéing makes this taste like it took an hour.
- Naturally vegetarian and gluten-free: As written, every ingredient in this recipe is plant-based and gluten-free. Add chicken, shrimp, or tofu to make it a protein-forward meal.
- Adjustable heat level: Three tablespoons of green curry paste gives you a medium-spiced curry. Drop to 1 1/2 tablespoons for mild, or push to 4 for serious heat. The paste is the dial.
- Meal prep powerhouse: Makes four generous portions, reheats beautifully, and the flavor deepens overnight. This is one of the best batch-cook recipes in the rotation.
- Best For: Weeknight dinners, meal prep, vegetarian entertaining, and anyone who wants restaurant-quality Thai curry at home without a restaurant's prep time.
💡 David's Tip: Get a Burn notice on your Instant Pot? It means there wasn't enough liquid on the bottom before pressurization. Add an extra 1/4 cup of water or broth, scrape the bottom of the pot well to deglaze any stuck curry paste, and try again. Once you've done it right once, you'll know exactly what the bottom should feel like before locking the lid.
SUMMARIZE AND SAVE THIS RECIPE CONTENT ON:
Why You'll Love This Instant Pot Thai Green Curry
What Makes Thai Green Curry Green?
Thai green curry gets its color — and much of its flavor — from green curry paste, which is made from fresh green chilies, lemongrass, galangal (a root similar to ginger), kaffir lime leaves, shallots, garlic, and Thai basil. It's significantly more herbaceous and aromatic than red or yellow curry paste, with a brightness that comes from those fresh green ingredients rather than dried spices. The flavor is floral, grassy, a little citrusy, and more complex than its color suggests.
The coconut milk turns the curry a lighter sage-green as it cooks, and the vegetables deepen the color further. What you're left with in the bowl is a pale, creamy green sauce that smells like lemongrass and lime and tastes unmistakably Thai. Maesri and Mae Ploy are the two curry paste brands I keep in my pantry — both are available at Asian grocery stores and online, and both are considerably more flavorful than the average supermarket brand. If you've been using the generic store-brand green curry paste and wondering why your curry tastes a little flat, this is probably why.
The Ingredient Breakdown
Top Tip for a “Fabulous” Curry
To boost the flavor profile significantly, stir in 2 tablespoons of fish sauce and 6 to 7 fresh Thai basil leaves after the quick release, before serving. Fish sauce adds a deep umami saltiness that makes the whole curry taste more authentically Thai — it won't taste “fishy,” it will just taste more complex. Thai basil (not Italian basil) has an anise-like quality that's distinctly Southeast Asian. Find it at any Asian grocery store and it's worth the trip.
How to Make Instant Pot Thai Green Curry (Step-by-Step)
Step 1: Sauté the Aromatics
Press the Sauté button on your Instant Pot and let the liner heat up for a minute before adding anything. Add the olive oil and let it shimmer — you want it properly hot. Add the sliced onion and minced garlic and cook, stirring occasionally, for about 3 minutes until the onion starts to soften and turn translucent. You'll smell the garlic sweetening as the raw edge cooks off — that's exactly what you're going for. The onion won't be fully soft yet, and that's fine. It will finish during pressure cooking.
Step 2: Bloom the Curry Paste
Add the green curry paste directly to the onion and garlic and stir constantly for about 2 minutes. This is the most important step in the whole recipe. The curry paste will sizzle in the hot oil and start to darken slightly at the edges — you'll see the oil take on a vivid green color as the fat-soluble flavor compounds release from the paste. The smell that hits you at this moment — lemongrass, green chili, galangal — is what tells you the blooming is working. Don't rush it. Two full minutes, stirring constantly so nothing sticks to the bottom.
Step 3: Add Coconut Milk and Deglaze
Pour in the coconut milk and the water or broth. Use a wooden spoon or spatula to scrape the bottom of the pot thoroughly — any curry paste or onion bits stuck to the liner will trigger the Burn warning if they're left there during pressurization. The coconut milk will turn a beautiful pale green as it incorporates with the bloomed paste. You'll see little swirls of the deeper green paste dispersing through the creamy white coconut milk. Stir to combine.
Step 4: Add Vegetables and Spices
Add the zucchini, mushrooms, broccoli, lime juice, cumin, ground coriander, ginger powder, and salt and pepper. Stir everything together so the vegetables are coated in the sauce and the spices are evenly distributed. The pot will look very full — that's normal. Press Cancel to end the Sauté mode.
Step 5: Pressure Cook
Lock the lid and set the steam release valve to Venting. Cook on Manual High Pressure for 3 minutes. The pot will take about 5 to 8 minutes to come to pressure first. When the timer ends, immediately quick release the pressure by switching the valve to Venting. The curry is done the moment the float valve drops. Open carefully — the steam that escapes will fill your kitchen with that lemongrass and coconut aroma immediately.
Step 6: Taste, Adjust, and Serve
Stir the curry gently and taste it. This is the moment to adjust — a squeeze more lime juice, a pinch more salt, a swirl of fish sauce if you're using it, a few torn Thai basil leaves. The vegetables should be tender with just a little bite remaining in the broccoli. If the sauce looks thinner than you'd like, press Sauté and simmer uncovered for 3 to 4 minutes, stirring occasionally, and it will thicken right up. Serve over jasmine rice garnished with chopped peanuts, fresh cilantro or parsley, red pepper flakes, and a wedge of lime.
David's Tip
The sauce will thicken noticeably as it cools and even more overnight in the fridge. If you're reheating leftovers and the curry looks very thick, add a splash of coconut milk or broth to loosen it back up before serving. Two tablespoons of additional coconut milk and a quick stir on the Sauté setting and you're right back where you want to be.
How to Add Protein to This Curry
This recipe is written as a vegetarian curry, but it's very easy to add protein. Here's how to do it without ending up with overcooked meat or a Burn warning:
Beef or pork: Thinly sliced strips of sirloin or pork tenderloin work well at 5 minutes on High Pressure with quick release. Avoid thick cuts — they won't cook through evenly in a short curry cook time.
Chicken: Use thin-sliced boneless skinless chicken breast or thigh, cut into strips no thicker than 1/2 inch. Add the chicken with the vegetables in Step 4. Cook on High Pressure for 5 minutes (not 3) with quick release. Thicker pieces will need 7 minutes. Check for doneness and add 2 minutes if needed.
Shrimp: Do not pressure cook shrimp — they'll be rubbery and overcooked. Instead, complete the recipe through Step 5 using the 3-minute cook time for the vegetables, then press Sauté, add peeled and deveined shrimp, and cook uncovered for 2 to 3 minutes until pink and curled. This is the right way to do shrimp in a curry.
Tofu: Use extra-firm tofu, pressed and cubed. Add it with the vegetables for the 3-minute pressure cook — it holds its shape well and absorbs the curry sauce beautifully. For extra texture, pan-fry the tofu cubes in a little oil until golden before adding them in.
Storage and Make-Ahead Instructions
Make-Ahead Tip: This curry is excellent made a day or two ahead. The flavor develops and deepens significantly overnight — the spices integrate, the coconut milk absorbs the curry paste, and the whole bowl tastes more cohesive. Make it Sunday, refrigerate, and you have the best weeknight lunches of the week lined up.
Refrigerator: Store cooled curry in an airtight container for up to 4 days. Reheat on the stovetop over medium-low heat or in the microwave in 60-second intervals, stirring between each. Add a splash of coconut milk or broth if the sauce has thickened too much during storage.
Freezer: Freeze in individual portions in airtight containers for up to 3 months. The coconut milk may separate slightly on thawing — just stir vigorously as you reheat and it will come back together. The vegetable texture will soften after freezing, which is completely acceptable in a curry context.
Fun Variations
Serve Over Cauliflower Rice: For a lower-carb version, serve over cauliflower rice instead of jasmine rice. The curry sauce is rich enough that it makes cauliflower rice completely satisfying — you won't miss the regular rice.
Thai Green Curry with Sweet Potato: Swap the zucchini for diced sweet potato cut into 1/2-inch cubes. Sweet potato takes the 3-minute cook time well and adds a natural sweetness that plays beautifully against the heat of the curry paste. Similar energy to my Sweet Potato Fajitas — that combination of warm spice and natural sweetness just works.
Thai Green Curry with Bamboo Shoots: Add a drained can of bamboo shoots with the other vegetables. They add a slightly crunchy texture and a mild, earthy flavor that's very traditional in Thai green curry.
Spicy Version: Add a teaspoon of sambal oelek or a fresh Thai chili, sliced thin, with the curry paste during the bloom step. The added fresh chili heat is different from the paste heat — it's brighter and more immediate.
With Japanese Eggplant: Slice Japanese eggplant (thinner than regular eggplant, with fewer seeds) into half-moons and add it in with the other vegetables. It becomes silky soft under pressure and soaks up the curry sauce in a way that's hard to describe and easy to love.
What to Serve with Instant Pot Thai Green Curry
Garnish generously: Chopped peanuts, fresh cilantro, red pepper flakes, a squeeze of lime, and a few drops of sriracha if you want heat. The garnishes aren't decoration — they add crunch, brightness, and contrast that the curry needs. Don't skip them.
Jasmine rice: The classic pairing. The fragrant, slightly sticky rice is perfect for soaking up the coconut curry sauce. If you have two Instant Pots, cook the rice pot-in-pot while the curry cooks, or use frozen jasmine rice (Trader Joe's is excellent) microwaved right before serving.
With a fresh salad: The richness of the coconut curry pairs well with something bright and crisp alongside. My Summer Couscous Salad works beautifully as a fresh contrast.
More Delicious Instant Pot Recipes to Enjoy
- Instant Pot Chicken Florentine Soup
- Instant Pot Chicken Enchiladas (Skinny) Recipe
- Instant Pot Chicken Parmigiana
- Instant Pot Easy Cheeseburger Pie
- Instant Pot Ribs You’ll Love
- Instant Pot Peach Iced Tea
- Instant Pot Weight Watchers Recipes
- Instant Pot Baked Beans – Easy No Soak!
This Instant Pot Thai Green Curry is one of those recipes I keep coming back to because it delivers so much for so little effort. Twenty-five minutes, one pot, and a bowl of something genuinely warming and complex that tastes like you know what you're doing in the kitchen. Serve it with jasmine rice, pile on the garnishes, and squeeze that lime wedge right before you eat. That's my favorite kind of recipe.
Give it a try this week and leave a comment below — I want to hear what vegetables you used and whether you added fish sauce. And if you went with the Thai basil, you made the right call.

Instant Pot Thai Green Curry
Ingredients
- 4 tablespoons olive oil
- 1 onion thinly sliced
- 1 garlic clove minced
- 3 tablespoons green curry paste
- coconut milk 14oz can
- 1 zucchinis diced into strips
- 1 cup mushrooms roughly chopped
- 1 cup broccoli florets fresh
- 1 teaspoon lime juice
- 1/2 teaspoon cumin
- 1 teaspoon ground coriander
- Salt and pepper to taste
- 1/2 teaspoon ginger powder
- 1/2 cup water or chicken broth
Instructions
- Select the sauté option in your Instant Pot. Add the oil,
onion and garlic and cook until the onion starts to soften. - Add the curry paste and the coconut milk and cook for 2 more minutes.
- Add the rest of the ingredients to your Instant Pot and stir so everything is coated with the spices. Lock the lid and cook on high pressure for 3 minutes. Quick release the pressure.
- Serve into bowls and garnish with fresh lemon, chopped parsley or cilantro, a crack of red pepper flakes and some chopped peanuts.
Nutrition
Notes
- Red pepper flakes
- Lime
- Parsley or cilantro
- Chopped peanuts
- To Boost flavor profile, you can add in 2 tablespoons of fish sauce and 6-7 Thai basil leaves.
- If you don't like broccoli, you can leave it out.
- If you have a lower tolerance to spice, then use only 1 1/2 tablespoons of Green curry paste.
Tried this recipe?
Let us know how it was!FAQs: Thai Green Curry in the Instant Pot, Answered
Why did I get a Burn notice?
The Burn notice happens when the Instant Pot detects something stuck to the bottom of the liner before it can build pressure. The culprit in this recipe is almost always curry paste or onion bits that didn't get fully deglazed after the sauté step. After you add the coconut milk and broth, take 30 full seconds to scrape the bottom of the pot with a spatula before locking the lid. If you do get the Burn notice, don't panic — open the pot, add an extra 1/4 cup of broth, scrape the bottom again thoroughly, and try again. The curry won't be ruined.
Can I use light coconut milk?
You can, but the sauce will be noticeably thinner and less rich. Light coconut milk has significantly lower fat content, which means the sauce won't coat the vegetables as well and the finished curry will taste a little watered-down. Full-fat is what makes this curry feel like something you ordered from a restaurant rather than something you made from a can. If calories are the concern, reducing the portion size is a better call than switching to light coconut milk — the flavor difference is significant.
My curry sauce is too thin. How do I fix it?
Press Sauté after the pressure cook and let the curry simmer uncovered for 3 to 5 minutes, stirring occasionally. The sauce will reduce and thicken. Alternatively, stir in a slurry of 1 tablespoon of cornstarch dissolved in 2 tablespoons of cold water on the Sauté setting — it thickens the sauce in about 60 seconds. The cornstarch method is faster; the reduction method gives you a more concentrated flavor.
Can I use red curry paste instead of green?
Yes, and you'll end up with a completely different but equally good dish — red curry is earthier and smokier where green curry is more herby and bright. The same method applies exactly. Use the same amount of paste and follow the recipe as written. Yellow curry paste also works and gives the mildest, most coconut-forward result of the three.
Is this recipe spicy?
At three tablespoons of paste, this is a medium-heat curry — warmth you notice but that most people can handle comfortably. Spice sensitivity varies quite a bit by brand of curry paste, so if you're using a new brand, start with 1 1/2 tablespoons and taste the sauce before adding more. You can always stir in more paste after the pressure cook on the Sauté setting. You can't un-spice a curry once it's done.
Can I make this on the stovetop instead of the Instant Pot?
Absolutely. Follow the same sauté steps in a large pot or wok over medium-high heat. After adding all the vegetables and coconut milk, bring to a boil, reduce to a simmer, cover, and cook for 8 to 10 minutes until the vegetables are tender. The flavor is nearly identical — the main difference is you'll need to watch the pot and stir occasionally to prevent the coconut milk from scorching on the bottom.
How do I make this curry less spicy after the fact?
Add more coconut milk — it's the fastest way to dial back the heat. An extra 1/4 to 1/2 cup stirred in after cooking will dilute the spice level noticeably. A small spoonful of sugar or a bit more lime juice also helps balance heat by giving the palate something else to focus on. As a last resort, a small dollop of plain yogurt or sour cream stirred in cools things down quickly, though it will change the flavor profile slightly.