Instant Pot Thai Chicken Thighs

These Instant Pot Thai chicken thighs are the kind of weeknight dinner that makes you feel like you actually have your life together. Bold peanut sauce, a hit of Sriracha heat, fresh ginger, honey, and a squeeze of lime all come together in the pressure cooker to produce chicken thighs that are impossibly tender, deeply flavorful, and completely coated in one of the most addictive sauces I have ever put on a piece of chicken. The Instant Pot makes this kind of meal ridiculously easy. You are going to love this one!
The pressure cooker keeps the chicken thighs juicy and tender while all those bold Thai-inspired flavors soak right into the sauce. You end up with a rich creamy peanut sauce that tastes like it simmered all afternoon—even though dinner comes together surprisingly fast. Peanut butter and coconut milk are especially popular together in Thai-inspired pressure cooker recipes because they create a creamy, flavorful sauce while helping keep chicken tender.
Recipe Snapshot
- Bold Thai-Inspired Flavor: These Instant Pot Thai chicken thighs are packed with creamy peanut sauce, fresh lime, ginger, and savory Thai-inspired flavor in every tender bite.
- Fast Weeknight Dinner: The Instant Pot keeps the chicken thighs juicy and flavorful while cutting down the cooking time dramatically compared to traditional braising methods.
- Great for Leftovers: The tender chicken works beautifully for meal prep and can easily be shredded for wraps, rice bowls, salads, or lettuce cups the next day.
- Best For: Busy weeknights, meal prep lunches, Thai-inspired comfort food cravings, easy family dinners, peanut sauce lovers, and flavorful low-effort Instant Pot meals.
David’s Tip: Make sure the peanut sauce stays slightly loose before pressure cooking. If the sauce becomes too thick from extra peanut butter, the Instant Pot can struggle to properly build pressure and may trigger the burn warning.

Why You’ll Love This Recipe

The Ingredient Breakdown
Top Tip for a “Fabulous” Texture Crunch
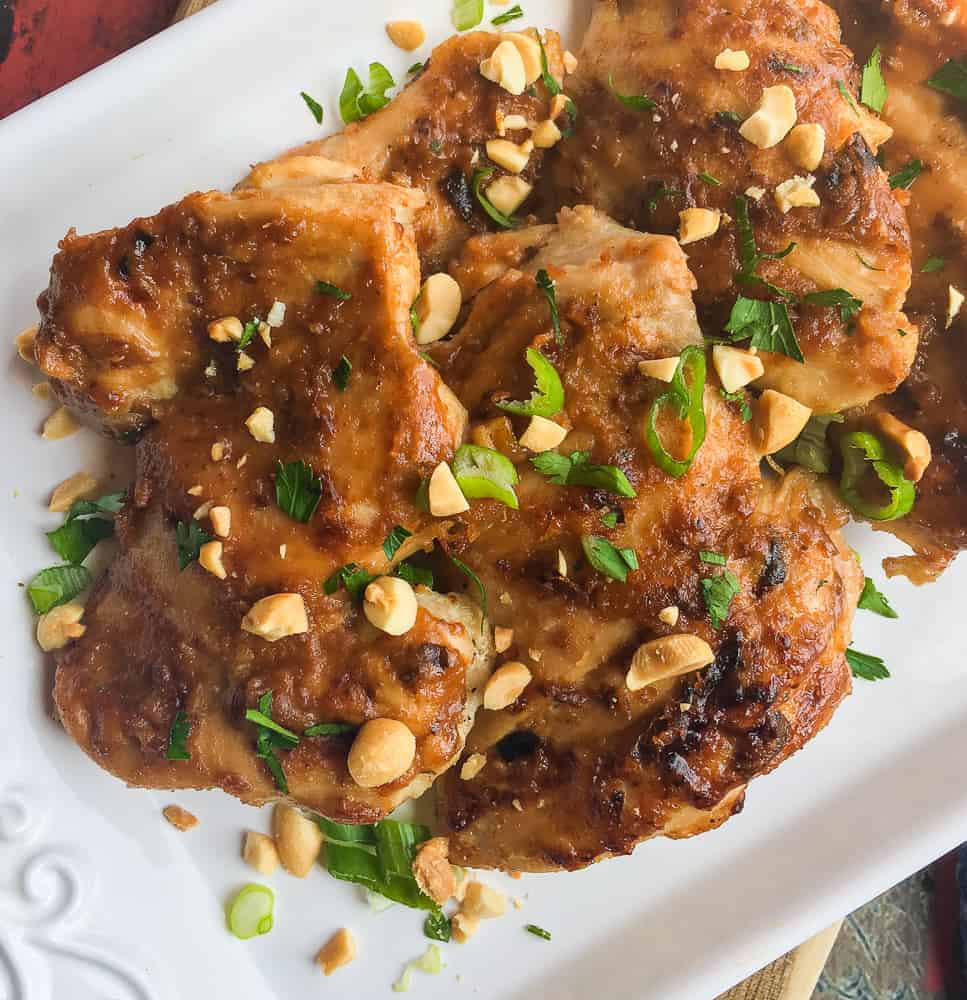
To elevate this from a simple home-cooked meal to a bistro-quality experience, do not skip the fresh toppings. Save a handful of crushed roasted peanuts, sliced green onions, and fresh cilantro to throw on at the very end. The intense contrast between the velvety, rich peanut sauce and the sharp, fresh crunch of the peanuts completely transforms the dish.
How to Make Instant Pot Thai Chicken Thighs (Step-by-Step)
Step 1: Brown the Chicken Thighs
Press the Sauté button on your Instant Pot and set it to High. Add the sesame oil and let it heat for about 30 seconds. Working in batches so you do not crowd the pot, add the chicken thighs and sear for three to four minutes per side without moving them. You are looking for a deep golden brown sear on each side. This builds a fond on the bottom of the pot that adds incredible flavor to the sauce and starts to render some of the fat from the thighs. Once browned, transfer the chicken to a platter and set aside.
New to Pressure Cooking?
Start with the Instant Pot Playbook—basics, FAQs, and 40+ Recipes to get you started
Step 2: Build the Peanut Sauce
With the Instant Pot still on Sauté, pour in the chicken broth and immediately scrape up all the browned bits from the bottom of the pot using a wooden spoon or spatula. Those bits are pure flavor. Add the peanut butter to the hot broth and whisk or stir continuously until it is fully dissolved and the mixture looks smooth and uniform. Now add the soy sauce, lime juice, honey, Sriracha, fresh ginger, and garlic powder. Season lightly with salt and black pepper and stir everything together. The sauce should look glossy, cohesive, and just thin enough to pour freely.
Step 3: Pressure Cook on High for 10 Minutes
Press Cancel to turn off the Sauté function. Place the trivet in the bottom of the Instant Pot and arrange the browned chicken thighs on top in a single layer. Lock the lid into place, make sure the steam valve is set to Sealing, and select Manual or Pressure Cook on High pressure. Set the timer for 10 minutes. The pot will take several minutes to build pressure before the countdown begins. While it does, line a baking sheet with foil if you plan to finish the chicken under the broiler.
Step 4: Quick Release and Check
When the 10-minute cook time is up, carefully do a quick pressure release by turning the steam vent to Venting. Stand back and let the steam fully escape before opening the lid. The chicken should be completely cooked through and very tender. Transfer the chicken to a platter and spoon some sauce over the top to keep them moist while you finish.
Step 5: Thicken the Sauce (Optional but Recommended)
Press the Sauté button again and let the sauce simmer uncovered for three to five minutes, stirring occasionally, until it thickens to the consistency you want. It should coat the back of a spoon cleanly when it is ready. Keep a close eye because peanut-based sauces can go from perfectly reduced to scorched quickly.
Step 6: Broil for the Caramelized Finish (Highly Recommended)
Preheat your broiler to High. Transfer the cooked chicken thighs to a foil-lined baking sheet and brush each one generously on both sides with the thickened peanut sauce. Slide under the broiler and broil for two to three minutes, just until the sauce caramelizes and turns dark and glossy in spots. Watch them very closely because this goes from perfect to burned in under a minute. Remove from the broiler, return the chicken and any accumulated juices back to the sauce in the pot, and turn to coat. Plate immediately and garnish with fresh cilantro, chopped roasted peanuts, and sliced green onions.
Fun Variations to Try
Storage & Make-Ahead Instructions
Refrigerator: Store leftover chicken and sauce together in an airtight container in the fridge for up to four days. The flavors deepen overnight. Reheat in a skillet over low heat with a splash of broth or water to loosen the sauce.
Freezer: Freeze the cooked chicken and sauce together in a freezer-safe container for up to three months. Thaw overnight in the refrigerator and reheat gently on the stovetop. The sauce may look separated when thawed but a quick stir over low heat brings it back together perfectly.
Room Temperature: Do not leave cooked chicken sitting at room temperature for more than two hours. Get it into the fridge as soon as it has cooled slightly.
Make-Ahead Tip: This is one of the best batch cooking recipes in the rotation. Make a full batch on Sunday and pull from it all week for rice bowls, wraps, and noodle dishes. The sauce gets better on day two as all the flavors meld together overnight.
Make This Tonight — Seriously
These Instant Pot Thai chicken thighs are everything a great weeknight dinner should be. Fast, bold, deeply satisfying, and flexible enough to reinvent itself completely the next day as a whole different meal. After years of working in restaurants, this kind of recipe is exactly what I want to cook at home. Big flavor, minimum effort, and leftovers worth looking forward to. That is my favorite kind of recipe.
If you make this, come back and leave a comment below. Did you go the rice bowl route or the lettuce wrap direction? Did you crank up the Sriracha or keep it mild for the family? Tell me how it went. And if you post it on social media and tag me, I want to see that broiled finish. Happy cooking, everyone.
More Delicious Instant Pot Recipes To Try
- How To Make Instant Pot Steel Cut Oats
- Instant Pot Lava Cake
- Instant Pot Pinto Beans and Bacon (No Soak)
- Instant Pot Cauliflower Soup (WW and Keto)
- Instant Pot Hawaiian Chicken
- Instant Pot Cherry Cobbler
- Instant Pot Blood Orange Cheesecake
- Instant Pot Baked Beans – Easy No Soak!
Instant Pot Thai Chicken Thighs
Ingredients
- 2 tablespoons sesame oil
- 2 lbs. boneless skinless & boneless chicken thighs
- 2/3 cup chicken broth
- ¼ cup sugar-free peanut butter
- ¼ cup gluten-free soy sauce or coconut aminos
- 2 tablespoon fresh lime juice
- 2 tablespoon honey preferably local
- 1½ tablespoon Sriracha sauce
- 2 teaspoons fresh ginger
- 1 teaspoon garlic powder
- Sea salt and black pepper to taste
Instructions
- Add sesame oil to Instant Pot and set the “Sauté” setting to high. Working in batches, if necessary, brown the chicken thighs, approximately 3-4 minutes per side. Repeat this process with remaining thighs. Remove and set aside on a platter.
- Pour chicken broth into hot container and gently scrape up brown bits from bottom. Add peanut butter to the hot liquid and stir until completed melted. Add soy sauce, lime juice, honey, Sriracha sauce, ginger, and garlic powder. Season with salt and black pepper, to taste, and stir to combine.
- Add trivet to the Instant Pot and place the browned chicken thighs on top.
- Add lid and lock into place. Switch vent to “Sealing” position and set the “Manual” setting on high before adjusting the cook time to 10 minutes. After a brief pause, the Instant Pot will automatically start building pressure.
- When finished, do a quick release (QR) to allow the pressure to escape. Unlock and carefully remove lid when finished and transfer the chicken to a platter.
- Optional: To thicken sauce, select the “Sauté” setting and heat, stirring continually, until the excess liquid is reduced and the sauce reaches the desired consistency.
- Turn Instant Pot off and return the chicken thighs and the juices that accumulated on the platter to the sauce and turn to coat.
- Remove chicken and transfer to a serving tray. Garnish with chopped fresh cilantro, chopped peanuts, and green onions, if desired. Serve immediately with extra peanut sauce and your favorite sides. Enjoy!
Notes
Tried this recipe?
Let us know how it was!FAQs: Thai Chicken Night, Answered
Can I use chicken breast instead of chicken thighs in this recipe?
Yes, but reduce the pressure cook time to eight minutes on high and do a quick release immediately when it is done. Chicken breast is leaner than thighs and will dry out quickly if overcooked under pressure. Thighs are the better choice because they stay juicy and absorb the sauce more deeply, but breast works fine if that is your preference.
Why did my Instant Pot give a burn notice during cooking?
The most common cause is peanut butter that was not fully dissolved into the broth before cooking began, leaving a thick paste sitting on the bottom of the pot. Always add the chicken broth first, scrape up any browned bits from the sear, and whisk the peanut butter into the warm broth until completely smooth before adding the other sauce ingredients. Using a trivet to keep the chicken above the sauce also helps prevent this.
Can I make this recipe without a trivet?
Yes. Place the chicken directly in the sauce without the trivet if you do not have one. The chicken will come out more tender and the sauce will be a little thinner since the chicken sits in the liquid during cooking. You may need to reduce the sauce a bit longer on Sauté after cooking to get it to the right consistency.
Is this recipe gluten-free?
It is, with one substitution. Swap the soy sauce for coconut aminos or a certified gluten-free tamari and the whole recipe is naturally gluten-free. Coconut aminos is available at most grocery stores and works as a one-to-one replacement. The flavor is very slightly sweeter and milder than soy sauce but works beautifully in this context.
How spicy are these Thai chicken thighs?
At one and a half tablespoons of Sriracha, the dish has a noticeable warmth that builds over a few bites but is not aggressively hot. Most people who tolerate mild to medium spice find it very comfortable. Cut the Sriracha to one teaspoon for a kid-friendly version, or push it to two tablespoons or more for serious heat lovers.
Can I make this ahead and reheat for meal prep?
Absolutely, and this recipe is genuinely one of my favorite meal prep options. Make the full batch, let it cool, and store in an airtight container in the fridge for up to four days. Reheat in a skillet with a splash of broth to loosen the sauce. The flavor is actually better on day two once everything has had time to meld.
What can I do with leftover Thai chicken?
So many good things. Shred it and serve in butter lettuce cups with shredded carrots and crushed peanuts. Toss it with cooked rice noodles, bean sprouts, and extra sauce for a Thai noodle bowl. Fold it into a flour tortilla with avocado and cabbage for a wrap. Slice it over a green salad with a drizzle of the remaining peanut sauce as the dressing. The leftovers are almost better than the original dinner.