Kuerig 2.0 K550 Product Review
Keurig 2.0 K550 Product Review
I get a lot of fun poked at my because I love using my Keurig machine. Before having the opportunity to review the newest Keurig 2.0 K550 machine, I've always had my trusted personal Kuerig single cup brewer. (Now, I have to get a disclaimer out of the way. I was provided with the new Keurig 2.0 machine, but all opinions are my own and 100% honest! Just because they sent it to me, doesn't mean that it's going to sway my opinion about anything at all.) I loved it because of the turquoise color, but loved it because of being able to utilize a reusable Kuerig K-Cup filter and use my favorite type of ground coffee in it. I'm a coffee waster, and brewing a big pot of coffee stopped being an option for me. Utilizing my Keurig single cup machine was perfect for me, with exception of those days that my fiancé (Stephen) wanted a cup of coffee. Albeit, those days are a far and few in between…he still wanted his cup…and we didn't have a normal coffee pot anymore.
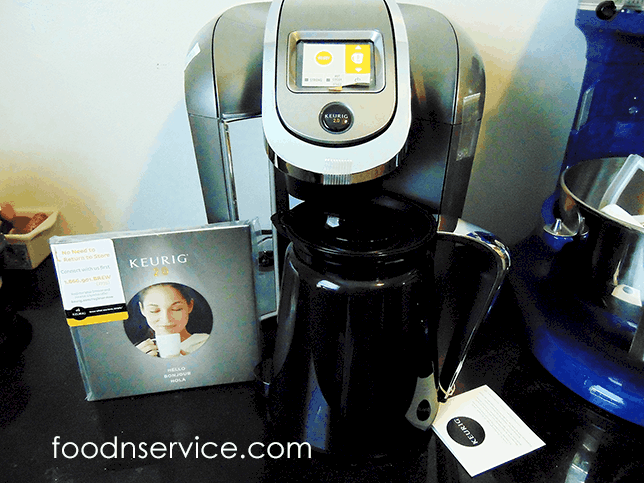
I really am super excited about the new Keurig 2.0 machine! Why? Because it now has a carafe brewer capability! It brews up to 4 cups of coffee, and you still have brew control over the strength of flavor of coffee! So, now there are two different size K-Cups to use in your machine! One is for the carafe, and the other is for your traditional single cup. Keurig provided me with 6 Carafe K-Cup and then 10 different varieties of coffee and tea. Then INSIDE of the box that the new Keurig comes with, there are 2 more boxes of K-Cups for you me to use. Yeah…I was in a coffee heaven for a while there.
You get of lot of different instructions with it, including a lot of great ideas of the different varieties of flavored coffees, teas, and hot chocolates that there are out there just begging to be used. The system itself is very easy to put together, and takes no time at all. The longest part is getting the water filter prepped for your water tank. You have to wash the filter for one minute and then let it soak in water for an additional 5 minutes. You add the filter to the bottom of the water tank filter holder, and then it just snaps into place. In testing, it doesn't take any kind of super human strength to take the filter stick out. Also, when you turn on your machine…it will take through some basic steps and tell you to change times and other personal modifications.

When you first put everything together and turn your machine on, it will go through a pre-heating stage for you. It takes about a minute-ish at the most. From there, you have the different options of choosing a LCD background color option. You get to choose from White (white casts a slight blue hue), blue, red, and green. Of course, I choose green…as it is my favorite color (just in case you can't tell from the color of my coffee mug I'm using. To change the color of your tank and LCD screen (which is a touch screen, by the way), you simply go into your settings by pressing the letter I. My normal setting for my size coffee cup is for a Strong brew and I also brew 10 ounces. You can scroll through and see the different settings the variety of different coffee cup sizes that you might have.
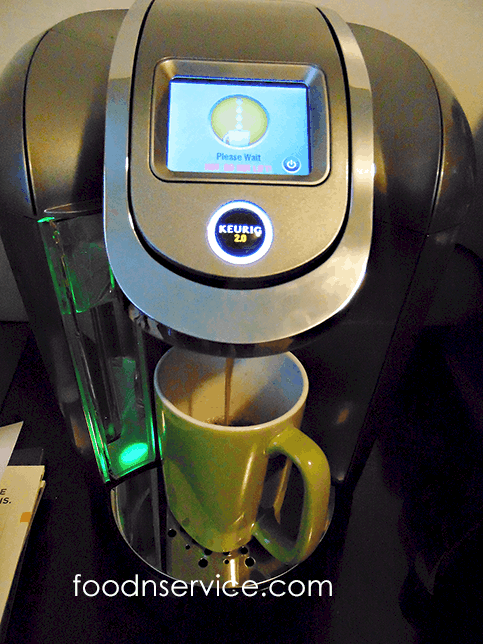
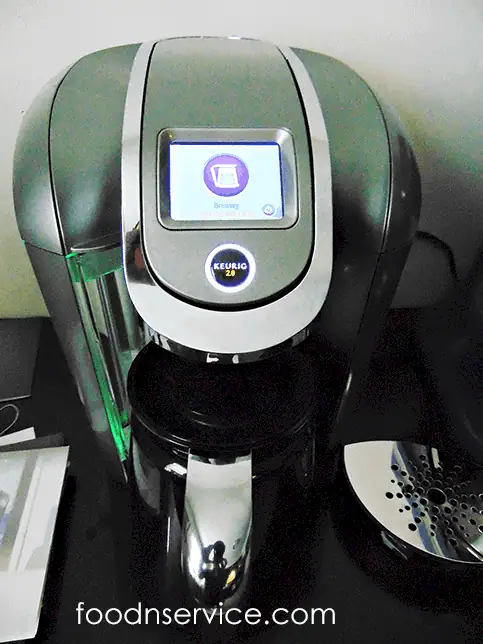
Before making your first cup of coffee, I recommend in brewing a cup or two of hot water. If you look at your digital screen, you will not a letter H, which stands for hot water. Run the water through a couple of times. I love having the hot water button, just incase you want to add a little extra water to your beverage, or even if you just want some hot water for your favorite instant oatmeal! I should also note that you can not use off brand K-Cups in this machine. It will not work. You have to use certified K-Cup pods in it. No worries, a majority of the K-Cups out there on the market are certified for his model Keurig! They will also be working on a feasible reusable K-Cup filter, too! At the moment, you can't use the normal reusable ones…it will not register in your machine and it will actually let you know! What a smart machine.
Now it was time for me to test out there carafe maker! This is a perfect size carafe (And yes…I know you can see me in their shiny handle of taking a photo, but there was just no getting me out of it! lol). To use the carafe pot, you have to remove the Keurig's traditional drip try and replace with their carafe. At the base of the carafe, there is a little node that sticks out and fits perfectly into place of where the drip tray was. This feature lets you know that you have the right sized device underneath to catch the coffee…and it won't brew your carafe sized K-Cup until it is in place. I think that's a great mess safety feature. You don't want to be caught brewing a carafe sized pot of coffee into a regular sized coffee cup! The Keurig machine has a spring loaded node that well expand when you put in your carafe sized K-Cup. Once you push in your carafe K-Cup, it is a nice snug fit. It will take the bottom traditional K-Cup “poker” off to the side and out of the way. It will create a duo hole in top of the foil. The first hole is for the water to go in, and the second hole (towards the very front) is where the coffee pours out of.
Another one of my favorite features is that you can actually set a timer in the system to brew your favorite carafe or cup of coffee! It will be ready by the time your ready to wake up and enjoy a cup! This is definitely tops on my list!
One of my most favorite features is that it brews a cup of coffee in no time! No waiting…just insert your favorite K-cup and go! Now, with me being a recipe site…of course, my sister and I made an amazing batch of Pumpkin Scones with butterscotch icing that goes great every cup of coffee!
I hope you enjoyed my thorough review of the Keurig 2.0 machine!. It s a super fabulous piece of coffee machinery, and it's something that you're going to love! What are you waiting for? Hurry and go get yours! There are a ton of great deals out there right now…and makes this beautiful machine even more affordable.