Christmas Linzer Cookies

These Christmas Linzer Cookies are a super easy cookie to make this holiday season! Fall season has started, and we all know what this means: Back-to-back festivities! Starting with Halloween, all the way to Thanksgiving, and ending with Christmas and New Year, the holiday season gives us lots of reasons to celebrate.
So, what are your plans this year? Are you also prepping up for mouthwatering and delectable meals for your feast table? I’m sure you are, and so am I! From roast beef, gingerbread, and fruitcake, to sweet potatoes, and chocolate and peppermint, I’m all set to prepare an extravagant Christmas meal for my family.
However, this year, I decided to add a little extra something. Something to awaken everyone’s Christmas spirit: The sweet, buttery, jam-centered Christmas Linzer cookies with a powdered-sugar coating!
Why Do We Love Christmas Linzer Cookies?
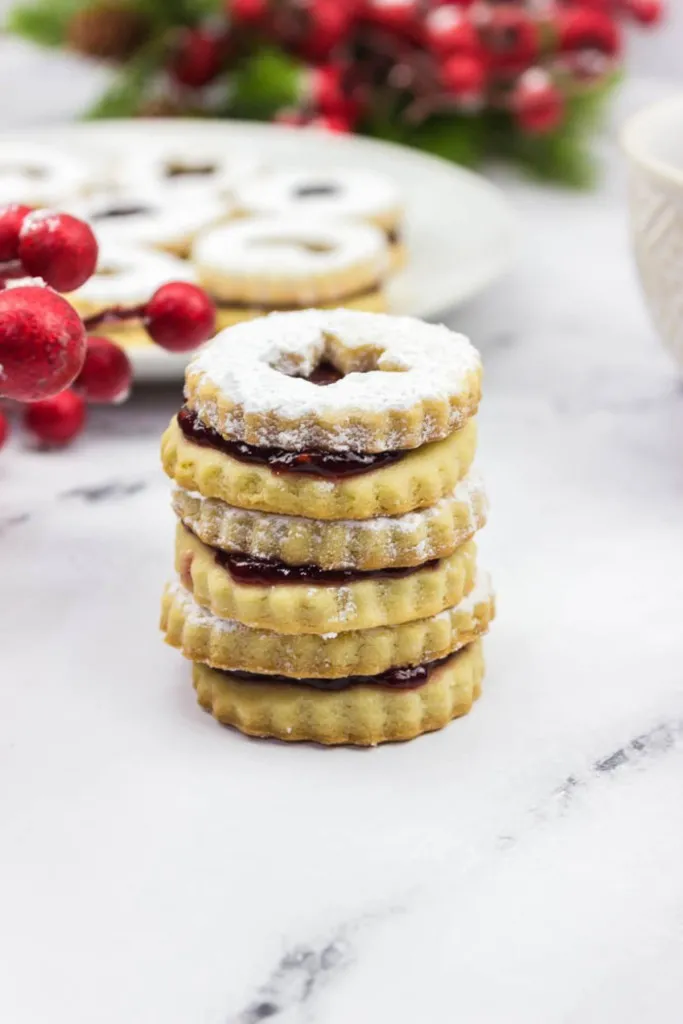
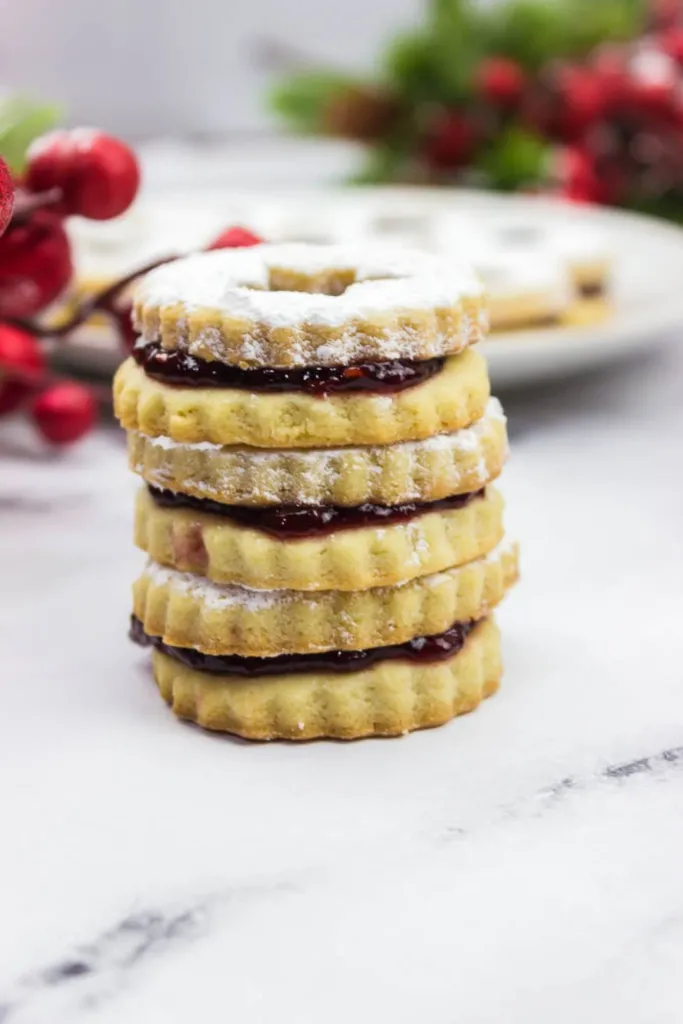
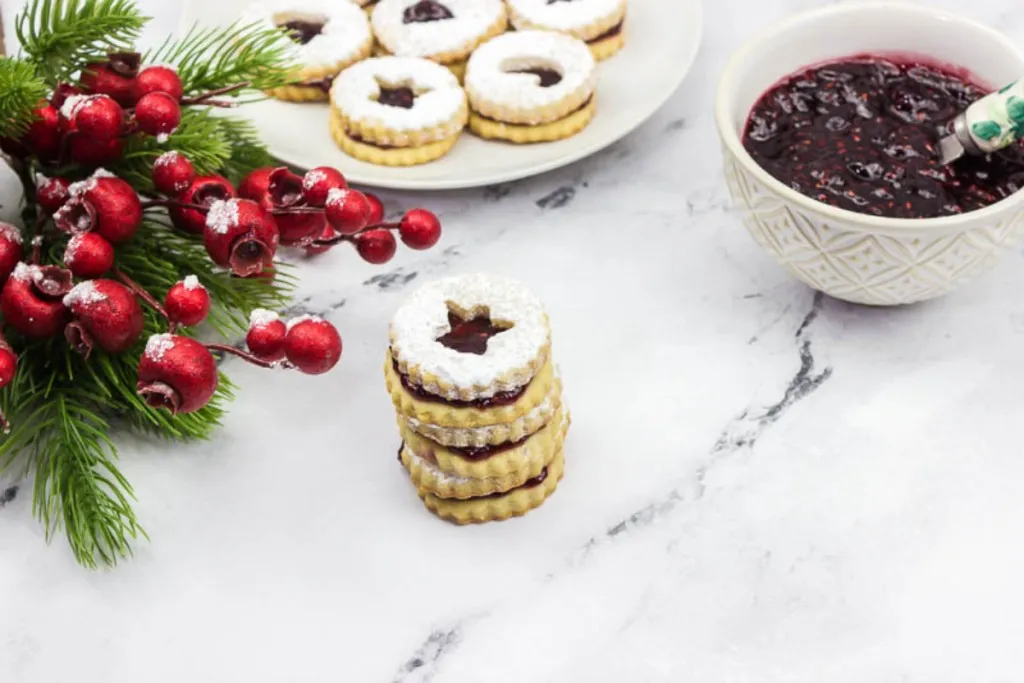
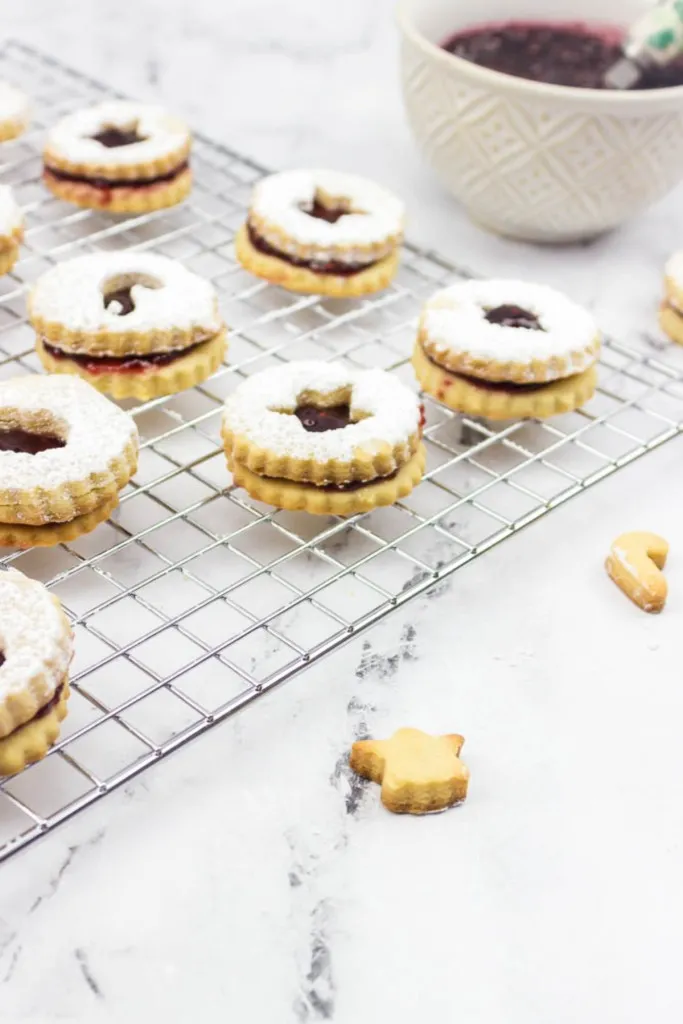
If there’s one dish that screams “Christmas!” it’s the Christmas Linzer cookies! They are sandwiched cookies, with a jam center, cut into cute little Christmassy shapes, and sprinkled with powdered sugar. The perfect holiday vibe!
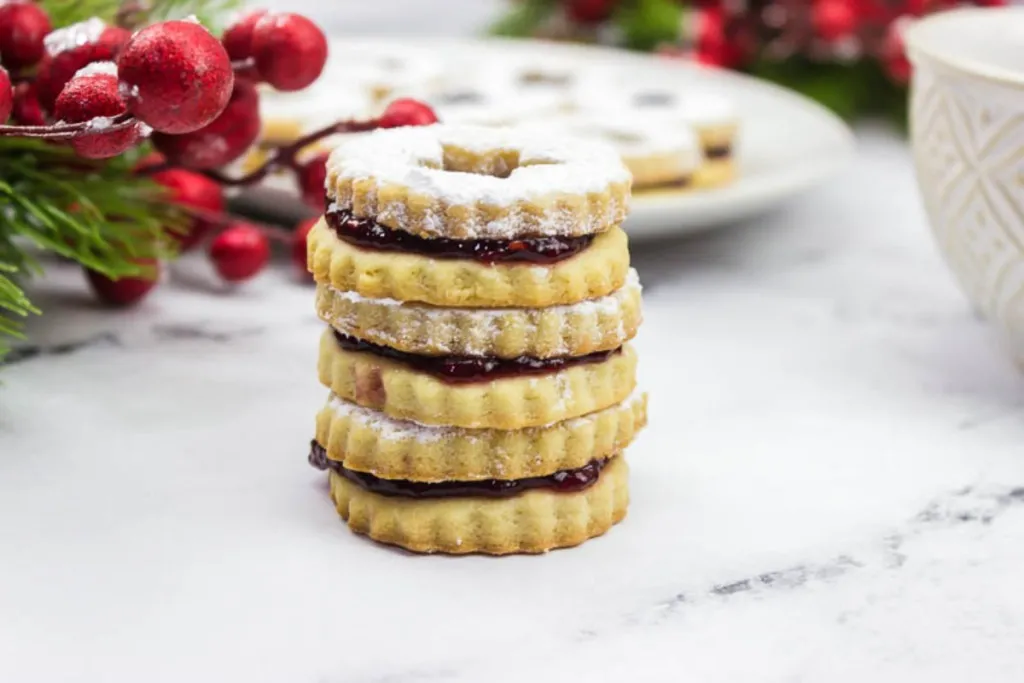
We love these cookies because, well they’re cookies, and who doesn’t love cookies!? Secondly, they are traditional butter vanilla cookies with a distinct lemony flavor. The slight tanginess of the lemon oil, when combined with the sweetness of the jam and powdered sugar creates an amazing flavor that sets these cookies apart!
The cookies themselves are not excessively sweet, and that’s the key to making Christmas Linzer cookies on fleek! The cookies are only lightly sweetened, with most of the sweetness coming from the jam filling and the sugar coating.
Next comes the making of the cookies. The whisking and mixing part is pretty basic; however, you do need to chill the dough for at least 4 hours or overnight to make the perfect Linzer cookies. But it’s Christmas and if you want to wow everyone with your creations, a couple of extra hours don’t make much of a difference now, do they? Plus, cutting the cookies using a cookie cutter is the fun part, where you can ask your kids to join in as well!
And when you see the result, all your efforts will be worth it!
Ingredients for Making My Christmas Linzer Cookies Recipe
- ¾ cup or 1 ½ stick of butter: Use unsalted butter softened at room temperature.
- ½ cup of powdered sugar: For a smooth batter and a lip-smacking coating at the end.
- 2 egg yolks and 1 egg white: Make sure the eggs are at room temperature so that you can beat them without clumps.
- 1 teaspoon pure vanilla extract: Cookies are incomplete without that sweet vanilla flavor!
- 2 drops of lemon flavoring oil: You can also use lemon zest if lemon oil is unavailable.
- 1 ½ cups of all-purpose flour: Spoon and level it with a knife.
- ¾ teaspoon kosher salt: Salt in cookie batter enhances the flavor of the other ingredients.
- One jar of your favorite jam: I used raspberry jam for this recipe; however, you can use strawberry, apple, or any jam of your choice. You can also use chocolate or nut spread for the filling.

Frequently Asked Questions (FAQs)
Here are some common queries to help you with the Christman Linzer cookies recipe:
Q. What can I use to cut the cookies?
I would suggest using a cookie cutter with a fluted edge; however, any regular cookie cutter will do. And, if you don’t have a cookie cutter at hand, no need to run to the store; use the bottom of a piping tip, a glass, a container lid, or any thing with a sharp edge to cut your cookies.
Q. What shapes can I cut the Christmas Linzer Cookies in?
You can get cookie cutters in various shapes and sizes. You can cut the cookies in a heart, circle, Christmas tree, star, or snowman shape, depending on the cutters you have, and your personal preference as well.
Q. Can I use a different jam for the filling?
Yes, of course, you can use any jam of your choice. In fact, if you’re not a fan of jams, you can use chocolate or nut spreads, cream, or cream cheese filling also. It all depends on your taste and creativity!
Tips and Tricks
1. Roll the dough before refrigerating it to avoid it from hardening and cracking.
2. You can bake the mini cookies from the cutouts for a snack to munch on later.
3. Do not over-mix the batter when adding dry ingredients. Just mix it slightly for the dry flour to disappear.
More Cookie Recipes To Enjoy
- Easy Double Chocolate Cookies
- Snickerdoodle Cookies
- Coffee House Cookies
- Chai Sugar Cookies
- Reeses Pieces Chocolate Chip Cookies

Christmas Linzer Cookies
Ingredients
- ¾ cup or 1 ½ sticks of unsalted butter room temperature
- ½ cup of powdered sugar
- 2 egg yolks
- 1 egg white
- 1 teaspoon pure vanilla extract
- 2 drops of lemon flavoring oil or more if you prefer –
- 1 ½ cups of all-purpose flour spooned and leveled with a knife
- ¾ teaspoon kosher salt
- One jar of your favorite jam I used raspberry for this recipe
- Additional powdered sugar to garnish the cookies
Instructions
- In a small bowl, whisk together the flour and salt and set aside.
- In a large mixing bowl, beat together the butter and the powdered sugar with a hand mixer until it’s reached a light and fluffy texture.
- Using an egg yolk separator, strain the eggs separately into a different bowl. Add in one egg white and mix it in until it’s thoroughly incorporated. Next, add in one egg yolk, whisk, then add in the second egg yolk and mix thoroughly.
- Once the eggs have been added, add in the vanilla and the lemon flavoring oil. Only add in a few drops of the oil. Feel free to adjust this as needed but when I made this recipe, I felt two drops added just the right amount of lemon flavor to the cookies. Mix together on medium speed until both of the ingredients have been mixed into the dough.
- Next, add in the dry ingredients (the flour and salt), and mix together just until it’s combined with a large wooden spoon or spatula. DO NOT OVERMIX THIS. You will only want to mix the ingredients until you no longer see the flour.
- Spoon the dough onto parchment paper and either wrap it up into a ball or flatten it between two pieces of parchment paper and place it in the fridge for up to four hours or even overnight.
- When the dough has chilled, preheat the oven to 350 degrees.
Prepare your baking sheet with either parchment paper or a silicone baking mat. - Next, prepare the area where you will be rolling out the dough and lightly flour it.
- Remove the dough from the fridge, divide it into two halves and place the one half back into the refrigerator and place the other half on the floured surface.
Roll out the dough until you get it to a thickness of about ¼ of an inch thick. - Dip the cookie cutter, without the interchangeable insert, into a little bit of flour, and then into your dough. These will be your bottom cookies.
- Next, re-roll any of the scraps of dough and continue the process making additional cookie bottoms.
- When you are done making the bottoms, get the remaining dough out of the fridge and roll that out into ¼ of an inch thickness. Then add in the interchange shape that you would like for the cookies to be and cut those shapes out. These will be the tops of your cookies.
- Place the cookies on your prepared cookie sheets and bake at 350 degrees for 10 – 12 minutes or until the edges are light golden brown.
- Remove the pans from the oven and let them cool for 10 minutes before removing the cookies. After 10 minutes, remove the cookies and place them on wire racks to finish cooling.
- Once they have completely cooled, place the wire racks with the tops of the cookies on them over parchment paper and put the powdered sugar into a shaker or shifter. Shift the powdered sugar and then lightly shake the powdered sugar over the tops of the cookies.
- Next, it’s time to assemble the cookies! Add 1/8 teaspoon of jam onto the bottom cookie and spread it out with a knife. Then add the top cookie and enjoy!
Notes
- Make sure that the dough is cold and kept cold between the batches so that the cookies don’t spread while baking.
- To ensure even results when adding the powdered sugar, make sure to shift the powdered sugar when adding it to the cookies after they have cooled.
- Only bake the cookies until they are light golden brown on the edges. They will continue baking after you remove them from the oven. I
- found that it was easier to flatten the dough in between the parchment paper BEFORE putting it in the fridge then leaving it in a ball form. That way it was already flatten and it made it easier to roll out.
- When measuring out your flour, always use the spoon and level with a knife method. Using a spoon, scoop out the flour into a measuring cup, then using the flat part of the knife, flatten the flour. Do NOT just put the measuring cup into the flour and scoop it out. You will never have the right amount of flour if you do that.
- Bake the inserts along with the cookies for a special treat to nosh on!
- You can use any flavor of jam! It seems for Christmas, it’s more traditional to use the raspberry, however, any flavor is fine.
- Always use kosher or sea salt. Do not use regular table salt when baking.
- Always use unsalted butter when baking when the recipe calls for additional salt. That way you are controlling the amount of salt you are adding to the recipe.