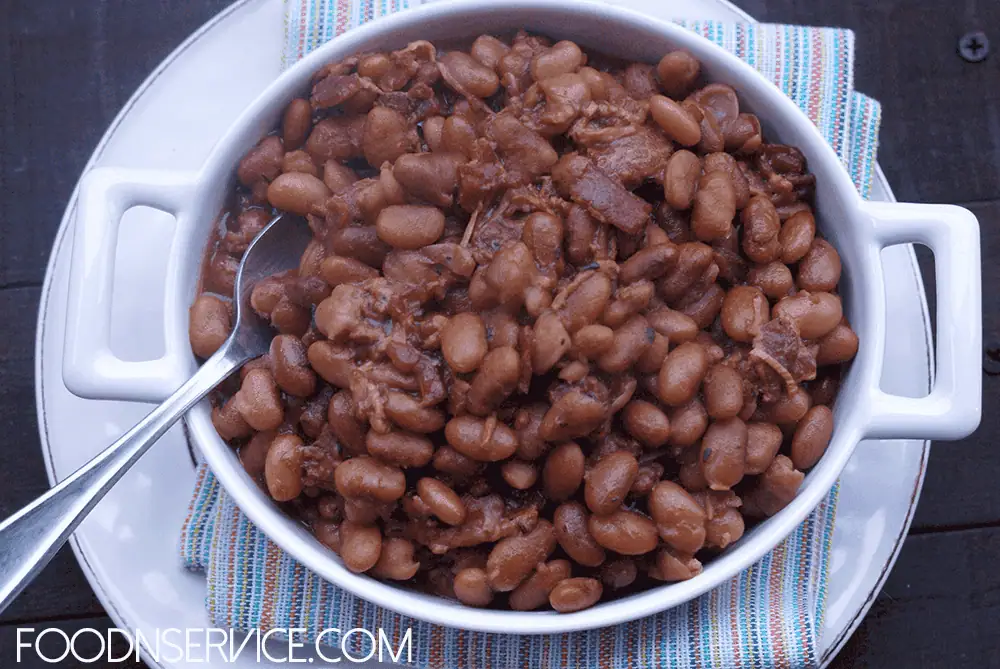
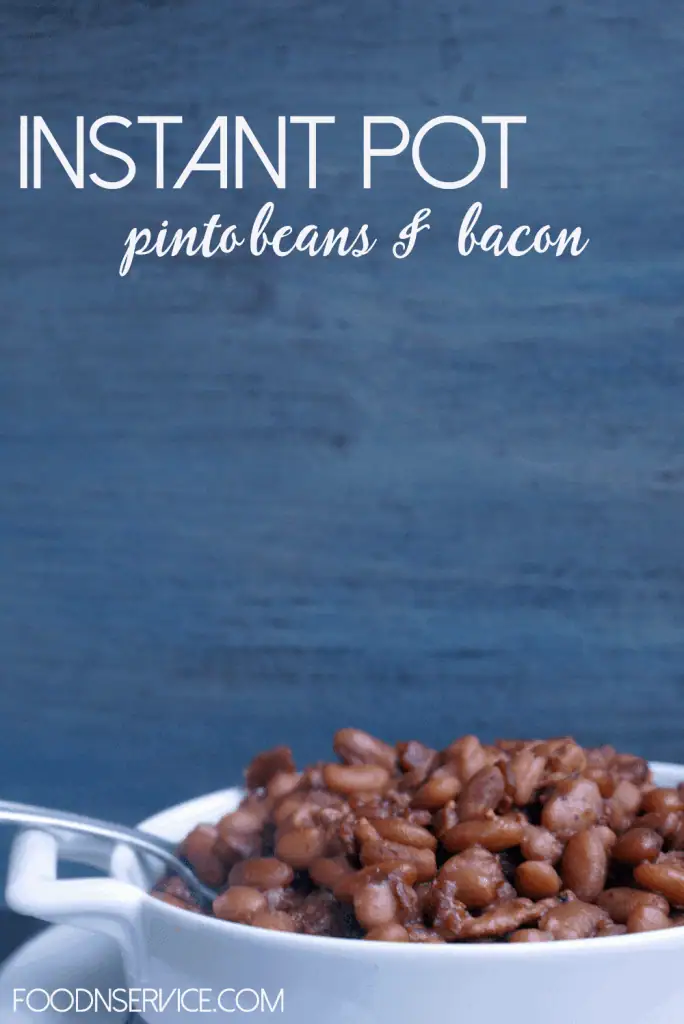
Instant Pot Pinto Beans with Bacon (No-Soak, Cozy & Creamy)

If you have never made Instant Pot pinto beans with bacon from scratch, I am about to change your dinner routine completely. No soaking. No babysitting a pot on the stove. No waiting around all afternoon wondering if the beans are done yet. You sauté a pound of thick-cut bacon right in the pot, drop in the dry beans and seasonings, seal the lid, and walk away. What comes out the other side is a pot of deeply smoky, creamy, soul-warming beans with the richest pot liquor you have ever tasted. Pure comfort food for your soul.
Over the years, I've learned to appreciate what real dried beans can do when you give them the right environment to cook in. The Instant Pot creates that environment in a fraction of the time that stovetop or slow cooker methods require. The pressure traps all that bacon flavor and forces it deep into every single bean. By the time the pot depressurizes naturally, you have something that tastes like it simmered in a Southern kitchen since sunrise. I serve these over jasmine rice almost every time, but they are just as good with my Cheddar Jalapeño Cornbread on the side or alongside my Garlic Butter Steak Bites for a full dinner spread.

Why You’ll Love This Recipe
The Ingredient Breakdown
Top Tip for a “Fabulous” Savory Finish
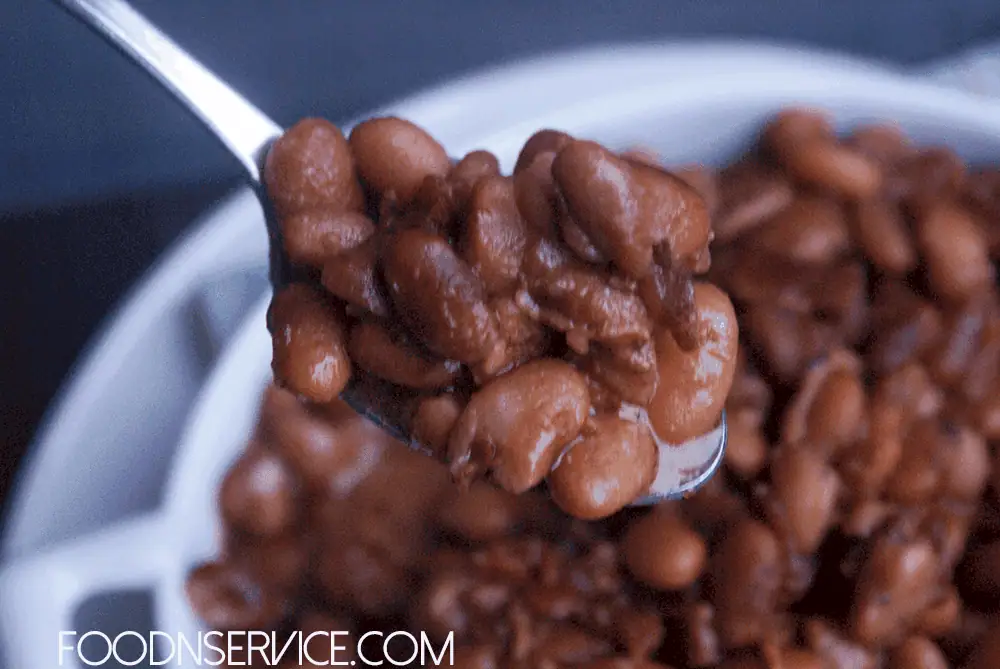
To take this from “good” to “restaurant-quality,” do not drain your beans after cooking! The liquid in the pot is essentially a “Bacon-Bean Consommé”. If the broth feels too thin for your liking, simply take a ladle of beans, smash them into a paste, and stir them back into the pot. This creates a naturally thick, rich gravy without needing any flour or starch.
How to Make Instant Pot Pinto Beans with Bacon (Step-by-Step)
Step 1: Render and Crisp the Bacon
Set your Instant Pot to the Sauté function on Normal or High heat. Once the pot reads Hot, add your bacon pieces in a single layer. Cook for eight to ten minutes, stirring occasionally, until the bacon is nicely crisped and has rendered most of its fat. The pot will be sizzling and smelling incredible at this point. Once the bacon is done, carefully tilt the pot and use a spoon to drain off about half the accumulated grease, leaving the rest behind to flavor the beans. Do not drain all of it. That fat is pure flavor.
David's Tip
Hold off on adding any acidic ingredients like tomatoes, vinegar, or salsa until after pressure cooking is complete. Acid slows down the softening of bean skins during pressure cooking and can leave you with beans that never fully creamy up. Stir in any acidic additions at the very end.
Step 2: Add the Beans and Everything Else
With the Instant Pot still on Sauté, add your rinsed dried pinto beans directly to the pot with the bacon. Pour in the six cups of water. Add the garlic powder, dried thyme, sea salt, black pepper, and Cholula. Give everything a good stir so the seasonings are distributed evenly. Make sure you scrape up any browned bits on the bottom of the pot from the bacon. Those bits are gold, and leaving them stuck to the bottom could trigger the burn notice on some Instant Pot models.
New to Pressure Cooking?
Start with the Instant Pot Playbook—basics, FAQs, and 40+ Recipes to get you started
Step 3: Seal and Pressure Cook
Press Cancel to turn off the Sauté function. Lock the Instant Pot lid into place and make sure the steam valve is set to the Sealing position. Select Manual or Pressure Cook on High pressure and set the timer for 38 minutes. The pot will take about 10 to 15 minutes to come to pressure before the countdown begins. Once it reaches pressure, leave it alone and let it do its thing.
Step 4: Natural Pressure Release — Do Not Skip This
When the 38-minute cook time is done, do not touch the steam valve. Let the pressure release completely on its own. This will take approximately 22 to 26 minutes on an 8-quart pot, and a little less on a 6-quart. The natural release keeps the bean skins intact so you end up with creamy whole beans instead of a blown-out, mushy pot. When the float valve drops on its own, it is safe to open.
Step 5: Rest, Taste, and Serve
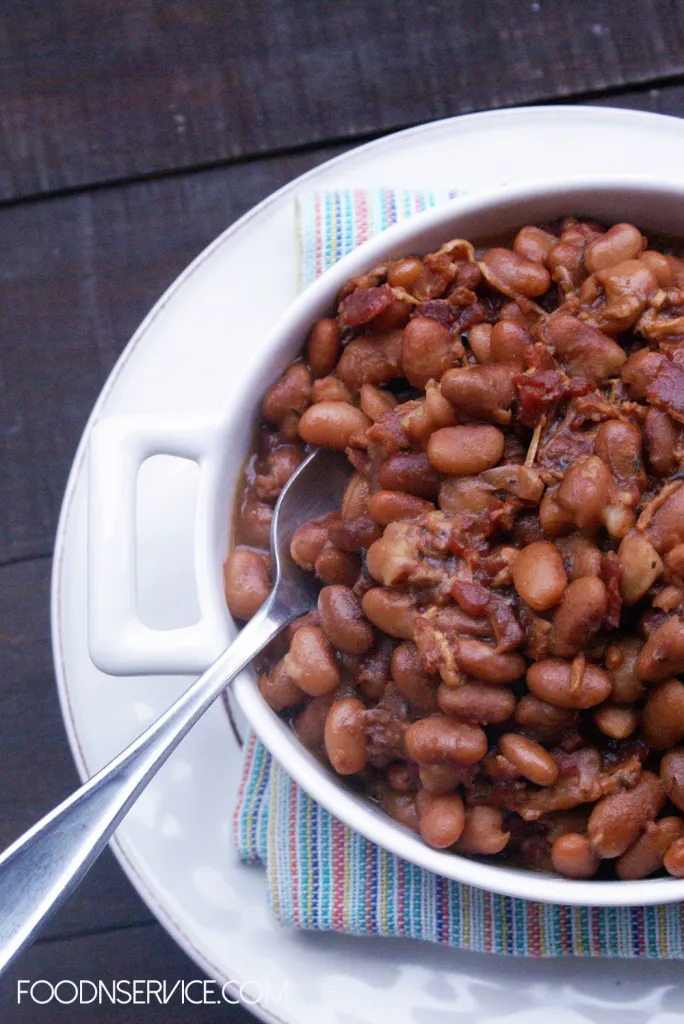
Once the lid is off, let the beans sit uncovered in the pot for about 10 minutes. This rest time lets the broth thicken slightly and lets the beans finish absorbing all that smoky flavor. Taste the broth and adjust for salt. Add a small splash of lime juice or apple cider vinegar if you want to brighten the whole pot. Serve over jasmine rice, with cornbread on the side, or straight from the bowl with a big spoon.
Fun Variations to Try
Smokier and spicier. Add one chipotle pepper in adobo sauce, finely chopped, along with a teaspoon of smoked paprika. Stir it in at the beginning with the seasonings for a bolder, smokier result.
Ham hock instead of bacon. Swap the bacon for one or two smoked ham hocks for a slightly different smoky character. A great move if you have a leftover ham bone from the holidays, similar to the vibe of my Dutch Oven Ham and Bean Soup.
Tex-Mex bowl. Serve the beans over cilantro lime rice with pico de gallo, sliced avocado, a squeeze of lime, and crumbled cotija cheese on top. Add a spoonful of sour cream and you have a full bowl meal everyone loves.
Vegetarian version. Skip the bacon and start with two tablespoons of olive oil on Sauté. Add a diced onion, cook until softened, then add the beans, water, and seasonings. Double the smoked paprika to keep that smoky depth.
Refried beans the next day. Reheat leftovers in a skillet with a splash of the reserved broth. Mash to your desired texture and finish with a pat of butter. Homemade refried beans with almost no extra effort.
Storage & Make-Ahead Instructions
Room Temperature: Do not leave beans sitting out for more than two hours after cooking. Get them into the fridge or freezer as soon as they have cooled enough to handle safely.
Refrigerator: Store in an airtight container in the fridge for up to four days. The beans and broth will thicken considerably as they cool. Add a splash of water or broth when reheating to loosen everything back up.
Freezer: These beans freeze beautifully for up to three months. Let them cool completely, then portion into freezer-safe containers or zip-top bags with some of the broth to keep them from drying out. Thaw overnight in the refrigerator and reheat gently on the stovetop or in the microwave.
Make-Ahead Tip: This is a perfect Sunday meal prep recipe. Make a full batch, portion it into containers, and you have ready-to-go lunches and dinners for the whole week. They reheat in minutes and taste just as good on day four as they did fresh out of the pot.
More Instant Pot Recipes To Love
- Instant Pot Cheesy Chicken and Pasta
- Instant Pot Sausage & Peppers
- Instant Pot Tex Mex Chili
- Instant Pot Monkey Bread
- How To Clean Your Instant Pot
- Instant Pot Ghormeh Sabzi
These Instant Pot pinto beans with bacon are the kind of recipe I make when I want something genuinely satisfying without a lot of fuss. There is nothing complicated here, just real ingredients, a little patience while the pot does its thing, and a result that makes the whole house smell incredible. That is my favorite kind of recipe.
If you make these, I want to hear about it. Drop a comment below and tell me what you served them with or any twists you added. Did you go the Tex-Mex bowl route? Serve them with cornbread? Make refried beans the next day? Tell me everything. And if you share on social media, tag me so I can see your bowl. Happy cooking, everyone.
For this recipe, I used an 8 QT Instant Pot. So we will have different cooking times of coming to pressure and depressurizing. You will also have different cooking times if you live up in the mountains, as in comparison to me living closer to the coast line. But you can totally do this in your 6 quart with no problems!
Instant Pot Pinto Beans and Bacon
Ingredients
- 1 pound bag of dried pinto beans
- 2 pounds thick cut bacon cut into 2″ pieces
- 6 cups of water
- 1 teaspoon garlic powder
- 1/2 teaspoon thyme
- 1 teaspoon sea salt
- 1/2 teaspoon black pepper
- 2 tablespoons of Cholula hot sauce.
Instructions
- With your IP on sauté, cook your bacon until it's nice and crispy. Drain half the grease out of your IP when done.
- Add in your dried beans, water, and all other seasonings.
- Set to manual high pressure for 38 minutes.
- When done, let it NATURALLY release pressure. It should take about 22-26 minutes for this to happen (depending on elevation).
- Take the lid off and allow to set for about 10 minutes before serving over some amazing jasmine rice!
- Done and serve!
Nutrition
Notes
Serving Suggestions
- Over jasmine rice. My go-to move and the most classic serving. Spoon a generous ladle of beans and broth over a bowl of fluffy jasmine rice, top with the reserved crispy bacon bits, and call it done. Simple, filling, and deeply satisfying.
- With cornbread. A thick slice of my Cheddar Jalapeño Cornbread dunked into that smoky pot liquor is one of my favorite things to eat. Serve it in a wide shallow bowl so there is room for the bread.
- As a Tex-Mex bowl spread. Set out bowls of rice, the pinto beans, shredded cheese, sour cream, pico, and avocado and let everyone build their own bowl. Great for casual entertaining with minimal effort.
- As a potluck pot. Keep the Instant Pot plugged in and set to Keep Warm and bring the whole pot to a gathering. Set out toppings and let people serve themselves. It always gets the most compliments on the table.
Tried this recipe?
Let us know how it was!FAQs: Pinto Beans, Pressure Cooked & Answered
Do I have to soak pinto beans before cooking them in the Instant Pot?
Nope. That is one of the best things about pressure cooking dried beans. The Instant Pot at high pressure cooks unsoaked dried pinto beans to perfect tenderness in 38 minutes. If you prefer to soak your beans overnight, go ahead, but reduce the cook time to around 20 to 25 minutes. No-soak is the easier path and the results are just as creamy.
Why are my pinto beans still firm after cooking?
The most common reason is that the beans are older. Dried beans that have been sitting in the pantry for over a year lose moisture and can be stubborn no matter how long you cook them. The fix is simple: reseal the lid, set to high pressure for another five minutes, and let it naturally release again. Also make sure you did not add any acidic ingredients before pressure cooking, as acid prevents bean skins from softening properly.
Can I use chicken broth instead of water in this recipe?
Absolutely, and I highly recommend it. Low-sodium chicken broth adds another layer of savory depth to the pot and makes the finished broth even more sip-worthy. Just be careful with sodium levels since the bacon already contributes a significant amount of salt. Low-sodium broth gives you control over the final seasoning.
Why do I have to do a natural release instead of a quick release?
Natural pressure release keeps the bean skins intact and gives you that beautiful creamy, whole-bean texture. Quick releasing pinto beans causes the sudden pressure drop to rupture the bean skins, which leaves you with a blown-out, mushy, and cloudy pot instead of the clean, creamy result you are after. The 22 to 26 minutes of natural release is part of the recipe, not a suggestion.
How do I thicken the broth if it is too thin?
Use the back of a wooden spoon or a potato masher to smash about a quarter of the cooked beans against the side of the pot, then stir everything together. The starch from the mashed beans will thicken the broth naturally within a minute or two. You can also switch to the Sauté function and simmer uncovered for five to ten minutes to reduce the liquid further.
Can I make this recipe in a 6-quart Instant Pot instead of an 8-quart?
Yes, with no changes to the cook time. The pressure cook time stays at 38 minutes regardless of pot size. The main thing to watch is the fill line. A 6-quart pot should not be filled past the two-thirds line for beans and liquids. You may want to halve the recipe if you are concerned about volume, though the full recipe often fits just fine.
What can I do with leftover pinto beans?
So many things. Reheat them as-is for lunch, serve over fresh rice for another dinner, or mash them in a skillet with a splash of broth and a pat of butter for incredible homemade refried beans. They also work great stirred into scrambled eggs, used as a filling for burritos or tacos, or stirred into a pot of chili for extra body and protein.broth thicker?
Mash a scoop of beans and stir back in, or simmer on Sauté for a few minutes.
Did you pre-soak the beans before you cooked them?
No need to pre-soak the beans at all! It’s the amazing-ness of the Instant Pot!
Looks amazing and trying for
Dinner tomorrow
Can’t wait to try this. The last batch I beans was so awful I may have cried in my bedroom for a bit. We ended up eating a very late supper while I wished we would have just gone for take out. The times people were recommending were SO OFF. Yours sounds doable!
David, I made these with a ham hock the first time. They were amazing. Beautiful to look at and the flavor was so good. I made them with bacon today. Wow!!! My husband agrees this is the best recipe for pinto beans ever!
I have this in the instant pot right now and can’t wait to try. I left out the garlic and thyme and only did about 6 oz. of bacon instead of 24. At first I thought I read your recipe wrong and you had to mean 2 lbs. beans to 1 lb. bacon 😂. Anyway, I’ll review later. Thanks for recipe!!
So to use this recipe for the IP Lux Mini 3 Qt, I would cut the measurements in half and would still have the same cooking time????
Hi Carlene! You can definitely cut the recipe in half for your 3 qt! For cooking time, I’m not 100% sure. However, you would definitely need less time. I would start off at 25 minutes. If it’s still a little too al dente for you, then add on a couple of extra minutes. Please let me know your results for your 3 qt!
You inspired me to make my own beans! I fried the thick bacon in one inch pieces, removed about 1/3 of the grease, added 2 pounds of rinsed beans, added 12-13 cups of water, 1/2 tablespoon of salt, half a tablespoon of garlic powder, a teaspoon of flour, and I chopped up a jalapeño for a little kick. I cooked on high pressure for 1 hour and 5 minutes (total) because I took it out at 45 minutes and it wasn’t look enough. I did natural release for 50 minutes and they came out so good!!! I did add a little salt at the end for more flavor. Next time I’ll leave out the jalapeño, so my kids can eat them because they’re pretty great!! Thank you!
Sorry, my phone autocorrected to flour, but it was pepper not flour!!!
That’s so awesome! I’m so happy that it turned out fab or you!
I tried these tonight. I added the amount of water stated in the recipe, but found it was too much liquid. I’ll try 1 cup or 2 less next time. I also put them back on for 15 minutes because they weren’t soft enough for my liking. I doctored up the recipe with some BBQ sauce. I think it would have been too bland without it.
I love the sound of the BBQ sauce being added in it. However, I’m not sure why it turned out a little liquidy for you. Hmmm.
Fantastic recipe!!!! Our family go to for beans . I just added one cup
Of pickled jalapeños chopped
Because we love them , other than that this recipe is perfect
This recipe is the first one I made in my new instant pot. Actually- this recipe convinced me to purchase one! People have been raving to me about these pots for a couple years, but I do NOT buy new kitchen gadgets often. I HATE the space they take up and try to survive with what I have. 🙂 However, I saw this recipe yesterday and thought- that is too simple to be true!
I love both the pot AND the recipe. Worked great. I added a little bbq sauce as one commentor suggested to make the beans more appealing to those in my home who don’t love pinto beans as the rest of us do. There was excess liquid I had to drain, but perhaps that is typical for the pot. Thanks for your inspiration!
Made this recipe tonight and it was delish! My husband loved it! I think I’ll use a little less salt (maybe 1/2 tsp salt) since lots of savory flavor comes from the bacon. Definitely making this again!! Served with frybread to dip and diced fresh onions lightly sprinkled as garnish.
Is it 2 lbs beans and 1 lb bacon or the other way around, like the recipe states?
It’s like the recipe states. I love bacon lol. You can reduce and go down to 1 pound of bacon if you wish to!
These are now my famous beans for gatherings. They are fabulous! One thing, I reduced the liquid down by putting it on saute after done cooking. These are sooooo good the next day. I always make a double recipe as friends want to take leftovers home. Yummy!
I’m so glad you love this recipe!
David, will this recipe fit in my 6qt? Or will I have to adjust?
Hi Roz! This should fit just fine in your 6qt, as I have made it in mine 🙂
How much will this recipe feed? If I have to double the recipe will the timing still be the same?
You can definitely double it, not sure if it will fit in a standard 6qt machine, but definitely an 8qt one. I would add on an additional 5 minutes…at least. And let that be your starting point.