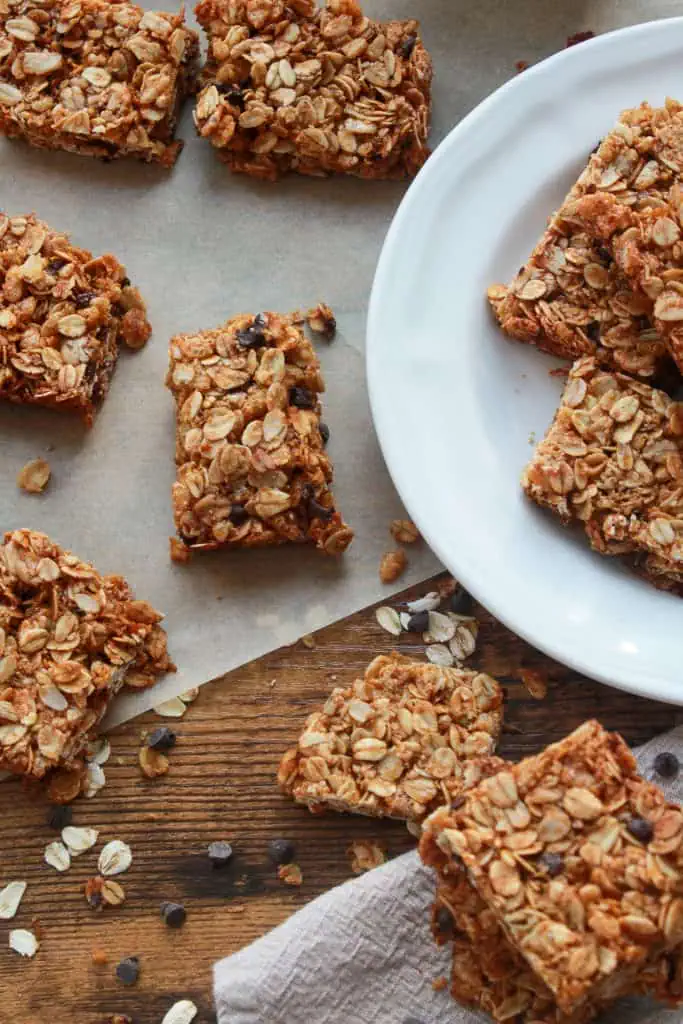
Honey Oat Granola Bars
These Honey Oat Granola Bars are the kind of snack you'll want to keep stocked at all times. They're chewy, lightly sweet, naturally gluten free and dairy free, and they come together with about 10 minutes of hands-on prep. No candy thermometers, no finicky candy coating — just real ingredients, one bowl, and a pan. Whether you're meal prepping snacks for the week or just tired of paying way too much for store-bought bars, this recipe has your back.
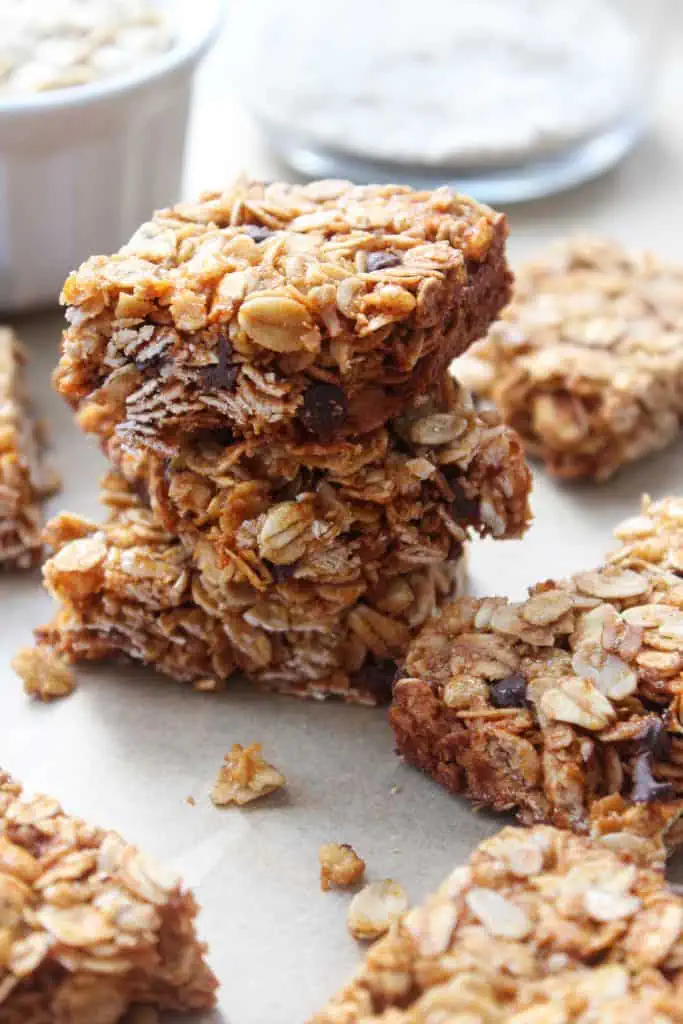
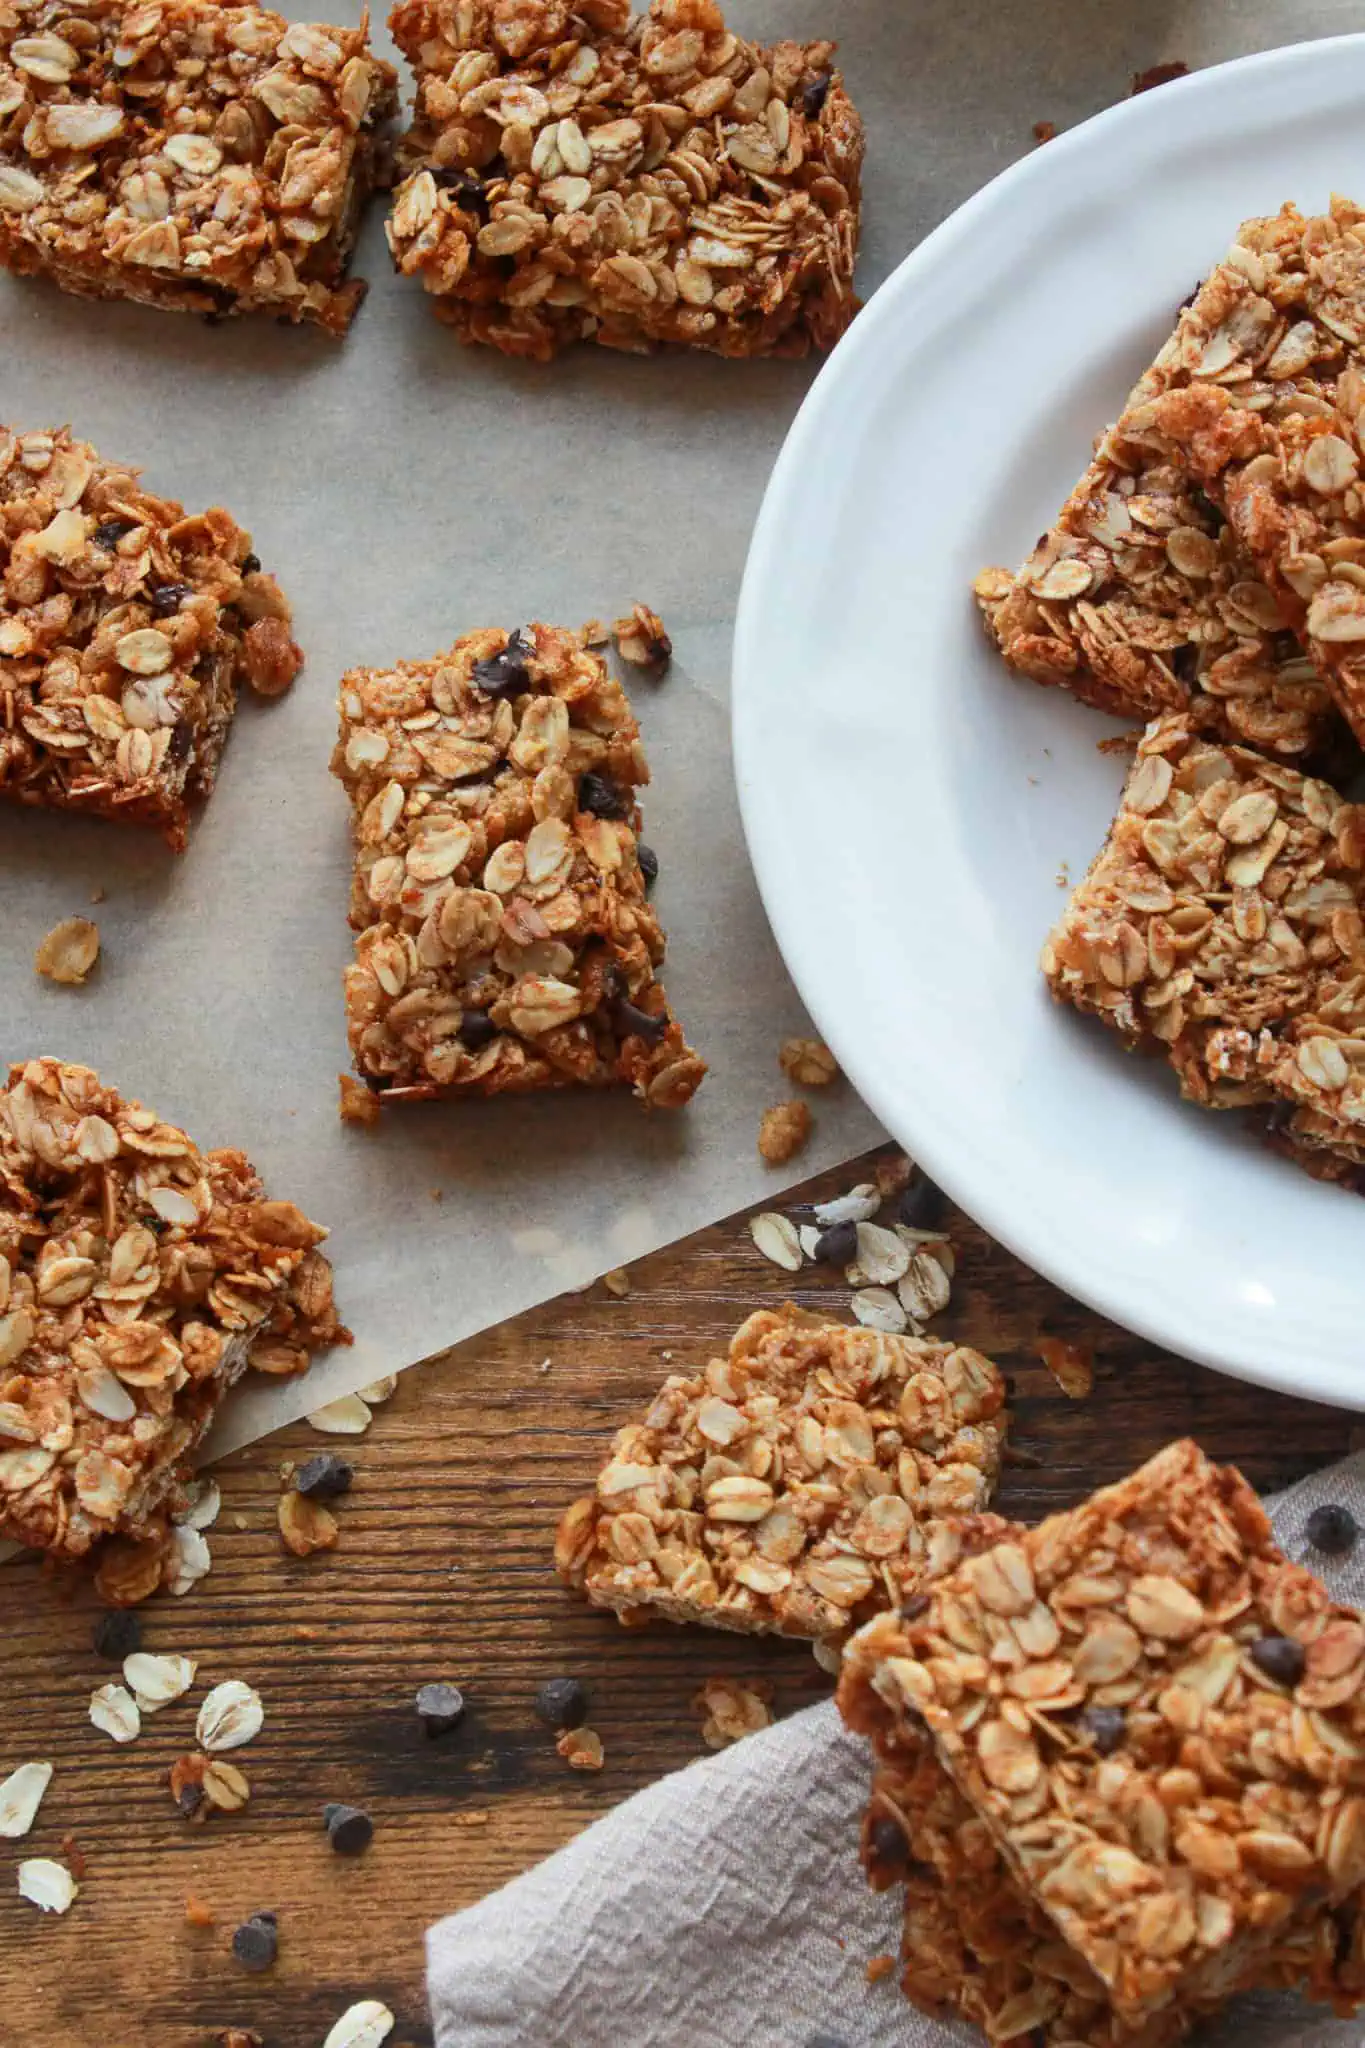
Honey and coconut oil act as the binder here, holding everything together into bars that actually slice cleanly and hold their shape. A little crispy rice cereal adds some crunch without making them feel heavy, and the optional mini chocolate chips are, honestly, not that optional if you ask me. These are great packed in a lunchbox, grabbed on the way out the door, or stashed in your bag for those days when hunger hits at the worst possible time.
About This Recipe
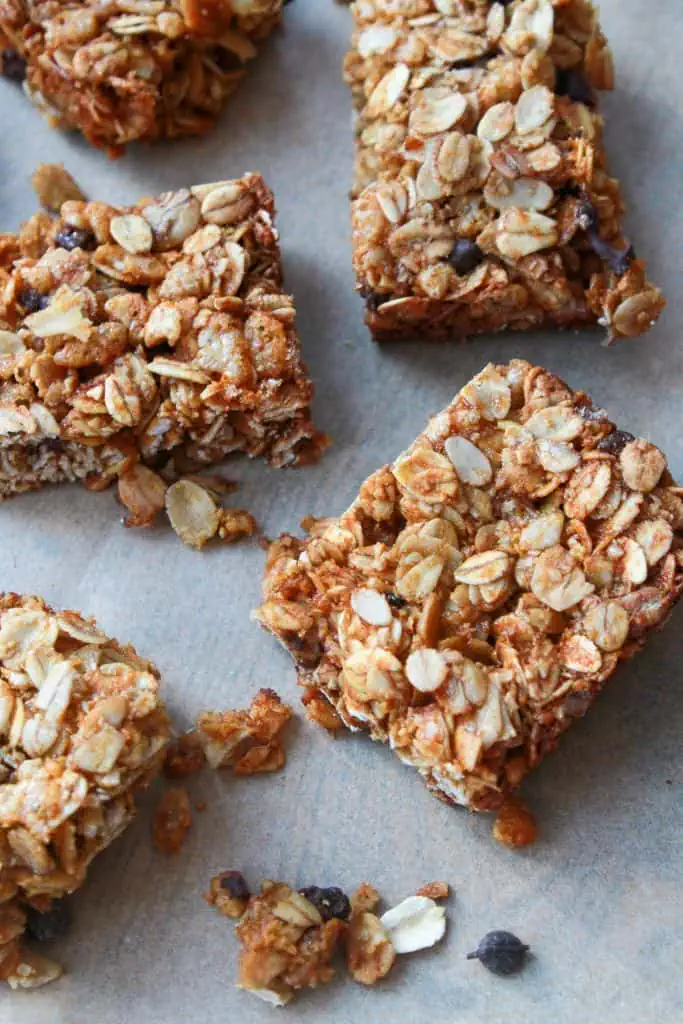
This is a batch of homemade honey oat granola bars made with gluten-free oats, crispy rice cereal, honey, and melted coconut oil. The recipe serves several, takes about 10 minutes of active prep, and bakes in roughly 25 minutes. The crucial step is using a flat-bottomed tool to compress the bars before baking and allowing them to cool completely before cutting, which ensures they hold their shape perfectly.
Recipe Snapshot
Prep Time: 10 minutes
Bake Time: 22–25 minutes
Cooling Time: 20 minutes
Total Time: About 55 minutes
Servings: Makes approximately 16 bars
Difficulty: Easy
Perfect For: Breakfast, lunchboxes, meal prep, after-school snacks
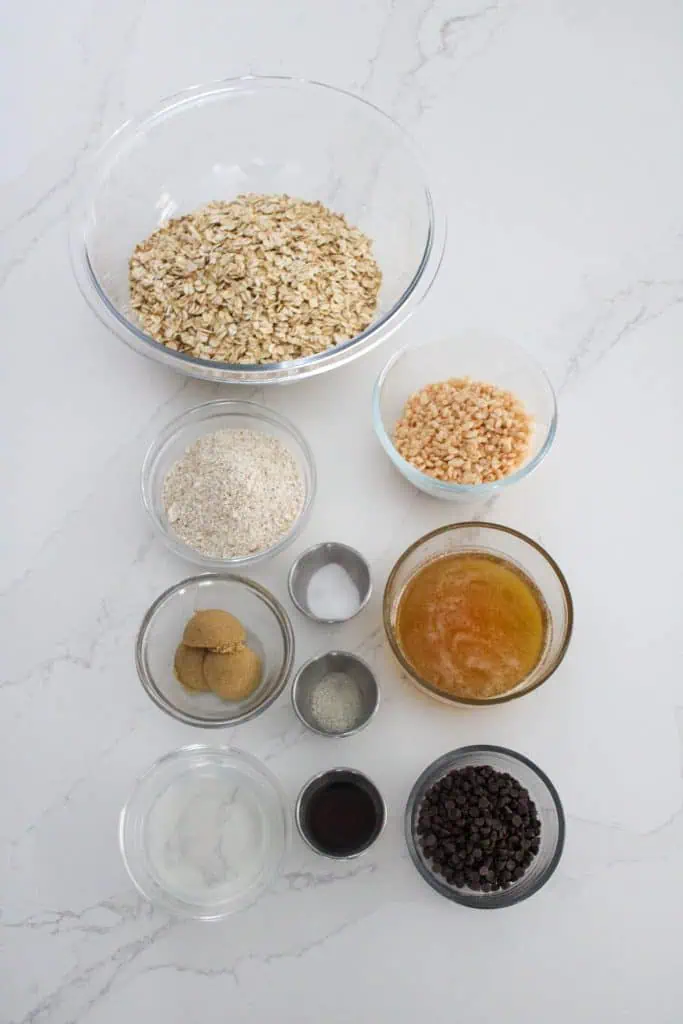
Main Ingredients: Gluten-free oats, honey, crispy rice cereal, oat flour, coconut oil
SUMMARIZE AND SAVE THIS RECIPE CONTENT ON:
Why You'll Love These Honey Oat Granola Bars
The Ingredient Breakdown
Top Tip for a “Fabulous” Finish
The secret to granola bars that don't fall apart is pressure, not extra ingredients. After spreading the mixture into the pan, firmly press it down using the flat bottom of a measuring cup. Compressing the mixture creates a tighter structure, helping the honey bind everything together as the bars bake and cool. It's a simple trick that makes a huge difference in the final texture.
How to Make Honey Oat Granola Bars
Step 1: Prep and Mix
Preheat your oven to 350°F and line a 9×13 baking pan with parchment paper. In a large mixing bowl, combine the oats, rice cereal, oat flour, brown sugar, baking soda, salt, and your chocolate chips if you’re using them. Stir until everything is well combined and distributed.
Step 2: The Binding
In a separate measuring cup, melt your coconut oil. Whisk in the honey and pure vanilla extract until smooth, then pour this mixture over your dry ingredients. Stir until the mixture is completely coated and evenly moistened.
Step 3: Press and Bake
Transfer the mixture into your prepared pan and use a spatula to spread it out. Firmly pat the mixture down into an even layer using a flat-bottomed measuring cup. Bake in your preheated oven for 22–25 minutes until the edges are golden.
Step 4: Cooling and Cutting
This is the most important part: let the granola cool in the pan for at least 15 minutes before you even think about removing it. Then, allow it to sit for an additional 5 minutes before cutting it into bars. Patience here is what keeps them from crumbling.
David's Tip
If the bars seem a little soft, you can place the pan in the fridge for 10 minutes after the initial cooling period to firm up the coconut oil, which makes for much cleaner, sharper cuts.
Make It Your Own
Add nut butter. Stir 2 to 3 tablespoons of peanut butter, almond butter, or sunflower seed butter into the honey and coconut oil before mixing. It adds richness, protein, and a deeper flavor.
Swap in dried fruit. Dried cranberries, raisins, chopped apricots, or cherries all work beautifully in place of or alongside the chocolate chips. Add about 1/4 cup.
Sprinkle in some seeds. Chia seeds, flax seeds, or pumpkin seeds blend right in without changing the texture much. They add a nutritional boost and a little extra crunch.
Go tropical. Swap the vanilla for coconut extract, use unrefined coconut oil, and toss in some shredded coconut and dried pineapple for a totally different vibe.
Storage Instructions
One batch goes a long way, and these bars store beautifully.
Room Temperature: Store completely cooled bars in an airtight container for up to 1 week. Place parchment paper between layers if stacking them to prevent sticking.
Refrigerator: For an even firmer texture, refrigerate the bars for up to 2 weeks.
Freezer: Wrap individual bars and freeze for up to 3 months. Let them thaw at room temperature for about 20 minutes before enjoying.
More Recipes You'll Love
- If you love baking with oats and chocolate together, my Homemade Chocolate Granola is crunchy, naturally gluten free, and just as easy to throw together on a weekend morning.
- Looking for a fun way to serve granola that feels a little fancy? These Granola Cups with Yogurt are adorable, handheld, and work just as well for breakfast as they do for dessert.
- Need a warm, oat-based breakfast that practically makes itself? My Instant Pot Apple Cinnamon Oatmeal is cozy, lightly sweet, and holds up great for leftovers all week.
- If you're in the mood for a quick bake with big flavor, my Orange Chocolate Chip Muffins are a bright, citrusy morning treat that comes together fast with zero fuss.
If you make these Honey Oat Granola Bars, I'd love to hear what mix-ins you went with! Drop a comment below or tag me on social — and if you're on the hunt for more easy, real-food snack ideas, you're in the right place.
Honey Oat Granola Bars
Ingredients
- 3 ¼ cups gluten free oats
- ¾ cups crispy rice cereal
- 2/3 cup gluten free oat flour
- 3 tbsp brown sugar
- ¾ tsp baking soda
- ¾ tsp salt
- ¼ cup mini chocolate chips optional
- 2/3 cup honey
- 1/3 cup coconut oil melted
- 2 tsp pure vanilla extract
Instructions
- Preheat oven to 350°F and line a 9×13 baking pan with parchment paper.
- In a large mixing bowl add oats, rice cereal, oat flour, brown sugar, baking soda, salt, and mini chocolate chips, if using and stir to combine.
- In a measuring cup melt 1/3 cup of coconut oil then add in honey and vanilla and pour over oat mixture, stir until all ingredients are mixed evenly.
- Using a spatula, transfer granola mixture to prepared baking dish and pat down in an even layer. Use a large measuring cup with a flat bottom to get your bars smooth on the surface.
- Place oats in preheated oven for 22-25 minutes.
- After baking, allow granola to cool for 15 minutes before removing from pan.
- Allow an additional 5 minutes before cutting into squares or bars. This will help the granola bars to stay together better.
Nutrition
Notes
Pro Tips
- Even layers: Take your time patting the mixture down; a flatter, more compressed layer creates a stronger bar.
- Storage smarts: Once fully cooled, transfer these to an airtight container to maintain their chewiness for up to a week.
- Don't rush the cut: Cutting while warm is a recipe for crumbs, so respect the total cooling time.
- Oat flour swap: If you don't have store-bought oat flour, you can easily pulse some gluten-free oats in a blender until they turn into a fine powder.
Tried this recipe?
Let us know how it was!Honey Oat Granola Bars: Your Questions Answered
Why did my granola bars fall apart when I cut them?
Usually this comes down to two things: not pressing the mixture firmly enough before baking, or cutting them too soon after they come out of the oven. Make sure you really compact the mixture into the pan, and give the bars the full cooling time listed in the recipe before slicing. The mixture firms up considerably as it cools, so rushing that step leads to crumbling.
Can I use regular oats instead of gluten free oats?
Yes, regular old-fashioned oats will work just fine in this recipe if gluten isn't a concern for you. The texture and flavor will be essentially the same. If you're baking for someone with celiac disease or a gluten intolerance, stick with certified gluten free oats to be safe.
Can I substitute maple syrup for the honey?
You can, and it works well. Maple syrup is slightly thinner than honey, so your bars may be a touch softer, but they'll still hold together. The flavor shifts to something a little earthier and more caramel-like, which is its own kind of delicious.
Can I make these without coconut oil
If you'd prefer not to use coconut oil, melted butter works as a substitute in the same quantity and will keep the bars dairy-containing. For a completely neutral-flavored option that stays dairy free, refined coconut oil (which has no coconut taste) is your best bet.
What's the best way to cut the bars cleanly?
Use a sharp knife and make one confident cut rather than sawing back and forth. Scoring the top of the bars lightly before they fully cool (around the 15-minute mark) can help too. If they're crumbling, they need a little more cooling time before you cut all the way through.