
Halloween Cherry Rhubarb Eyeball Pie

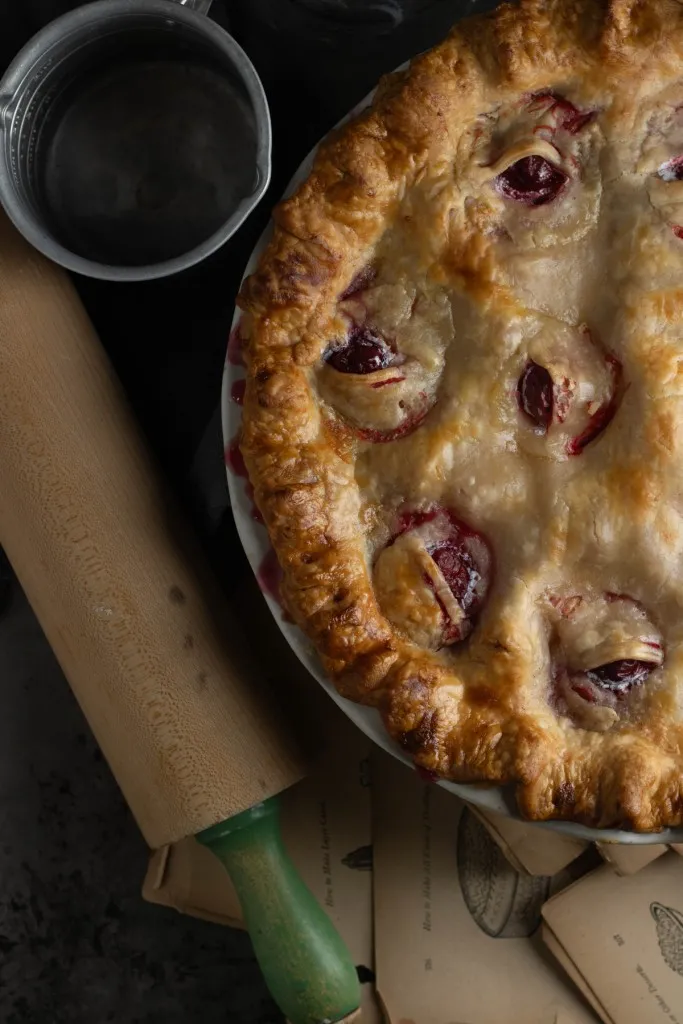
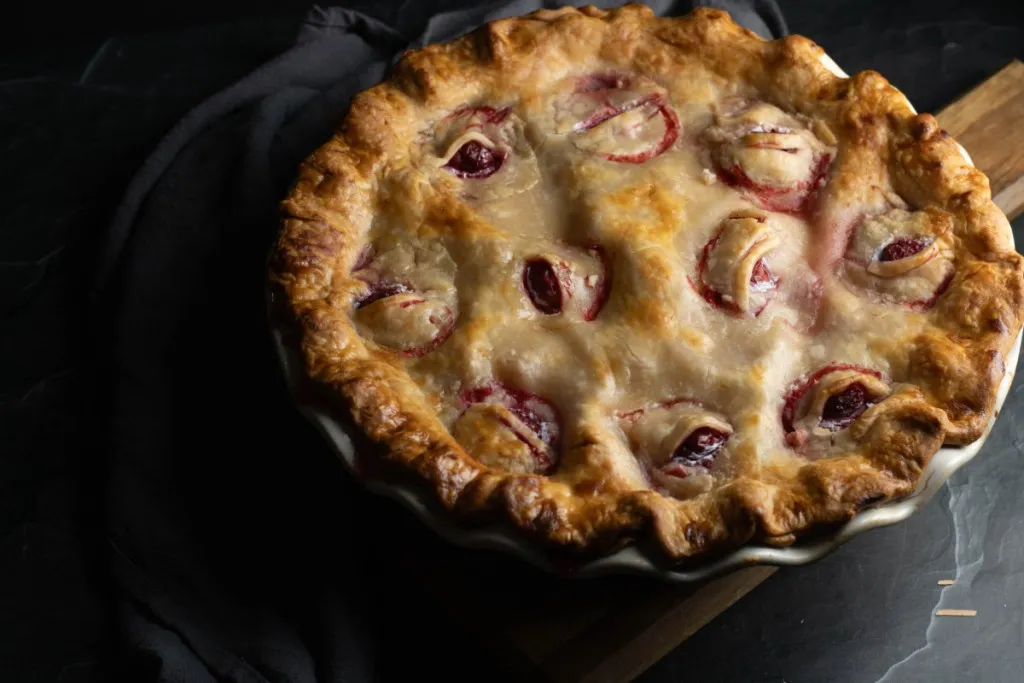
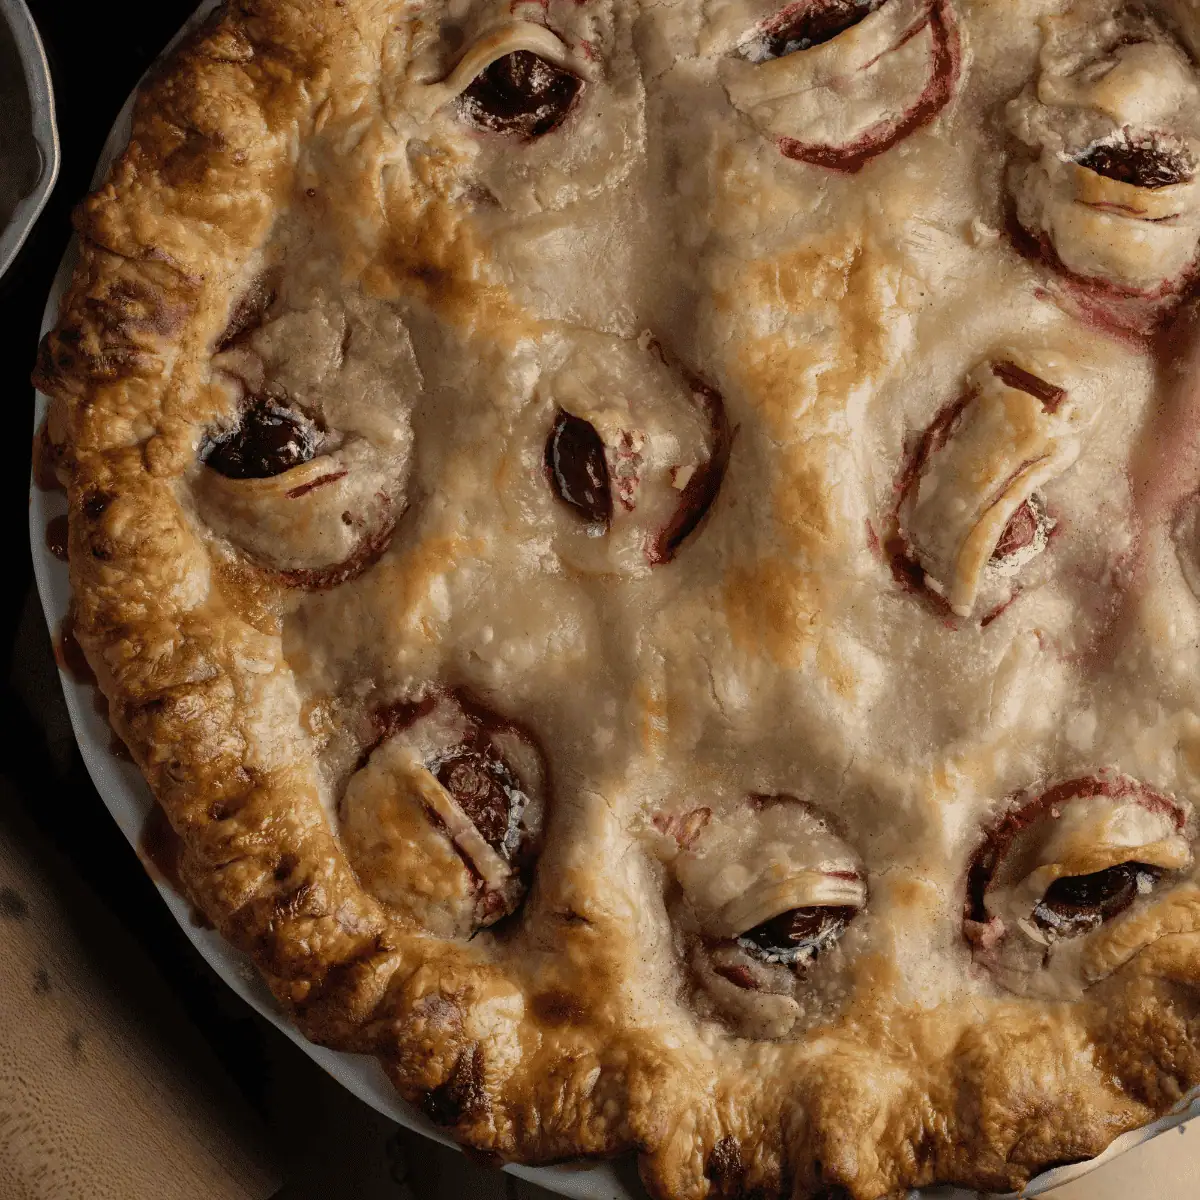
This Halloween cherry rhubarb pie takes a sweet and tangy fruit pie and turns it into something wonderfully creepy. Whole red cherries peek through little openings in the golden top crust while pieces of pastry curl around them like eyelids, making it look like a whole bunch of eyeballs are staring right back at you.
As the pie bakes, some of the bright red cherry juices bubble around those openings and stain the pastry. Instead of trying to make everything look neat and perfect, we’re actually hoping for a little mess here. The more those cherries look like creepy, bloodshot eyes, the better. Underneath all that Halloween fun is a fabulous cherry rhubarb pie with vanilla, almond extract, lemon, cinnamon, and a flaky double crust. So while everyone may come to the table because of the eyeballs, they’ll stay for the pie.

About This Recipe
This Halloween cherry rhubarb pie is a 9-inch double-crust fruit pie filled with frozen cherries, fresh rhubarb, sugar, lemon, vanilla, almond extract, cinnamon, and cornstarch. It takes about 15 minutes to prepare and 55 to 60 minutes to bake. Whole cherries are reserved from the filling and tucked into openings in the top crust, then surrounded with leftover pastry to create the creepy eyeball design

Recipe Snapshot
Prep Time: 15 minutes
Cook Time: 55 to 60 minutes
Total Time: About 1 hour 15 minutes, plus cooling
Servings: 1 9-inch pie
Difficulty: Moderate
Perfect For: Halloween parties, spooky dessert tables, October baking, Halloween movie nights
Main Ingredients: Cherries, rhubarb, pie crust, sugar, lemon, vanilla, almond extract
Why You’ll Love This Halloween Pie
Why This Recipe Works
Cherry and rhubarb already make a great pie filling because you get sweetness, tartness, and plenty of juicy fruit flavor. Lemon keeps everything bright, while vanilla and just a little almond extract complement the cherries without covering up the rhubarb.
Cornstarch thickens all those fruit juices as the pie bakes. You want to see the filling bubbling through the openings before you pull the pie from the oven because that tells you the filling has gotten properly hot.
The double crust does more than hold everything together. The top crust becomes part of the Halloween decoration. Instead of cutting ordinary vents into it, we’re turning those openings into little places for whole cherries to peek through.
Then the leftover scraps become the eyelids. Once everything gets brushed with egg wash and baked, you get golden pastry surrounding deep red cherries with juice bubbling around them. It’s creepy in exactly the way a Halloween dessert should be.
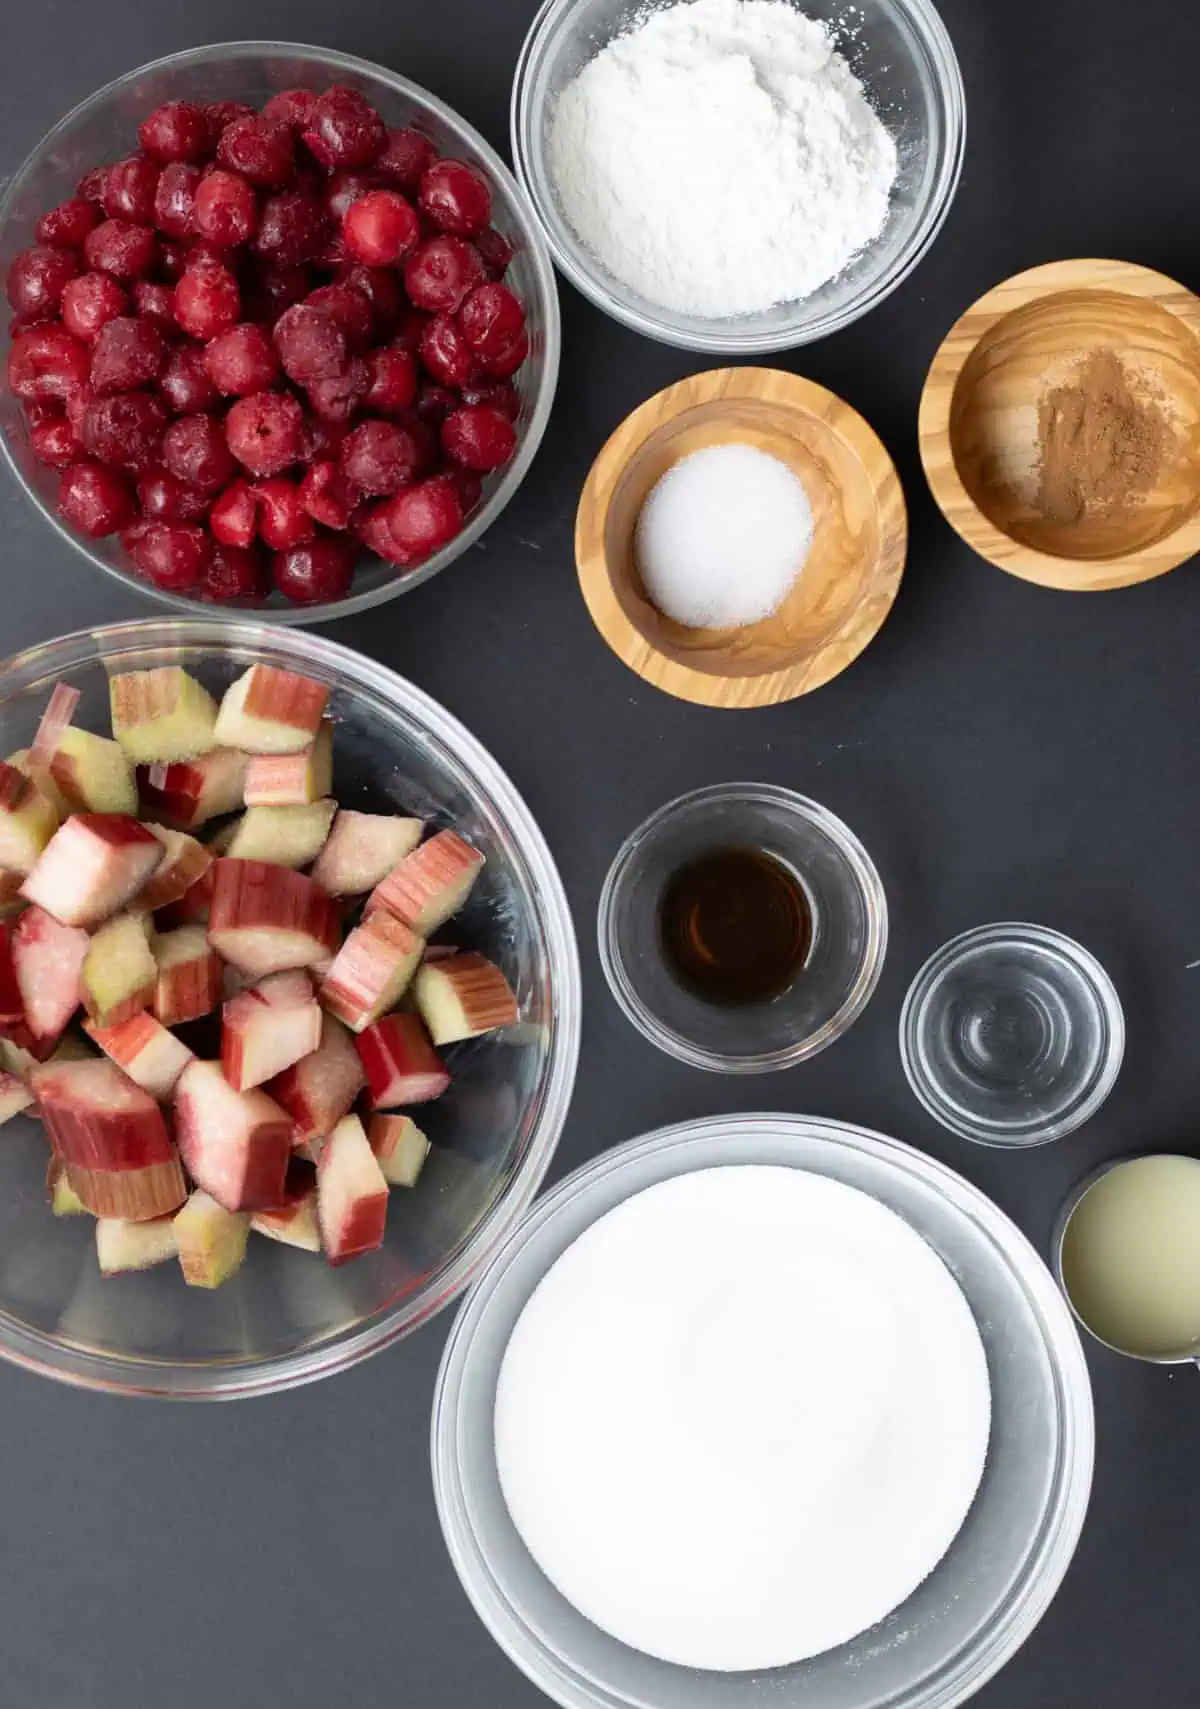
The Ingredient Breakdown
Top Tip for a “Fabulous” Finish
Let your filling sit for 15 minutes after you toss it, then drain off any excess liquid before it goes in the crust. Frozen cherries and rhubarb throw off a lot of water, and that puddle in the bowl is exactly what turns into a soggy bottom crust. Giving the cornstarch a head start on the juices and pouring off the extra is the single best thing you can do for a clean, sliceable pie.
How to Make Halloween Cherry Rhubarb Eyeball Pie
Step 1: Mix the filling and reserve your eyes
Preheat the oven to 400°F and line a baking sheet with foil to catch drips. Pull out 10 to 12 pretty cherries for the eyeballs and set them aside. In a large bowl, toss the remaining cherries, rhubarb, sugar, cornstarch, lemon juice, vanilla, almond extract, cinnamon, and salt until everything is evenly coated. Let it rest 15 minutes, then drain off the excess liquid.
Step 2: Fill the bottom crust
Press the first crust into a 9 inch pie plate so it hugs all the sides, and prick the bottom all over with a fork so it does not bubble up. Pour in the filling and level it out. The dish should look full and mounded slightly in the center, since it will settle as it bakes.
Step 3: Add the top crust and cut the eyes
Lay the second crust over the filling, trim the overhang, and crimp the edges firmly to seal. Now cut small curved slits across the top, and tuck a reserved cherry into each one so it peeks through like an eye. Press the pastry gently around each cherry so the crust forms a little lid over it. Uneven, mismatched eyes look the creepiest, so do not fuss over making them match.
Step 4: Egg wash and bake
Beat the egg with the water and brush it over the entire crust, getting into the crimped edges. Bake at 400°F for 55 to 60 minutes, until the crust is deep golden and, most importantly, the filling is bubbling in the center, not just at the edges. That center bubble is how you know the cornstarch has activated and the filling will set. If the edges brown too fast, tent them with foil.
Step 5: Cool completely, then reveal
Here is the hardest step: let the pie cool completely on a rack, at least 3 to 4 hours. The filling needs that time to set into clean slices. If you want extra realism once it is cool, use an edible white marker to add a highlight line under each eyelid.
Serving Suggestions
Display it whole first: set the full pie out on a dark platter so everyone gets the full staring-eyes effect before you cut it.
À la mode, of course: a warm slice with a scoop of vanilla ice cream or a dollop of whipped cream is the classic move.
In a pool of blood: spoon warmed cherry sauce onto the plate first, then set the slice on top for maximum drama.
On a spooky dessert board: plate it alongside my easy spider web sugar cookies for a Halloween table that has it all.
Serving Suggestions
Storage & Make-Ahead
Refrigerator: store the cooled pie covered in the fridge for 4 to 5 days. The filling firms up even more once chilled, so cold slices hold their shape beautifully.
Freezer: freeze the baked, cooled pie for up to 3 months. Wrap it well, thaw overnight in the fridge, and warm it in a low oven to bring back the crisp crust.
Make-ahead: you can assemble the pie and refrigerate it unbaked for a few hours before baking, which actually helps the crust hold its shape. Bake it the day of your party so the eyes look freshest.
Room temperature: a fruit pie is fine at room temp for a few hours of serving, which is perfect for a party spread. Refrigerate any leftovers after that.
TIPS FOR MAKING EYEBALL PIE
- I haven’t blind-baked my pie crust bottom in this recipe, but you can do this to ensure a crispy pastry.
- Crimp the sides of the pie well where the pastry meets to prevent any fruity pie filling from spilling out while baking.
- Pricking the bottom of the pie crust prevents the pie crust from lifting up while baking.
- The fruity pie filling will be extremely hot when the pie has been removed from the oven. Allow the pie to rest for 10 minutes before serving it.
More Halloween Recipes You’ll Love
Keep the creepy menu going with a few more FoodnService favorites.
- My DIY Halloween Deviled Eggs are a fun savory addition when you need something creepy before dessert.
- These Jalapeño Mummy Poppers bring a little heat to your Halloween party table.
- For another dessert that really looks the part, try my Easy Spider Web Sugar Cookies.
- My Monster Cupcakes are especially fun if you’re planning a dessert table for kids.
- And you can never go wrong with a batch of Halloween Macarons when you want something a little extra special.
Give This Eyeball Pie a Try
This is the rare Halloween treat that is equal parts creepy and genuinely delicious. It looks like something out of a horror movie, it tastes like a proper cherry rhubarb pie, and it will absolutely be the thing everyone talks about at your party. Best of all, it is far easier than it looks, so you get all the reaction with none of the stress.
If you make it, I would love to see those eyes staring back at you. Leave a comment and a star rating below, and tell me how creepy you managed to get yours. Came up with a fun variation? Share it so the rest of us can steal your idea.
Halloween Cherry Rhubarb Pie
Ingredients
- One 12-ounce package of frozen pitted cherries
- 3 cups of rhubarb diced in 1 ½” pieces
- Two premade pie crusts or homemade
- 1 tsp vanilla extract
- ¼ tsp almond extract
- 2 Tbs lemon juice
- ⅓ cup cornstarch
- ½ tsp salt
- 1 ¼ cup granulated sugar
- ¼ tsp cinnamon
- 1 egg
- 2 Tbs. water
Instructions
- Preheat oven to 400 degrees. Line a baking sheet with foil to catch juices that may overflow.
- In a large bowl, add all the ingredients and toss until everything is evenly distributed.
- Add the first crust to a 9” pie plate and gently press and stretch until the crust touches all sides. Trim any overhanging crust and set aside.
- Prick the bottom of the crust so that it doesn’t bubble up while baking.
- Pour the pie filling ingredients into the crust and level it evenly.
- Take the second crust and lay it across the top of the pie filling.
- Trim off the overhanging crust and set aside.
- Using the leftover crust, combine it to make a ball and roll it out as large as you can while keeping it thick enough that you can still work with it.
- Take a small circular cookie cutter, approximately 1 ½” in diameter, and cut as many circles as possible with your dough.
- Cut each circle into equal halves, and then gently use the back of your knife to create a line near the front of the flat part of your semi-circles.
- Take one cherry and place it in the position you desire.
- Take the semi-circle and lay it over the backside of the cherry with the flat portion at the front part where the cherry should be peaking out from under the lid.
- Gently press around the seams to create an eyelid over an eyeball.
- Take one egg and 2 Tbs of water and thoroughly beat with a fork.
- Use a kitchen brush to apply the egg wash over the entire crust carefully.
- Bake at 400 degrees for 55-60 minutes or until the juices are bubbling.
- Allow to cool, and if desired, use an edible white marker to add lines to the bottom of the lid to add realistic characteristics.
Nutrition
Notes
Pro Tips for the Best Eyeball Pie
- Cool it fully or it will bleed everywhere: cutting a warm fruit pie is how you get soup on the plate. Give it hours, not minutes.
- Drain the frozen fruit: pour off the excess liquid after the filling rests so your bottom crust stays crisp.
- Hot sheet, low rack: a preheated pan on the bottom rack is the best insurance against a soggy bottom.
- Lean into imperfect eyes: uneven sizes and crooked lids make it look more alive and unsettling, which is the whole point.
- Add the white highlight after baking: a tiny edible-marker dot or line under each lid is what tips it from cute to genuinely creepy.
- Restaurant habit, taste your fruit first: cherries and rhubarb vary in tartness, so taste and nudge the sugar to match what you have.
Tried this recipe?
Let us know how it was!FAQs: Eyeball Pie, Answered
Why is my pie filling runny?
Almost always excess liquid from the frozen fruit or not enough cook time. Let the filling rest and drain off the extra liquid before filling the crust, and make sure you bake until the filling bubbles in the center, which is when the cornstarch actually thickens. The biggest fix of all is patience: a fruit pie needs to cool completely, 3 to 4 hours, to set into clean slices.
How long does the pie need to cool before cutting?
At least 3 to 4 hours, and honestly the longer the better. Cutting into a warm fruit pie releases all the trapped juices and you end up with a soupy slice. The filling firms up as it cools, so if you can wait, you will get clean, sliceable pieces that hold their shape.
Can I use frozen rhubarb?
Yes. Thaw it first, then run it under water and pat it dry with a clean kitchen towel, not paper towel. Tossing the chopped rhubarb with a little flour helps absorb extra moisture so your filling does not get watery. Fresh rhubarb is ideal, but frozen works well with that quick prep.
How do I keep the bottom crust from getting soggy?
Three things work together here. Prick the bottom crust before filling, drain the excess liquid from your fruit, and bake the pie on a preheated baking sheet on the lower oven rack. That blast of heat from the hot metal crisps the base while the pie bakes. You can also blind-bake the bottom crust first for extra insurance.
Can I make this pie ahead of time?
You can assemble it unbaked and refrigerate it for a few hours before baking, which helps the crust keep its shape. For the freshest, creepiest look, bake it the day you plan to serve it. Baked leftovers keep 4 to 5 days in the fridge or up to 3 months frozen.
What if I do not like rhubarb?
Just leave it out and use more cherries for a classic cherry eyeball pie, or swap in a mixed berry filling. The eyeball decorating technique works the same no matter what fruit is inside, so use the filling you love.
How do I make the eyeballs look extra realistic?
Let the cherry juice do the work first, since it seeps around each opening as it bakes and creates a natural bloodshot look. Once the pie is completely cool, add a small white highlight line or dot under each pastry eyelid with an edible white marker. That little reflection is what makes the eyes look like they are actually watching you.
