Snow Cone Cake Pops
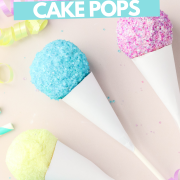
Snow cone cake pops are exactly what summer party desserts are supposed to be — bright, fun, a little bit messy, and impossible to resist. I'm talking moist cake rolled into bite-sized balls, dipped in smooth white candy melts, covered in crunchy sanding sugar crystals, and served up in a little paper cone just like the real thing. If you love that carnival snow cone vibe as much as I do, you have to check out my Snow Cone Oreo Truffles, too — they're another no-bake spin on the same summer theme. Every single time I make these at a party, people stop in their tracks.
They look like they took hours of work. They actually don't. That's my favorite kind of recipe. If you've ever made cake pops before and felt like they were too complicated, this version is going to change your mind. There are a few small tricks that make the whole process go smoothly, and I'll walk you through all of them.
Recipe Snapshot
- Fun Summer Showstopper: These snow cone cake pops look like carnival-worthy treats but are made with just a handful of simple ingredients — including a box cake mix and store-bought frosting.
- No Special Equipment Needed: You don't need a cake pop maker or any fancy tools. A cookie scoop, some sticks, and a microwave is really all it takes.
- Totally Customizable: Use any cake flavor, any frosting, and any color combination of sanding sugar to match a theme, holiday, or party palette.
- Best For: Birthday parties, summer cookouts, carnival-themed parties, school events, 4th of July celebrations, baby showers, and bake sales.
💡 David's Tip: Don't skip the freezer step! After inserting the sticks, those 10–15 minutes in the freezer are what make the difference between a cake pop that holds together beautifully and one that slides right off the stick when you go to dip it.
Why You'll Love This Recipe
The Ingredient Breakdown
Top Tip
After dipping each stick in melted candy coating before inserting it into the cake ball, let it sit for just 30 seconds before placing the tray back in the freezer. That tiny bit of set time locks the stick in even better.
How to Make Snow Cone Cake Pops (Step-by-Step)
Step 1: Crumble the Cake
Break your fully cooled cake into a large mixing bowl. You want fine, even crumbs with no large chunks left — your hands are honestly the best tool for this. Work through the whole cake until it's completely broken down into a fluffy, uniform crumble.
Step 2: Add the Frosting
Add 1/4 cup of frosting and mix it into the crumbs. You can use a spoon, but your hands work best here too. Mix until the cake mixture starts to hold its shape when you press it together — think soft play dough. It should be firm enough to roll but not sticky or wet. If your cake is on the drier side, add an extra tablespoon of frosting at a time until you hit that texture.
Step 3: Roll and Chill
Use a cookie scoop to portion out balls about 1 inch in diameter. Roll each one between your palms to smooth it out and place them on a lined cookie sheet with a little space between each one. Once they're all rolled, pop the tray in the freezer for about 10 minutes to firm them up before the next step.
Step 4: Melt the Candy Coating
Place your white candy melts in a microwave-safe bowl. Microwave at 50% power for 2 minutes, then stir. Continue microwaving in 30-second bursts at 50% power, stirring between each one, until the melts are completely smooth. This usually takes around 5 minutes total. Low and slow is the move here — high heat will seize them up and ruin the texture.
Step 5: Insert the Sticks
Dip the tip of each candy stick about half an inch into the melted coating, then push it straight down into the center of a cake ball. The coating acts as glue once it sets. Once all the sticks are in, put the tray back in the freezer for another 10–15 minutes until everything is firm and the sticks are locked in place.
Step 6: Dip and Coat
Remove your cake pops from the freezer. Dip each one into the melted white candy coating, letting it coat the entire ball. Tap the stick lightly against the side of the bowl to shake off any excess — this helps you get a smooth, even coat without drips.
Step 7: Roll in Sanding Sugar
Immediately after dipping, roll the wet cake pop into your sanding sugar. Work quickly before the coating sets. You want every bit of the outside covered in color — any gaps in the sugar mean gaps in the crunch, and they also let air get to the cake underneath. Stand each finished cake pop upright to dry and set, which only takes about 10 minutes.
Step 8: Make the Paper Cones
While the cake pops dry, cut your card stock into 6-inch circles. Cut each circle into 4 equal pie-shaped pieces. Take one piece, bring the two straight cut edges together to form a cone shape, and tape it in place. That's your snow cone cup! Make as many as you need.
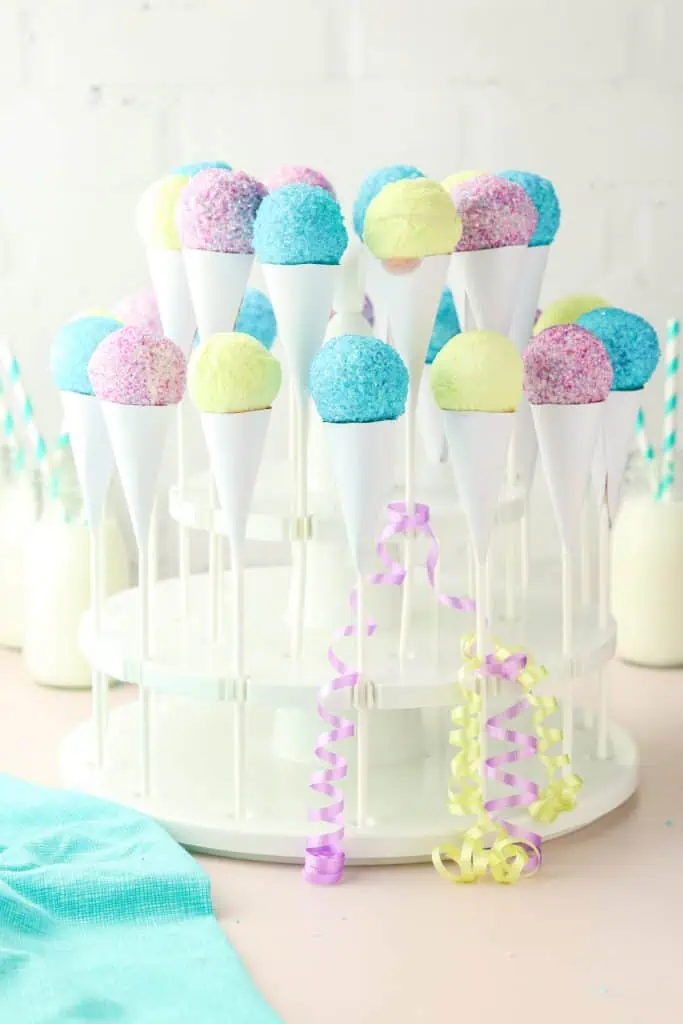
Step 9: Assemble and Serve
Once the cake pops are fully set, slide the stick through the top of the paper cone so the cake pop sits right in the cup like a real snow cone. If the cone slides around, a small piece of tape at the bottom point holds it in place. Serve immediately and get ready for everyone to ask you how you made them.
Top Tip for a Smoother Finish
Add a teaspoon of vegetable shortening to your candy melts before melting. It thins the coating just slightly and gives you a smoother, more even dip with less dripping — a trick I picked up after years working in restaurant kitchens where presentation is everything.

Fun Variations to Try
- Chocolate base: Use a chocolate cake and chocolate frosting, then coat in white candy melts for a classic flavor combo.
- Funfetti celebration pops: Funfetti cake, vanilla frosting, and pastel sanding sugar make these perfect for birthdays.
- Lemon burst: Lemon cake with a lemon frosting, coated in yellow sanding sugar for a bright, citrusy summer pop.
- Holiday versions: Red and green sanding sugar for Christmas, red and pink for Valentine's Day, or red, white, and blue for 4th of July — check out my 4th of July Rice Krispie Treats for another easy patriotic party treat.
Storage & Make-Ahead Instructions
Make ahead tip: You can bake the cake and roll the balls up to 2 days ahead and keep them in the fridge. Dip and decorate the day of your event for the freshest results.
Room temperature: Store finished cake pops in an airtight container or individually wrapped for up to 5 days. They actually hold up really well.
Freezer: Freeze in an airtight container for up to 3 months. Thaw at room temperature when you're ready to serve. The paper cones can be made fresh after thawing.

Serving Suggestions
These snow cone cake pops are a total crowd-pleaser on their own, but here are a few ideas for serving them up in style:
- Stand them upright in a block of styrofoam or a tall glass filled with sugar to display them at a party dessert table.
- Bag each one individually in a clear treat bag tied with a ribbon for party favors or bake sale items.
- Set up a decorating station with different sanding sugar colors and let guests roll their own.
- Pair them alongside other summer party favorites — my Tropical Fruit Marshmallow Fluff or Key Lime Icebox Cake both make incredible additions to any summer dessert spread.

Sow Cone Cake Pops
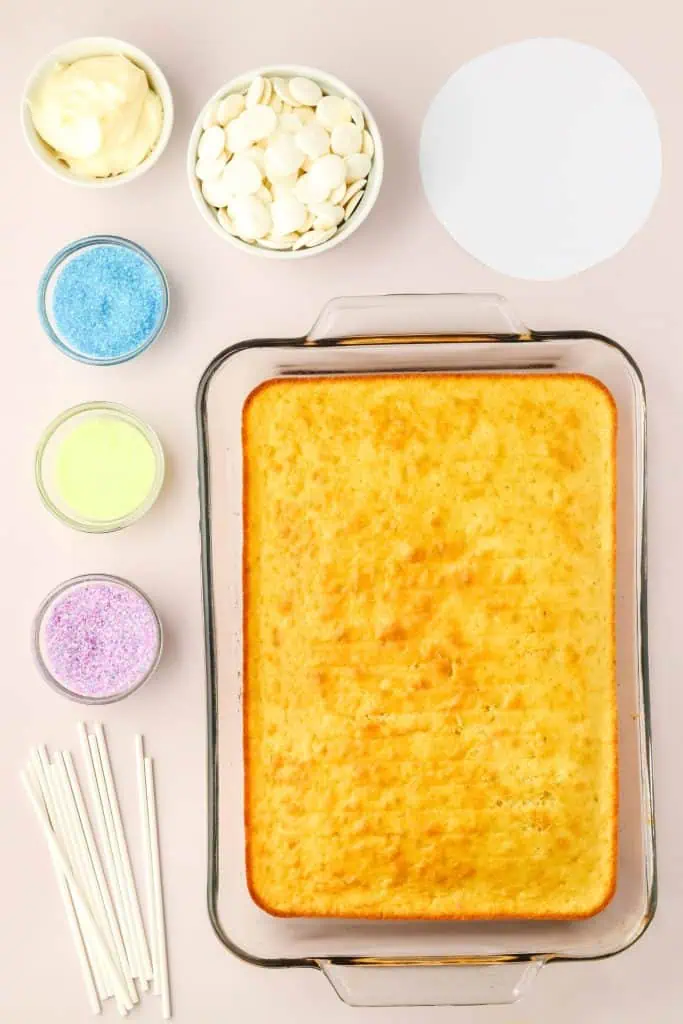
Ingredients
- fully baked 9×13 cake approximately 16oz, 454g , any flavour
- 1/4 cup frosting approximately 1.2oz, 35g, any flavour
- 2 cups 12oz, 350g white candy melts
- 1 cup 7oz, 200g (total) sanding sugar sprinkles, in any variety of colors or shades
Equipment
- large mixing bowl
- cookie sheet
- small, microwave safe mixing bowl
- Scissors
- scotch tape
- 36-40 candy sticks
- white card stock
Instructions
- Crumble your cake into a large mixing bowl. You want fine crumbs. I think your hands are the best tool for the job but you can use the back of a wooden spoon if you want to keep your hands clean.
- Add the frosting and stir until you get it is a texture that resembles play dough. The cake will be slightly firm and will hold a shape.
- Use a cookie scoop to measure out small balls about 1 inch in diameter. Place on a cookie sheet leaving a bit of room in between.
- Place the white candy melts in a microwave safe bowl. Heat in the microwave at 50% power for 2 minutes. Remove and stir. Continue microwaving in 30 second bursts at 50% power until fully melted. You’ll want to stir between each burst of time. Depending on your microwave, this could take up to 5 minutes.
- Dip the end of the stick into the white chocolate and insert one into each cake ball. Once done, place the cake pops on a cookie sheet and put them into the freezer for 10-15 minutes.
- Once the cake pops are firm, remove them from the freezer and dip each ball into the melted white candy. Tap lightly on the side of the bowl to remove any excess.
- Immediately, dip the cake pop into the sanding sugar, covering the entire outside of the cake pop. Place the cake pop upright to dry and set. This only takes about 10 minutes. We’ll start on the paper cone while we wait.
- Cut your card stock into a 6” circle. Cut each circle into 4 pie pieces. Take one of the pie pieces and bring the two cut edges together to make a cone shape and tape it together. This will be your sno-cone cup.
- Once the cake pops have set and dried, place the stick of your cake pop through the paper cone. If the cone won’t stay, use a small piece of tape at the point of the cone to hold it in place. Enjoy immediately.
Nutrition
Notes
Pro Tips for Perfect Sno-Cone Cake Pops
- Bake the cake a day ahead. Slightly cooled and rested cake crumbles more evenly and holds together better than cake that just came out of the oven.
- Use coarse sanding sugar over fine. Coarse crystals give you that bold, true sno-cone look and are much easier to work with during the dipping step.
- Keep your candy melts warm. If they start to thicken while you're working, microwave for 30 seconds at 50% power, stir well, and continue dipping.
- Cover every inch of the cake pop in coating. Even a tiny hole can allow air to dry out the cake underneath over time.
- Use multiple sanding sugar colors for a rainbow effect. Set out small bowls of different colors and roll each pop in a different one for the most visual impact. Link used is in the ingredients list!
Tried this recipe?
Let us know how it was!Ready to Make Some Magic?
Snow cone cake pops are one of those recipes that hits every note — fun to make, beautiful to look at, and even better to eat. Whether you're throwing a summer birthday bash, heading to a backyard cookout, or just looking for a project to do with the kids on a warm afternoon, this recipe delivers every single time.
Give them a try and let me know how yours turn out! Drop a comment below and tell me what flavor combo you used — I'd love to hear your creative take on the classic snow cone.
FAQs: Cake Pop Questions, Answered
What kind of cake works best for cake pops?
Any fully baked box mix or homemade cake works. The key is that it's completely cooled before you crumble it. Denser cakes like vanilla, chocolate, or lemon tend to hold together the best, but funfetti and spice cake work great too.
Why do my cake pops fall off the stick?
The most common reason is skipping the freezer step or not letting the cake pop firm up long enough. After dipping the stick in melted candy and inserting it, the tray needs to go back in the freezer for at least 10–15 minutes so everything sets solid before you dip. Cold cake pops also hold up much better during the coating dip.
Can I use sprinkles instead of sanding sugar?
You can, but sanding sugar is what gives you that authentic snow cone look with the chunky, glittery crystal texture. Regular sprinkles will still taste great, but they won't give you that same snow-cone visual effect.
Do I have to use white candy melts?
White candy melts are recommended because they give you that clean, bright base that lets the sanding sugar colors really show up. Colored candy melts work too, but they can muddy the look of the sugar on top. Clear white is the classic choice.
How do I keep the candy melts from getting lumpy?
Always melt at 50% power and stir between every burst. High heat is the enemy of smooth candy melts — it makes them seize and go grainy. If yours do get lumpy, try adding a teaspoon of vegetable shortening and stirring it in to smooth them back out.
Can I make these ahead of time for a party?
Absolutely. These are actually a great make-ahead party treat. The finished cake pops store at room temperature for 5 days and in the freezer for up to 3 months. Make them a day or two ahead and keep them in an airtight container until it's time to serve.
How much frosting do I need?
Start with 1/4 cup and work from there. If your cake is very fresh and moist, that might be all you need. If the cake is a day or two older and drier, add an extra tablespoon at a time until the mixture holds together like soft play dough. More frosting than that makes the pops too dense.