How To Make A Wine Cork Heart Trivet
How To Make A Wine Cork Heart Trivet
I have more than my fair share of wine corks, and have a 1,001 ideas for DIY wine cork projects. In this post, I'm going to teach you how to make a wine cork heart trivet…a perfect project for Valentine's Day! I had the luxury of working in a B.Y.O.B restaurant, and started collecting all of the wine corks that I could. The collection initially started off in making presents for everyone a couple of Christmas's ago. Thankfully, I still have TON of wine corks left to craft my little heart out!
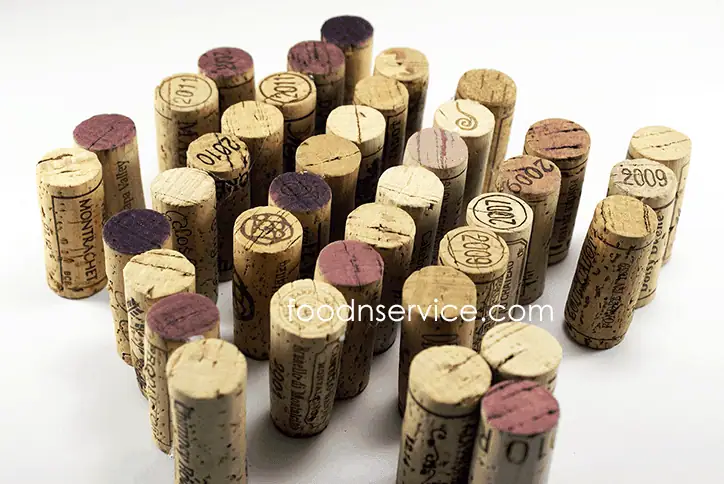
The biggest tip in making this wine cork trivet, or any wine work trivet, is try to find as many same sized corks that you can. Of course, you can always trim them to your desired length…but that just seems like extra work for me! Also, in the materials section, I've linked up to all the things you would need…just to help make life easier for you! With that said, let's get started!
Materials Needs:
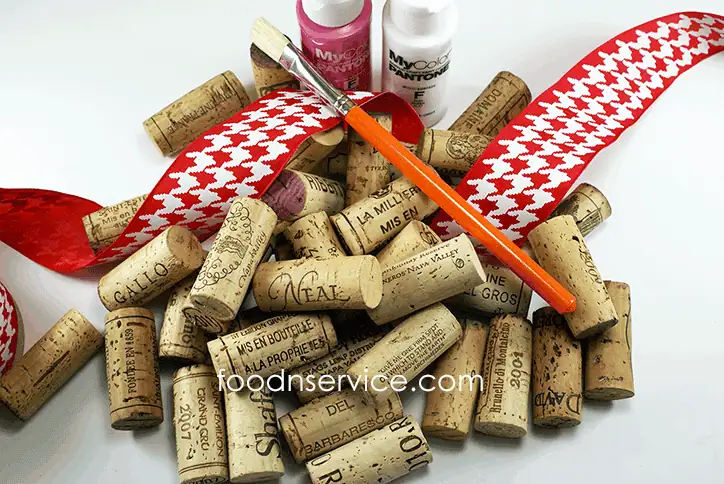
42 Wine Corks
Hot Glue Gun
1.5″ Red Ribbon
Multi-Surface Paint in Lilac and White
2 Eyelet screws (for the top, in case you want to hang it on the wall)
A small paintbrush
Directions:
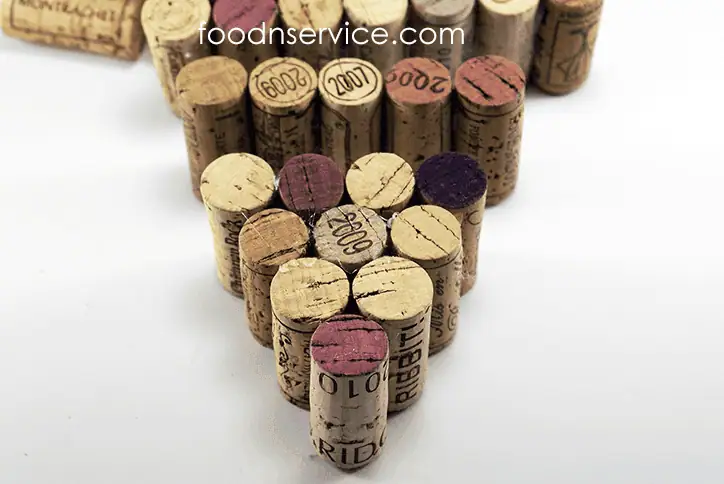
You will need to turn your hot glue gun on and get it ready to start working its little butt off! You're going to glue them together in sections, but we have to prepare the sections. First, you will glue 3 wine works together in the shape of a small pyramid (as seen in the photo above…lower right corner). Then you will start gluing the wine corks into strips in a straight line. I glued them together on a flat surface to make sure the line is even. Each line grows by one cork. So start by gluing 3 in line…side by side. Next row, is a line of four, then a line a five, then a line of 6, then a line of seven. When you get to your line of seven wine corks glued together, you will then glue together a line of 6. You will then glue 2 together, and then another two together. These are the tops of the heart. Finally, you will have 4 corks left over. Do not glue them together! You need them to add on to the curve of the top sections of the heart.
Now, let's glue all of our sections together…one row at a time. Start with your pyramid first, and then hot glue each layer above it.
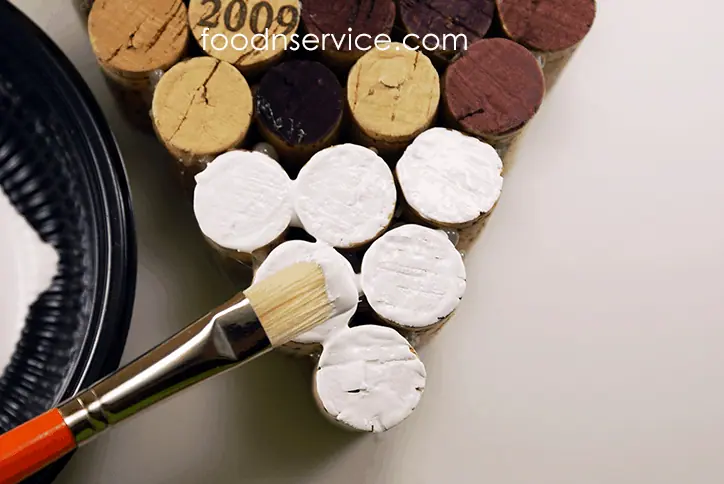
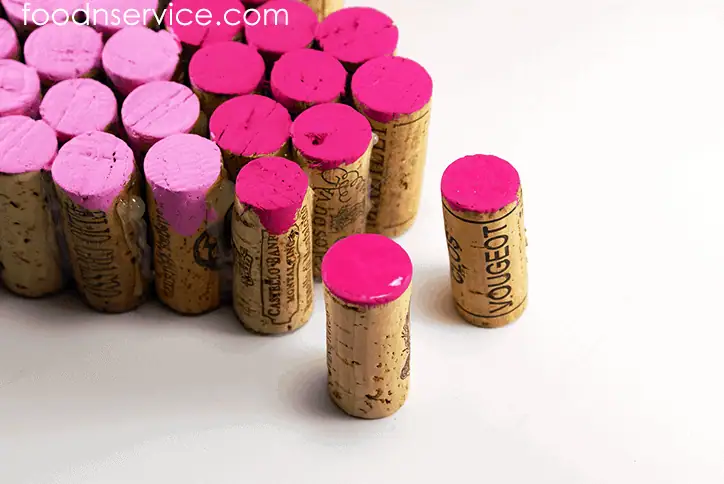
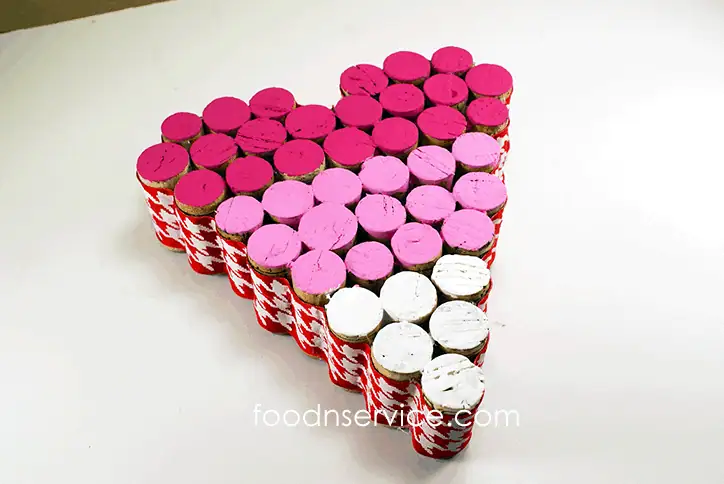
Now is the time to start painting the tops of your corks. I found that I needed to paint over the corks twice to get a nice bright color. I painted the bottom 3 layers white, and the top three layers in the lilac rose color. I then made a 50/50 color mixture to get a middle hue color of the white and lilac rose. I painted the three middle layers with the 50/50 color. For the 4 extra wine corks that aren't glue, you will paint them the Lilac Rose color!
Once the 4 extra wine corks are dried, we are going to add them to the top portions of each side of the heart.
Once your paint is dry, we are then going to glue the ribbon around the outer ridge of the heart. Start the ribbon and hot glue process at the very top of the heart. It is just a place that worked out best for me, and it helps to hide the ends of the ribbon. During the process, we want to make sure our fingers are guiding the ribbon along the crevices. You want to hot glue the ribbon into place in the crevices of the wine corks. I did this a little bit at a time to help make sure to keep the form of the ribbon, and that there was no ripple of the sort. Again, the hot glue goes in between in the corks…and not on the outside of the corks. When done, hot glue the very end piece top middle section where you started. It's okay if you have extra…simply cut that extra piece off. I had to guess in measuring the length of the ribbon. It's always best to have a little extra. To guess…just wrap the ribbon around the exterior of the heart…and then make sure you have a couple of extra inches to play around with. It's better to have extra…and than not having enough.

Now, if you wish…you can screw in your eyelet screws to the very top of the heart. One on each side of the mid points of the heart peaks. I also added in a little red ribbon to keep with theme of red.
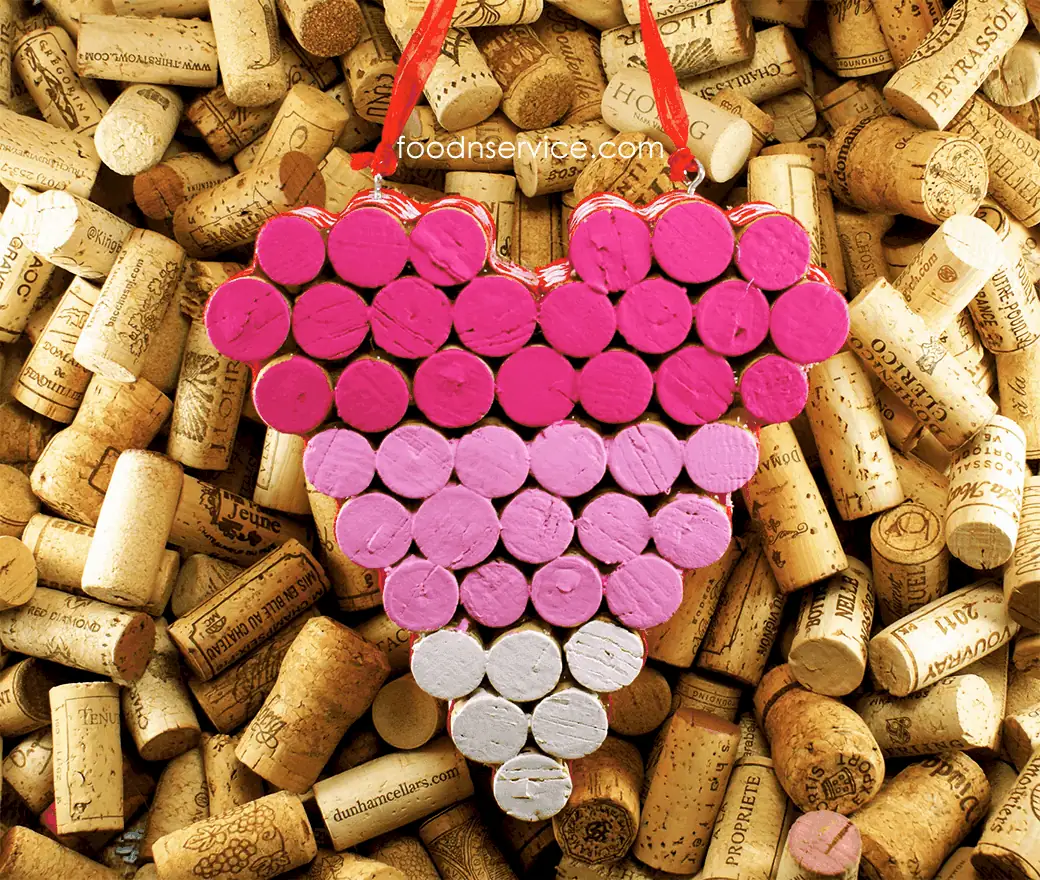
Look how simple and beautiful it is! This will definitely add a festive charm to your home decor!
Here's a small hint: To use for trivet, be sure to turn it upside down! You don't want the heat from any pan to peel off the beautiful colors you painted on!
I hope you enjoyed this DIY post, and I look forward to creating more for you!
Be sure to sign up for my news letter to receive a Free Recipe eBook I created just for you!