Biscoff Cheesecake
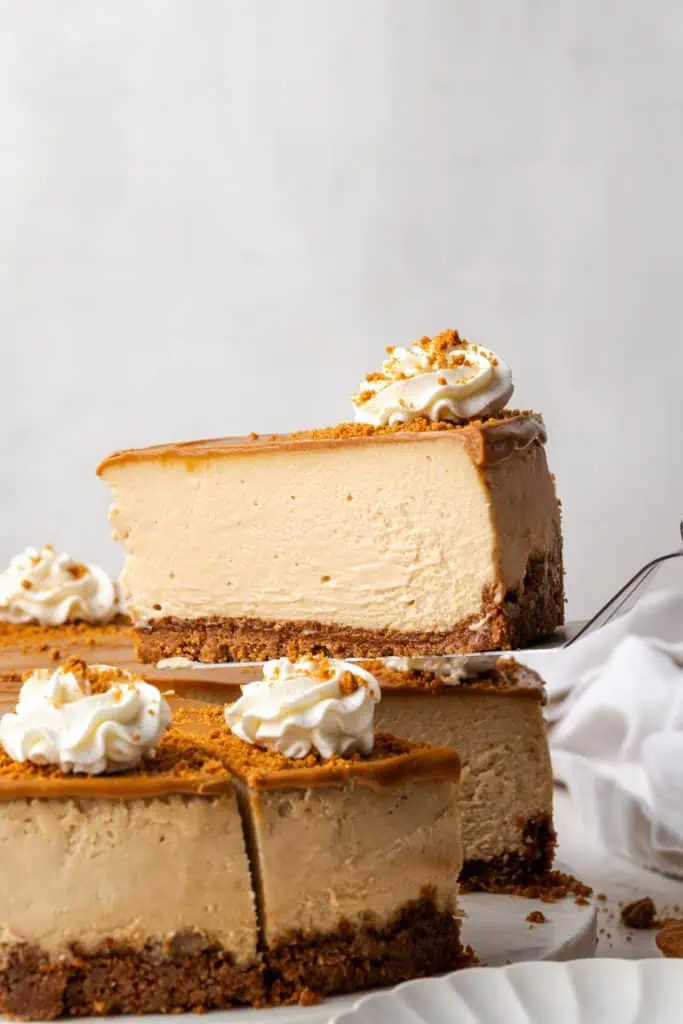
If you’re the kind of person who eats cookie butter straight from the jar with a spoon (like I do), this Biscoff cheesecake is about to become your dream dessert. This cheesecake is rich, creamy, silky smooth, and packed with warm spiced Biscoff flavor in every single bite. Between the crunchy Biscoff cookie crust, velvety cheesecake filling, and glossy cookie butter topping dripping over the top, it feels like the kind of dessert people stop talking in the middle of a conversation to eat.
It's a baked, water bath cheesecake, which means the texture is unmatched – silky smooth, impossibly creamy, and set just perfectly so it slices like a dream. I know the water bath sounds intimidating if you haven't done one before, but I'll walk you through it step by step and make it completely doable. If you love cookie butter in dessert form, my Biscoff Truffles are another obsession-level treat worth adding to the list.
Recipe Snapshot
- Triple Biscoff from Crust to Topping: Cookie crumbs in the crust, cookie butter spread in the filling, and more warmed cookie butter poured over the top. No bite escapes the Biscoff.
- Silky, Crack-Free Texture: The water bath and slow oven cool-down give you that ultra-creamy, dense-yet-light texture that separates a great baked cheesecake from a mediocre one.
- All Room-Temperature Ingredients: Cream cheese, eggs, sour cream, and heavy cream all at room temperature is the single biggest factor in a smooth, lump-free filling.
- The Topping Hides Imperfections: That glossy pour of warmed Biscoff spread covers any cracks or imperfect edges, so even if the bake isn't picture-perfect, it looks stunning on the plate.
- Best For: Thanksgiving, Christmas, birthdays, dinner parties, holidays, Biscoff lovers, and any occasion that deserves a genuinely show-stopping dessert.
💡 David's Tip: This cheesecake is genuinely better on day two. The flavors deepen, the texture firms up perfectly, and every slice is cleaner. If you can make it the day before you need it, do it. The overnight chill is part of the recipe, not just optional.
Why You'll Love This Recipe
What Is Biscoff (and What Is Lotus Biscoff Cookie Butter)?
If you've ever been on a flight and been handed a small wrapped cookie with your coffee, there's a good chance it was a Biscoff. Biscoff cookies are made by Lotus Bakeries, a Belgian company founded in 1932. The cookies are a type of speculoos – a traditional spiced shortbread popular in Belgium and the Netherlands – with a deeply caramelized, lightly spiced flavor with notes of cinnamon, brown sugar, and warm spice that's unlike any other cookie on the market.
Lotus Biscoff spread (also called Biscoff cookie butter) is exactly what it sounds like: Biscoff cookies blended into a smooth, spreadable paste with a consistency similar to peanut butter. It's intensely flavored, sweet, spiced, and deeply addictive. It comes in both smooth and crunchy varieties. For this cheesecake, smooth is the right call in the filling – it incorporates seamlessly without any textural inconsistency.
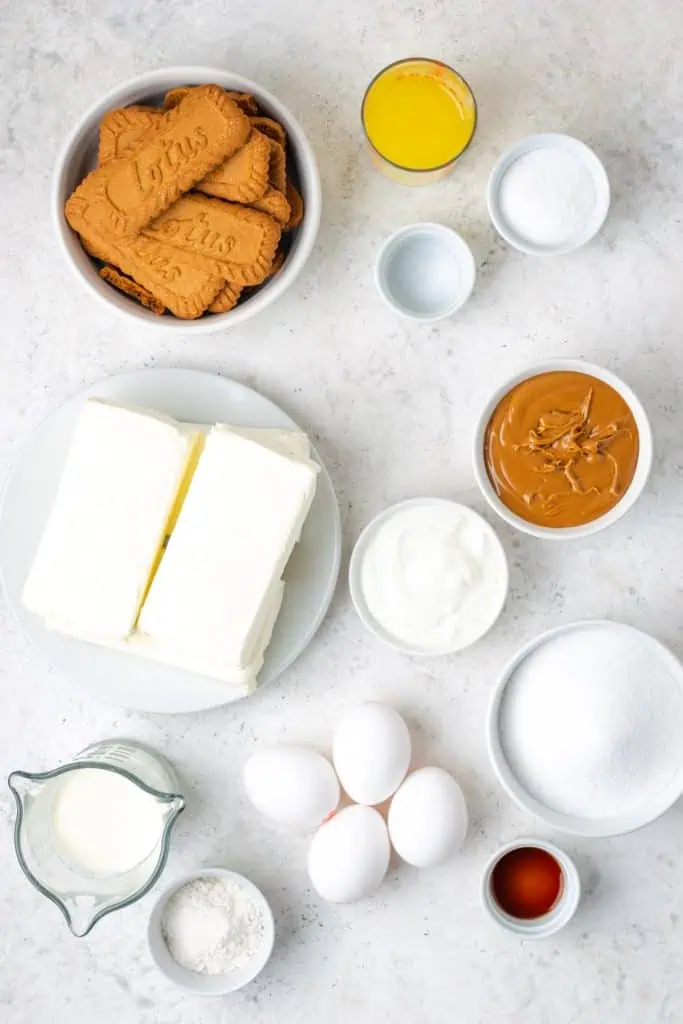
The Ingredient Breakdown
For the Biscoff Cookie Crust
For the Cheesecake Filling
For the Topping
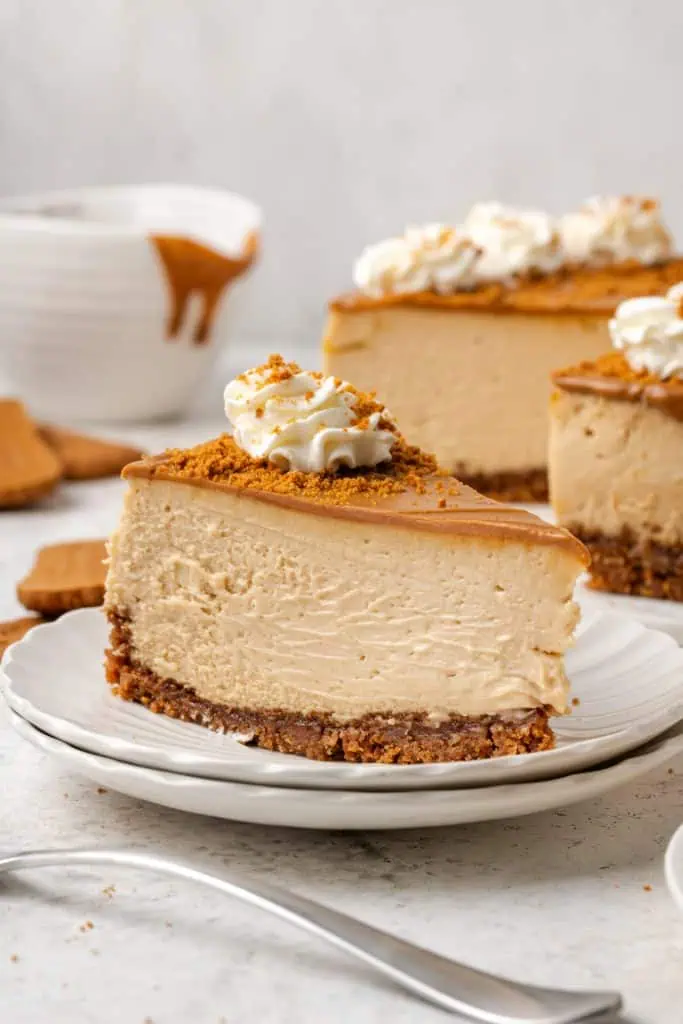
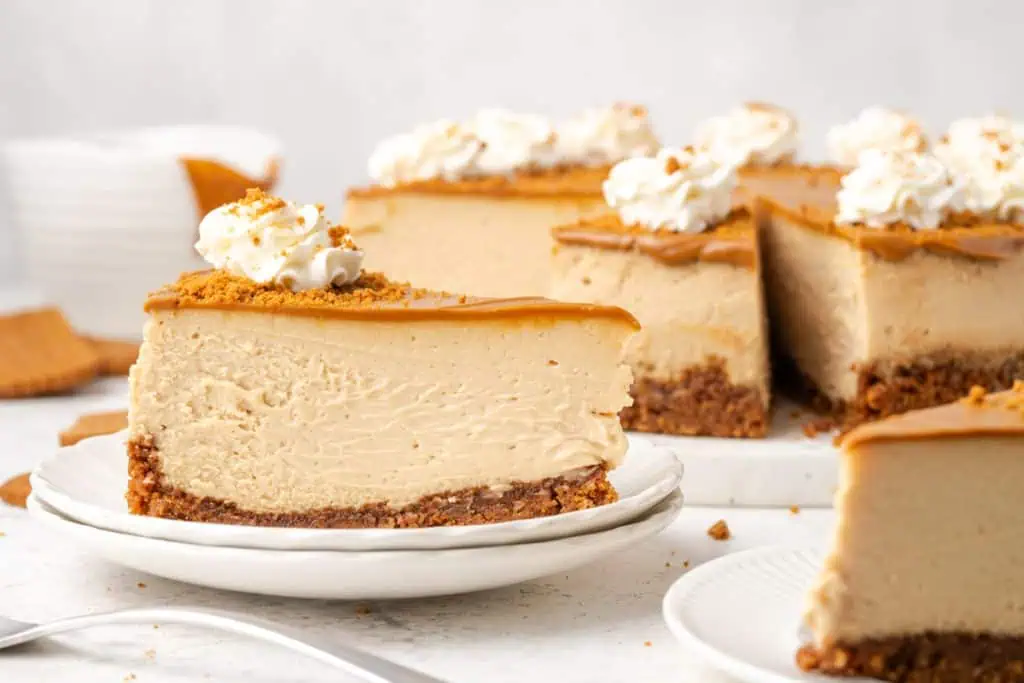
Biscoff cookie crumbs and whipped cream (optional): A handful of crushed Biscoff cookies scattered over the warm spread before it sets, plus piped or dolloped whipped cream around the edges. Both are technically optional but the presentation goes from great to spectacular.
Top Tip for a Crack-Free Cheesecake
Beat the cream cheese alone first, on medium speed, for a full two minutes before adding anything else. This ensures it's completely smooth and lump-free before the other ingredients go in. Any lumps at this stage will still be there when the cheesecake comes out of the oven.

The Water Bath: What It Is, Why It Matters, and How to Do It
The water bath (also called a bain-marie) is the step that intimidates most home bakers but is actually straightforward once you understand why it exists.
Why it matters: Cheesecake is essentially a very rich egg custard. Egg proteins set when they reach a certain temperature, and if that happens too quickly or unevenly, the proteins tighten, contract, and crack. A water bath surrounds the cheesecake with humid, steam-filled air that keeps the oven temperature gentle and consistent. The result is a cheesecake that cooks through slowly and evenly, with a silky texture and a dramatically reduced chance of cracking.
How to set it up: Wrap the outside of your springform pan in two to three layers of heavy-duty aluminum foil, going all the way up the sides – this prevents water from seeping in. Place the wrapped pan inside a larger roasting pan. While the crust bakes, bring eight cups of water to a boil on the stovetop. After filling the pan with batter, place the roasting pan on the oven rack, then pour the boiling water into the roasting pan until it reaches about one inch up the sides of the springform pan.
The foil is critical: Any water that gets into the springform pan will give you a soggy, wet-bottomed cheesecake. Wrap thoroughly. If you're concerned about the foil method, place a separate shallow pan of boiling water on the rack below the cheesecake instead. It's not quite as effective but provides insurance.
How to Make Biscoff Cheesecake (Step-by-Step)
Step 1: Make and Pre-Bake the Crust
Preheat the oven to 325°F. In a bowl, combine the Biscoff cookie crumbs, melted butter, sugar, and salt and stir with a fork until everything looks like wet sand. Pour into a 9-inch springform pan and press firmly into an even layer across the bottom using the bottom of a measuring cup – pack it tightly, especially at the edges. Bake for 10 minutes, then set aside. While the crust bakes, bring eight cups of water to a boil on the stovetop.
Step 2: Make the Filling – Cream Cheese Base
In the bowl of a stand mixer fitted with the paddle attachment (or with a hand mixer), beat the room-temperature cream cheese on medium speed for two full minutes until completely smooth, creamy, and lump-free. Scrape down the sides and bottom of the bowl thoroughly. Add the sugar, Biscoff cookie butter, sour cream, flour, and vanilla extract. Beat on medium speed for three minutes until fully combined and silky smooth. Scrape the bowl again.
David's Tip
Switch your mixer to the lowest possible speed before adding the eggs and keep it there for the rest of the mixing process. High speed incorporates air bubbles into the batter, and those air bubbles expand in the oven and cause the cheesecake to crack. Low and slow from this point on.
Step 3: Add Eggs and Cream
With the mixer on its lowest speed, add the room-temperature eggs one at a time, mixing just until each egg is fully incorporated before adding the next. Do not overmix. Once all four eggs are in, slowly pour in the heavy cream and mix just until combined – about 15 to 20 seconds. The batter should look smooth, glossy, and pourable with a rich, warm amber color from the Biscoff spread.
Step 4: Set Up the Water Bath and Bake
Wrap the outside of the springform pan in two to three layers of heavy-duty aluminum foil, going all the way up the sides. Place inside a large roasting pan. Pour the cheesecake batter over the pre-baked crust. Slide the roasting pan onto the middle rack of the oven, then carefully pour the boiling water into the roasting pan until it reaches about one inch up the sides of the springform pan. Bake for 65 to 75 minutes until the outer two to three inches look set and the center still has a distinct jiggle when you gently shake the pan.
Step 5: Cool Gradually – This Step Is Not Optional
Turn the oven off. Prop the oven door open about two inches using a wooden spoon or oven mitt. Leave the cheesecake inside the oven for one full hour. This gradual cooling prevents the sudden temperature change that causes cracking. After the hour, remove the cheesecake from the water bath. Carefully run a thin knife around the edge to separate it from the pan sides. Let it cool completely on a wire rack, then transfer to the refrigerator for at least six hours or overnight.
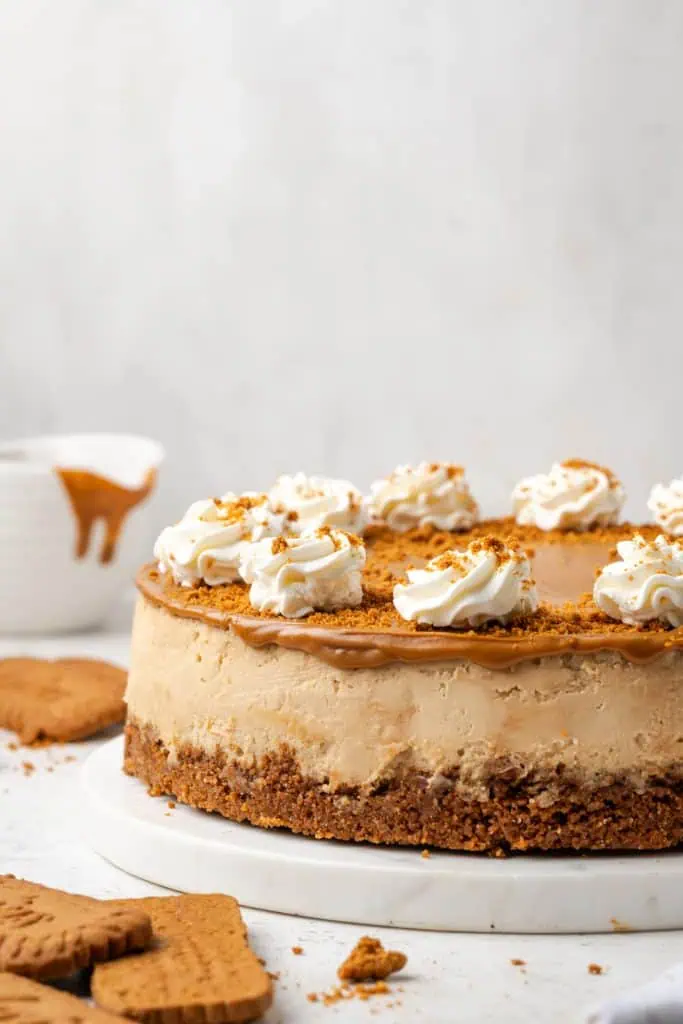
Step 6: Add the Biscoff Topping
Once fully chilled, remove the cheesecake from the springform pan and transfer to a serving plate or cake stand. Place the 1/2 cup of Biscoff cookie butter in a microwave-safe bowl and microwave for about 20 seconds until warm and pourable. Pour over the top and use an offset spatula to spread into an even layer, letting it drip slightly over the edges. While still warm, scatter Biscoff cookie crumbs over the top and add whipped cream dollops or rosettes around the edge. Let it set a few minutes before slicing.
Fun Variations
No-bake Biscoff cheesecake: Skip the oven entirely. Beat 16 oz room-temp cream cheese with 1 cup powdered sugar, 1 cup Biscoff spread, and 1 tsp vanilla until smooth. Fold in 2 cups of thawed Cool Whip. Spread over the unbaked cookie crust and refrigerate for at least six hours. Top with warmed Biscoff spread and cookie crumbs. Incredibly creamy, zero oven time required.
Mini Biscoff cheesecakes: Press crust mixture into lined muffin tins, pre-bake for 5 minutes, fill with cheesecake batter, and bake at 325°F for 18 to 22 minutes with no water bath needed. Makes about 24 to 30 individual cheesecakes.
Chocolate Biscoff swirl: Melt 4 oz of dark chocolate and swirl it through the cheesecake batter before baking for a chocolate-Biscoff combination that is genuinely next-level.
Crunchy Biscoff topping: Use crunchy Biscoff spread in the topping glaze for added texture on the finished cheesecake.
Graham cracker crust swap: If you can't find Biscoff cookies locally, a classic graham cracker crust works as a substitute. The filling and topping still deliver all the Biscoff flavor.
Storage & Make-Ahead Instructions
Slicing tip: Run a sharp knife under hot water, dry it, and slice. Wipe the knife clean between every cut. Cold cheesecake slices much more cleanly than one at room temperature.
Refrigerator: Store covered in the refrigerator for up to 5 days. The flavor deepens and improves over the first two days as the Biscoff flavors meld into the filling.
Freezer: Wrap the fully chilled cheesecake (without the Biscoff glaze topping) tightly in plastic wrap, then in foil, and freeze for up to 3 months. Thaw overnight in the refrigerator. Add the Biscoff topping, cookie crumbs, and whipped cream after thawing.
Make-Ahead: The crust can be made and refrigerated up to three days ahead. The full cheesecake (without topping) can be baked two to three days before serving. Add the Biscoff glaze and garnishes on the day of serving.
Make This Cheesecake for Your Next Special Occasion
This Biscoff cheesecake is exactly the kind of dessert that gets talked about long after the dinner is over. The triple Biscoff flavor, the silky baked texture, the glossy cookie butter topping – it's one of those recipes that earns a permanent spot in your repertoire from the very first time you make it. Yes, it requires overnight chilling and a water bath, but neither of those things is difficult, and the result is something genuinely extraordinary.
Give this a try and let me know how it went in the comments! Did you make it for a holiday or a birthday? Did you try the no-bake variation? I want to hear all about it. And if you share a photo on Pinterest, tag FoodnService – a cheesecake this beautiful deserves to be seen.
More Delicious Cheesecake Recipes
- Caramel Apple Cheesecake Recipe
- Lemon Raspberry Cheesecake
- Instant Pot Nutella Cheesecake
- Instant Pot Sugar Cookie Cheesecake

Baked Biscoff Cheesecake (Lotus Cookie Butter)
Ingredients
- 1 ¾ Cup / 230 g Biscoff cookie crumbs
- ⅓ Cup / 74 g butter melted
- ¼ Cup / 50 g sugar
- ½ teaspoon / 3 g salt
- 4 – 8 ounce packages / 904 g cream cheese room temperature
- 1 ¼ Cup / 250 g sugar
- 1 Cup / 240 g Biscoff cookie butter
- ½ Cup / 120 g sour cream room temperature
- 2 Tablespoons / 16 g all-purpose flour
- 1 teaspoon / 5 g vanilla extract
- 4 large eggs room temperature / 224 g
- ½ Cup / 112 g heavy cream room temperature
- ½ Cup / 120 g Biscoff cookie butter
- Biscoff cookie crumbs. optional
- Whipped cream optional
Instructions
- Preheat the oven to 325 degrees.
- Combine Biscoff cookie crumbs, melted butter, sugar, and salt. Mix until it resembles wet sand. Spread the cookie crumb mixture into an even layer on the bottom of a springform pan. Bake for 10 minutes. Remove from the oven and set aside.
- While you’re mixing the cheesecake batter, bring 8 cups of water to a boil.
- Add the cream cheese to the bowl of an electric mixer. Beat on medium speed until the cream cheese is smooth.
- Add the sugar, cookie butter, sour cream, flour and vanilla extract. Beat on medium speed for about 3 minutes until well combined.
- Turn the mixer to low speed and add the eggs one at a time. Mix just until the eggs are incorporated.
- Slowly pour in the heavy cream and mix just until combined. Wrap the outside of your springform pan with 2-3 layers of heavy duty aluminum foil.
- Place the wrapped pan in a roasting dish. Pour the cheesecake mixture into the wrapped pan. Place the roasting dish on the middle rack of your oven. Add boiling water to the roasting dish until it’s about 1 inch deep.
- Bake the cheesecake for 65-75 minutes until the outer 2-3 inches are solid and the center jiggles when shaken. Turn the oven off and prop the door open with a wooden spoon. Allow the cheesecake to cool inside the oven for 1 hour.
- Remove the cheesecake from the oven and the water bath. Carefully run a knife around the outside of the cheesecake to separate it from the pan. Cool the cheesecake to room temperature on a wire rack. Then transfer the cooled cheesecake to the refrigerator for 6 hours up to overnight before removing it from the pan.
- Remove the cheesecake from the pan and transfer it to a serving plate.
- Place ½ cup of cookie butter in a microwave safe bowl and heat for about 20 seconds until it’s a pourable consistency. Pour the melted cookie butter over the cheesecake and spread into an even layer with an offset spatula. Sprinkle the top with cookie crumbs and decorate with whipped cream.
Nutrition
Notes
Pro Tips for a Perfect Biscoff Cheesecake
- Every ingredient at room temperature: Cream cheese, eggs, sour cream, and heavy cream all need to be genuinely at room temperature before you start. Leave everything out for at least an hour, ideally two.
- Mix on low after adding the eggs: Overmixing after the eggs go in is the number one cause of cheesecake cracking. Keep the mixer at the lowest speed setting and mix only as long as needed.
- Don't skip the knife around the edge: Running a thin knife around the edge right after it comes out of the oven releases it from the pan and prevents cracking as the cheesecake contracts while cooling.
- The jiggle test: Done when the outer two to three inches look set and firm and only the very center – about a three-inch circle – still jiggles when you shake the pan gently. If the whole surface jiggles like liquid, it needs more time.
- Don't rush the chill: Eight hours minimum. Overnight is better. A cheesecake that hasn't fully chilled won't slice cleanly and the texture will be underset. This is not a same-day dessert.
- Add the topping after chilling: Don't pour the Biscoff glaze over a warm cheesecake. Wait until it's fully chilled so the glaze sets into a firm, glossy layer rather than soaking into the filling.
Tried this recipe?
Let us know how it was!FAQs: Biscoff Cheesecake, Sorted
What is Biscoff and where can I buy it?
Biscoff refers to both the Lotus Biscoff cookies (a Belgian spiced shortbread with a distinctive caramelized, cinnamon-spiced flavor) and Biscoff cookie butter spread (a spreadable paste made from blended Biscoff cookies, similar in consistency to peanut butter). Both are available at most major grocery stores – the cookies near coffee or international foods, and the spread in the peanut butter aisle. Trader Joe's also sells their own excellent cookie butter that works just as well.
Do I really need a water bath for Biscoff cheesecake?
For this specific recipe with four eggs and a full cup of Biscoff spread, yes – the water bath is strongly recommended. The high fat and egg content benefits enormously from the gentle, humid heat environment a water bath creates. Without it, the outer edges tend to overbake before the center sets, increasing the risk of cracking and a denser texture. That said, the Biscoff glaze topping covers cracks beautifully. If you skip the water bath, bake at 300°F for a longer time and cool very gradually.
Why did my Biscoff cheesecake crack?
The most common causes are overmixing after the eggs are added (incorporates air bubbles), overbaking (the center should still jiggle when done), cooling too quickly (oven door must be propped open for the full hour after turning off), or skipping the knife around the edge right after baking. The Biscoff topping poured over the chilled cheesecake covers most cracks completely, so even an imperfect bake can look stunning.
Can I make a no-bake version of this Biscoff cheesecake?
Yes – and it's genuinely delicious. Beat 16 oz of room-temperature cream cheese with 1 cup of powdered sugar, 1 cup of Biscoff spread, and 1 teaspoon of vanilla until smooth. Fold in 2 cups of thawed Cool Whip or stabilized whipped cream. Spread over the unbaked Biscoff cookie crust and refrigerate for at least six hours or overnight. Top with warmed Biscoff spread and cookie crumbs. The no-bake version is creamier and lighter in texture, and zero oven time is required.
Can I freeze Biscoff cheesecake?
Yes. Freeze the fully chilled cheesecake (without the Biscoff glaze and garnishes) wrapped tightly in plastic wrap and then foil for up to three months. Thaw overnight in the refrigerator. Add the warmed Biscoff topping, cookie crumbs, and whipped cream fresh before serving. The texture holds up very well after freezing.
Can I use crunchy Biscoff spread instead of smooth?
In the filling, smooth is better – the cookie pieces in the crunchy spread don't fully incorporate into the cream cheese batter and can create an uneven texture. For the topping glaze, crunchy Biscoff is great and adds a pleasant textural contrast to the smooth cheesecake beneath it.
How do I know when the Biscoff cheesecake is done baking?
The cheesecake is done when the outer two to three inches look fully set and firm, and only a small circle in the very center (about three inches across) still jiggles when you gently shake the pan. It should look like a firm jelly, not liquid. If the entire surface is still moving, give it another five to ten minutes. If nothing moves at all, it's overbaked – remove it immediately and begin the cooling process.