Chicken Roll Ups with Marinara
If you’re craving melty, cozy, and a little bit fancy without the stress, these chicken roll ups deliver. Thin chicken cutlets get layered with savory ham, creamy mozzarella, and spinach, then rolled, sauced, and baked until tender with a golden parmesan finish.
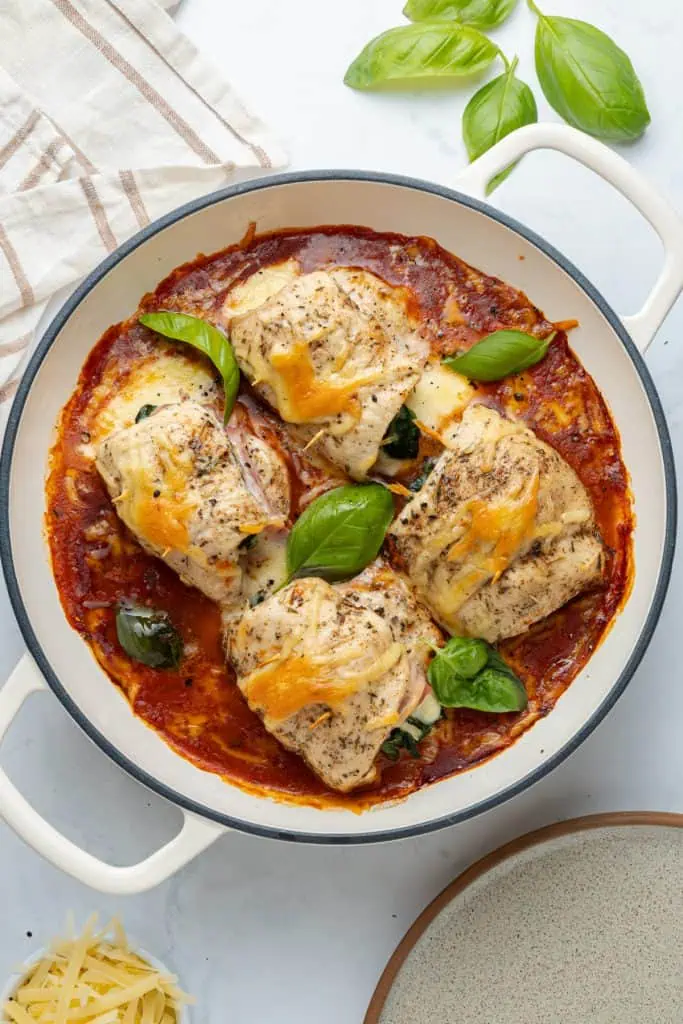
I love this for weeknights because it looks restaurant-cute in the skillet, but the steps are simple and the bake is hands-off. Spoon extra marinara over the tops, scatter fresh basil, and watch everyone get quiet in the best way.
Recipe Snapshot
- Comfort Food with an Italian Twist: These chicken roll ups with marinara combine tender chicken, creamy cheese filling, and rich marinara sauce in one cozy baked dinner the whole family will devour.
- Easy Family-Friendly Dinner: Using simple ingredients and an approachable method, this recipe feels special enough for Sunday dinner while still being easy enough for busy weeknights.
- Cheesy and Saucy in Every Bite: The creamy filling stays rich and flavorful while the marinara sauce keeps the chicken moist as it bakes.
- Best For: Cozy family dinners, weeknight comfort food, make-ahead freezer meals, casual dinner parties, pasta night alternatives, and picky eater-friendly meals.
David’s Tip: Pound the chicken to an even thickness before rolling. Thinner, evenly flattened chicken cooks more consistently and makes the roll ups much easier to secure without the filling squeezing out during baking.
Make it for busy nights, date nights, or meal prep. Leftovers reheat well, and the slices pack neatly for lunches. Keep it classic with mozzarella and basil, or try a fun twist like ricotta and roasted peppers.
By the end, you’ll have a reliable, go-to method for juicy chicken, a shatter-crisp coating, and marinara that brings it all together. Simple, flexible, and seriously satisfying.
Why You’ll Love This Recipe
This isn't just “chicken in a wrap.” It’s a carefully structured meal that balances the acidity of the marinara with the creamy richness of the mozzarella.
Keep it simple, keep it tasty. These are pantry-friendly ingredients that turn basic chicken into a flavorful, saucy dinner with real comfort vibes. Use what you have, swap what you need, and stick to the quantities for consistent results.
Top Tip for a “Fabulous” Finish
For that restaurant-quality look and taste, don't just dump the marinara over the top. Once the chicken is cooked, move the roll-ups to the side of the pan and “toast” your marinara in the center for 60 seconds. This caramelizes the sugars in the tomatoes, taking the sauce from “jarred” to “gourmet” in a minute.
Ingredient Notes
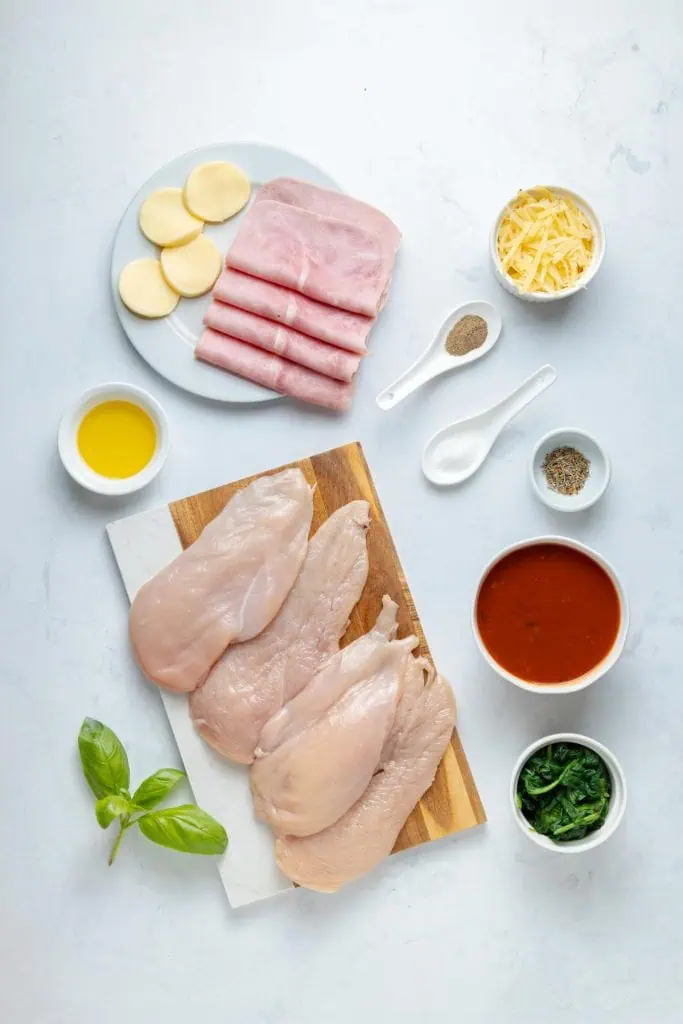
- Boneless, skinless chicken breasts (halved horizontally): Pounding to about ¼ inch keeps the meat juicy and lets it roll tightly so the filling stays put. If your breasts are very large, trim ragged edges so they roll neatly.
- Italian seasoning: Brings garlicky-herby warmth to the chicken before it meets the sauce. If you’re out, a mix of dried oregano, basil, and a pinch of thyme works.
- Cooked ham (slices): A salty, savory buffer between chicken and cheese that also helps the roll hold shape. Prosciutto or deli turkey work if you want to switch it up.
- Mozzarella (slices): Melts into creamy layers inside the roll — low-moisture slices are tidy, fresh mozzarella is extra gooey.
- Spinach (cooked): Adds color and a gentle earthiness. Squeeze out excess moisture so the rolls stay tight and the sauce doesn’t thin.
- Marinara sauce: The bake medium and the serving sauce in one. Use your favorite jar or homemade; a thicker sauce clings best to the rolls.
Step-by-Step: How I Make Tender Chicken Roll Ups
Step 1: Prep and Pound Your Chicken
Preheat your oven to 375°F (190°C) for the final melt. Lay your chicken breasts between two sheets of plastic wrap. Using the flat side of a meat mallet, gently pound the chicken until it is an even ¼-inch thickness. This isn't just about making it thin; it's about breaking down the muscle fibers so the chicken is incredibly tender and rolls without cracking.
Step 2: The Season and Stuff Phase
Lightly season both sides of your flattened chicken with salt, pepper, and garlic powder. Place a slice of mozzarella and a couple of fresh basil leaves at one end of each breast. Don't overstuff! You need a little bit of “naked” chicken at the ends to overlap and create that essential seal.
Step 3: The Roll and “Chill” Secret
Roll each piece tightly from the stuffed end to the empty end. Secure the seam with a toothpick if you’re worried about it, but here is the Chef’s Secret: Place the rolls on a plate, seam-side down, and pop them in the fridge for 10–15 minutes. This “sets” the shape and ensures they don't unravel the moment they hit the heat.
Step 4: Sear for the Golden Crust
Heat a tablespoon of olive oil in a large skillet over medium-high heat. Place the chilled roll-ups in the pan, seam-side down first. Leave them alone for 3 minutes! This creates that golden-brown sear that locks in the flavor. Flip them carefully and sear the other side for another 3 minutes until the chicken is opaque and firm.
Step 5: The Marinara “Toast” and Melt
Push the chicken roll-ups to the outer edges of your skillet. Pour your marinara into the center of the pan and let it bubble for one minute. This “toasts” the sauce and intensifies the flavor. Once the sauce is hot, spoon it over the chicken, top with a little extra cheese, and slide the whole skillet into the oven (or cover with a lid if you're staying on the stovetop).
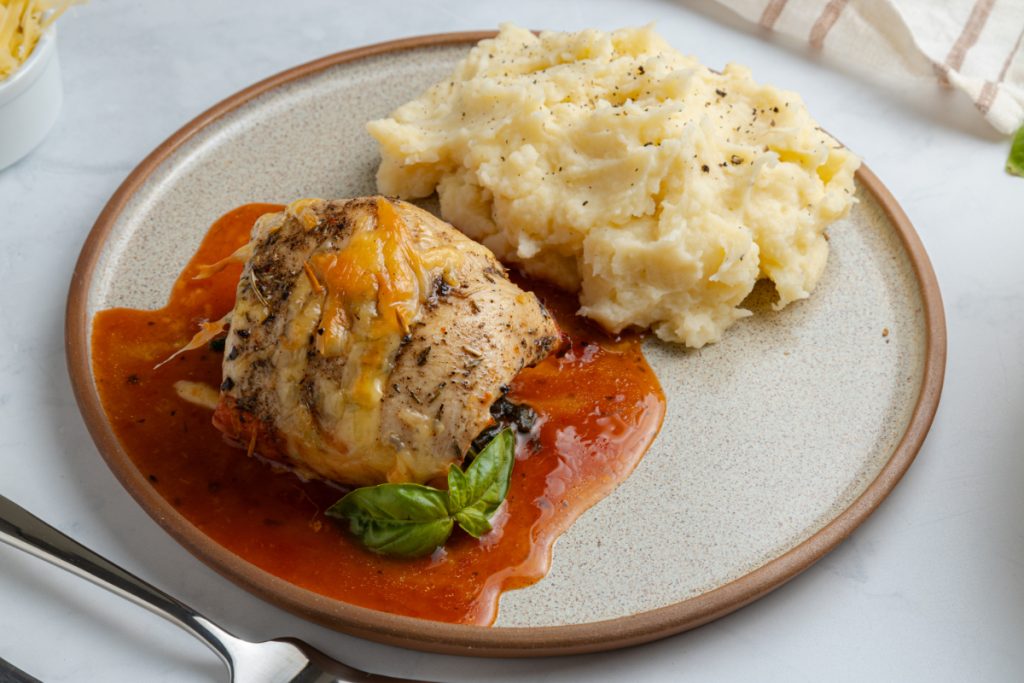
Step 6: The Final Rest and Serve
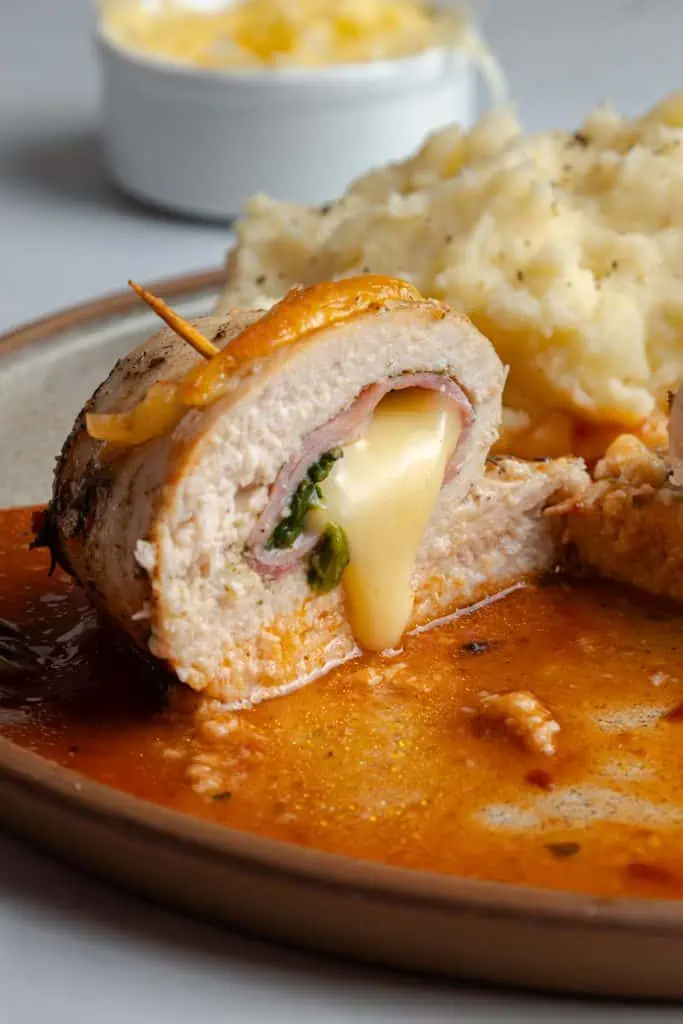
Bake for 10 minutes or until the internal temperature of the chicken hits 165°F and the cheese is bubbly and molten. Remove the skillet from the heat and let the chicken rest for 5 minutes. This is crucial—if you cut into them immediately, the cheese will run out like a river. Let it settle, garnish with fresh herbs, and serve!
Storage, Make-Ahead, and Reheat
Fridge: Airtight up to 3 days.
Reheat: Cover and warm in a 325°F oven or gently in a skillet with a splash of marinara.
Make ahead: Roll and chill up to 24 hours; bake just before serving.
Freeze: Assemble, freeze on a tray, then bag. Bake from frozen at 350°F until 165°F, adding time as needed and saucing halfway through if the top darkens.
David's Cooking Tips
- Rest the chicken roll ups briefly: Two or three minutes makes cleaner slices if you’re cutting the rolls.
- Pound the chicken evenly: Thin, even cutlets cook faster and roll cleaner, which helps the centers stay melty.
- Dry the spinach: Excess moisture loosens the rolls and waters down the sauce — give it a good squeeze.
- Thermometer = hero: Pull at 165°F so the chicken stays juicy.
- Toothpicks or kitchen twine: Use to secure each roll so fillings stay put.
- Baking sheet or oven safe skillet: Both work. A rimmed sheet makes cleanup easy, a skillet gives nice browning.
For even more delicious recipes, you may like these:


Chicken Roll Ups with Marinara
Ingredients
- 2 large chicken breasts, boneless, skinless sliced in half horizontally
- Salt & pepper, to taste
- 1 tsp Italian Seasoning
- 4 slices Cooked ham
- 4 slices Mozzarella cheese
- 1/2 cup Baby spinach cooked
- 1 cup Marinara
- 1/2 cup Grated Parmesan cheese
- 1 tbsp Olive oil
- Fresh Basil for garnish
Instructions
- Preheat oven to 375°F (190°C).
- Place chicken breasts between two pieces of parchment and pound them to even thickness (about ¼ inch).
- Season both sides with salt, pepper, and Italian seasoning.
- Lay a slice of ham on each piece of chicken. Add a slice of cheese and a few spinach leaves. Roll up tightly and secure with toothpicks.
- Pour the marinara sauce into the bottom of the skillet. Arrange chicken rolls over it.
- Sprinkle with grated Parmesan. Transfer skillet to the oven and bake for 20–25 minutes, or until chicken is cooked through (internal temp of 165°F / 74°C).
- Garnish with fresh basil and serve hot.
Tried this recipe?
Let us know how it was!FAQ: Your Roll-Up Troubleshooting
Why is my chicken tough?
You likely skipped the “pounding” step. Thinning out the chicken doesn't just help it roll; it tenderizes the meat. Also, be careful not to overcook it in the pan before the sauce goes in. The sear is for color; the oven is for cooking.
Can I use chicken thighs?
You can, but they are much harder to roll because of their irregular shape. If you use thighs, you'll definitely need several toothpicks to hold them together, and you'll need to increase the oven time by about 5 minutes.
My cheese all leaked out! What happened?
Three words: Skip. The. Chill. If the chicken is at room temperature when it hits the pan, the meat expands too quickly and the seam opens up. Chilling the rolls keeps the seam tight while the outside sears shut.
Is this recipe keto-friendly?
Yes! As long as you use a marinara sauce with no added sugar, this is an excellent low-carb, high-protein meal.
Love this recipe? Please leave a 5-star 🌟 rating in the recipe card below and/or a review in the comments section further down the page.
Be sure to check out my FREE Meal Planner and Kitchen Organizer!